Sybase Adaptive Server Enterprise (ASE)
Important
Starting August 30, 2023, we will remove the ability to create new data sources using the Sybase Adaptive Server Enterprise (ASE) Native Connector. Support for the Sybase Adaptive Server Enterprise (ASE) Native Connector will cease on December 1, 2023, as set out in Alation’s Support Policy. See the Transition from Native to OCF Connectors announcement in Alation Community (requires login to Community).
Prerequisite
Ensure that the feature flag alation.feature_flags.enable_datasource_sybasease is turned on using alation_conf. If the feature flag is not turned on, Sybase ASE will not be displayed in the drop-down list of Database Types in the Add Data Source wizard. This will not allow you to add this data source.
Required Information
To configure Sybase in Alation, you will need the following information:
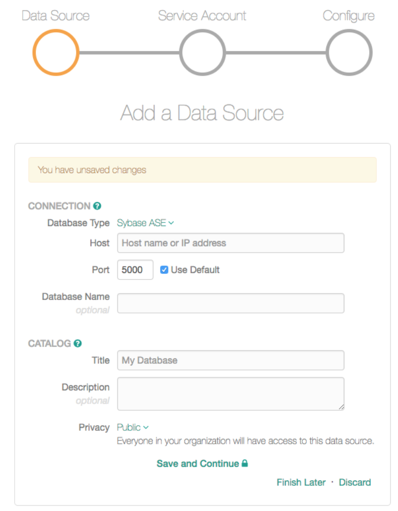
Hostname or IP address of your server
Port number
Optional database name: If the name is not provided, the ‘master’ database is assumed
Service account with privileges listed in the corresponding section
Query Log Ingestion setup
Connectivity
Firewall Configuration: Open outbound TCP port 5000 to Sybase ASE Server.
Service Account
Create a service account as follows. For illustration purposes, the
document uses alation as the service account user name.
CREATE LOGIN alation WITH password <password>;
USE <database>;
sp_adduser  alation;
Metadata Extraction
Service Account requires SELECT access on system tables:
GRANT SELECT on master.dbo.sysdatabases to alation;
On each database, provide the following grant to the service account for metadata extraction:
GRANT SELECT on sysusers to alation;
GRANT SELECT on sysobjects to alation;
GRANT SELECT on syscomments to alation;
GRANT SELECT on syscolumns to alation;
GRANT SELECT on systypes to alation;
GRANT SELECT on sysindexes to alation;
GRANT SELECT on syspartitions to alation;
GRANT SELECT on syspartitionkeys to alation;
GRANT SELECT on sysprocedures to alation;
GRANT SELECT on sysconstraints to alation;
GRANT SELECT on syskeys to alation;
Profiling/Sampling
On each database, provide the following grant for profiling each table:
GRANT SELECT ON <table_name> to alation;
Query Log Ingestion
Overview of Query History
A new feature called “Monitoring Data Access (MDA) tables” is available to users from ASE version 12.5.0.3. These MDA tables provide access to low-level monitoring information in ASE. Because the MDA tables can be accessed with regular SQL select statements, they are easier to use than Monitor Server/Historical Server. MDA is also used as an acronym for Monitoring and Diagnostics for ASE, Monitoring and Diagnostic Agent, Monitoring and Diagnostic Access. The MDA table is commonly referred to as the monitoring table. They are proxy tables mapped to native remote procedure call (RPC) inside ASE.
The MDA tables are proxy tables located in the master database. All MDA
tables are named master..monXXX, where XXX indicates the type of
information in the table.
Example: master..monCachedObject, has details about the current data
cache usage for different tables and indexes.
After the installation of MDA tables, monSysSQLText and monSysStatement are enabled
and queries are extracted from them. The maximum permissible limit for
Statement and SQL Text file is 2147483647. The maximum value set as log
will be rolled off after this limit.
Install MDA tables (ASE version 15+)
In ASE 15, the MDA tables are automatically installed by the install
master script. This is applicable to ASE 15.0 ESD#2 and later versions.
Always run the install master script when you install a new EBF.
Failure to do so might result in incorrect values or errors being
returned when the MDA tables are queried. Run sp_version to check for the
correct version installed for the EBF.
Configuration Settings
The following configuration setting must be set before using MDA tables.
Ensure that the configuration parameter
enable cisis set to 1.If the value is not set to 1, then, ASE must be restarted.
sp_configure "enable cis" 1 go
Assign
mon_roleto the service account to allow MDA access.use master go Grant role mon_role to alation go
The same procedure is applicable to
salogin. In version 15.7 and onwards, ESD#2, themon_roleis assigned tosaby default so you may not need to make this change.use master go Grant role mon_role to sa go
Note
If the
mon_roleis not granted to the service account,, you will not be able to accessmonSysStatementandmonSysSQLTexttables.You might need to disconnect/reconnect to activate
mon_roleafter the role isgranted to the login.
Test the basic MDA configuration:
select * from master..monState
go
Enable Monitoring
enable monitoringis essentially the ‘master switch’ for most MDA functionality. This must be set to 1 for Alation to have logs to read.sp_configure "enable monitoring", 1 go
Enable all configuration parameters.
For all “pipe” tables, the number of messages is set to 1,000,000. However, you may want to choose a larger size.
Logs will be rolled off after the maximum value is set. The maximum permissible value is 2147483647.
SQL text pipe max messages and statement pipe max messages should be set as equal.
Parameter |
Command |
|---|---|
monSysSQLText |
sp_configure "sql text pipe active", 1
go
sp_configure "sql text pipe max messages", 1000000
go
|
monSysStatement |
sp_configure "statement pipe active", 1
go
sp_configure "statement pipe max messages", 1000000
go
|
Column in MDA table |
sp_configure "statement statistics active", 1
go
sp_configure "per object statistics active", 1
go
|
mon*SQLTexttables |
sp_configure "SQL batch capture", 1
go
|