EMR SparkSQL
Applies from 2021.1
Alation has certified the EMR SparkSQL with the following driver to accommodate additional features:
cdata.jdbc.sparksql.SparkSQLDriver.cdata.jdbc.sparksql
Alation will provide the above mentioned CData driver license for EMR SparkSQL.
Scope of Support
Supported as Custom DB with the CData Driver.
Metadata Extraction (MDE)
Automated MDE
Query Based MDE
Compose
Data Profiling
Lineage through Compose
Ports
Port 10001 must be open.
Required Information
JDBC driver used to connect to the database: CData JDBC Driver for EMR SparkSQL
JDBC URI for the EMR SparkSQL data source.
Service Account with the required privileges
Kerberos information - Optional
Keytab file - Optional
Authentication
Kerberized data sources can only be added to the catalog after Kerberos configuration has been done on the Alation server side. Refer to Configuring Kerberos for Data Source Authentication.
JDBC URI
When building the URI, include the following components:
EMR Instance IP - This is the master DSN value of the AWS EMR.
KDC IP from krb.conf file
KerberosRealm - This will be the domain name you specified while configuring the security setting on EMR. Refer to EMR Kerberos Configuration.
KerberosKDC - This will be the IP address of your KDC server, If Kerberos is hosted on EMR then this value will have the same value as that of EMR Instance IP.
Service account - User name
Service account - Password
RTK Key - Use the RTK parameter only if you have the RTK provided by Alation.
Use the following format for the JDBC URI:
sparksql://<EMR_Instance_IP:Port>;KerberosSPN=hadoop/<KDC IP from Krb.conf file>;AuthScheme=Kerberos;KerberosRealm=CDATA.COM;KerberosKDC=<EMR_Instance_IP>;port=1000 1;user=<Service account_User name>;password=<Service account_Password>;RTK=<RTK_Key>
Example:
sparksql://ec2-34-208-101-143.us-west-2.compute.amazonaws.com:100001;KerberosSPN=hadoop/ip-172-31-42-240.us-west-2.compute.internal;AuthScheme=Kerberos;KerberosRealm=CDATA.COM;KerberosKDC=ec2-34-208-101-143.us-west-2.compute.amazonaws.com;port=1000 1;user=admin1@CDATA.COM;password=Password;RTK=444752465641535552425641454E545042424D333236323900000000000000000000000000000000414C4154494F4E5800005559475655474E4E464242370000
Service Account
Create the service account for EMR SparkSQL based on Kerberos authentication.
Log in to any SSH tool with EMR Public DNS.
Open the Kerberos prompt.
sudo kadmin.localCreate the Kerberos user using the following command:
add_pricipal <user_name>@Realm_NameOnce the User Name is created, it will prompt for the password. Provide the password for the Service account.
Set Up in Alation
Step 1: Add the CData Driver for MongoDB to Alation
Step 2: Add a New Datasource
Add a new Datasource on the Sources page.
Step 3: Set up the Connection
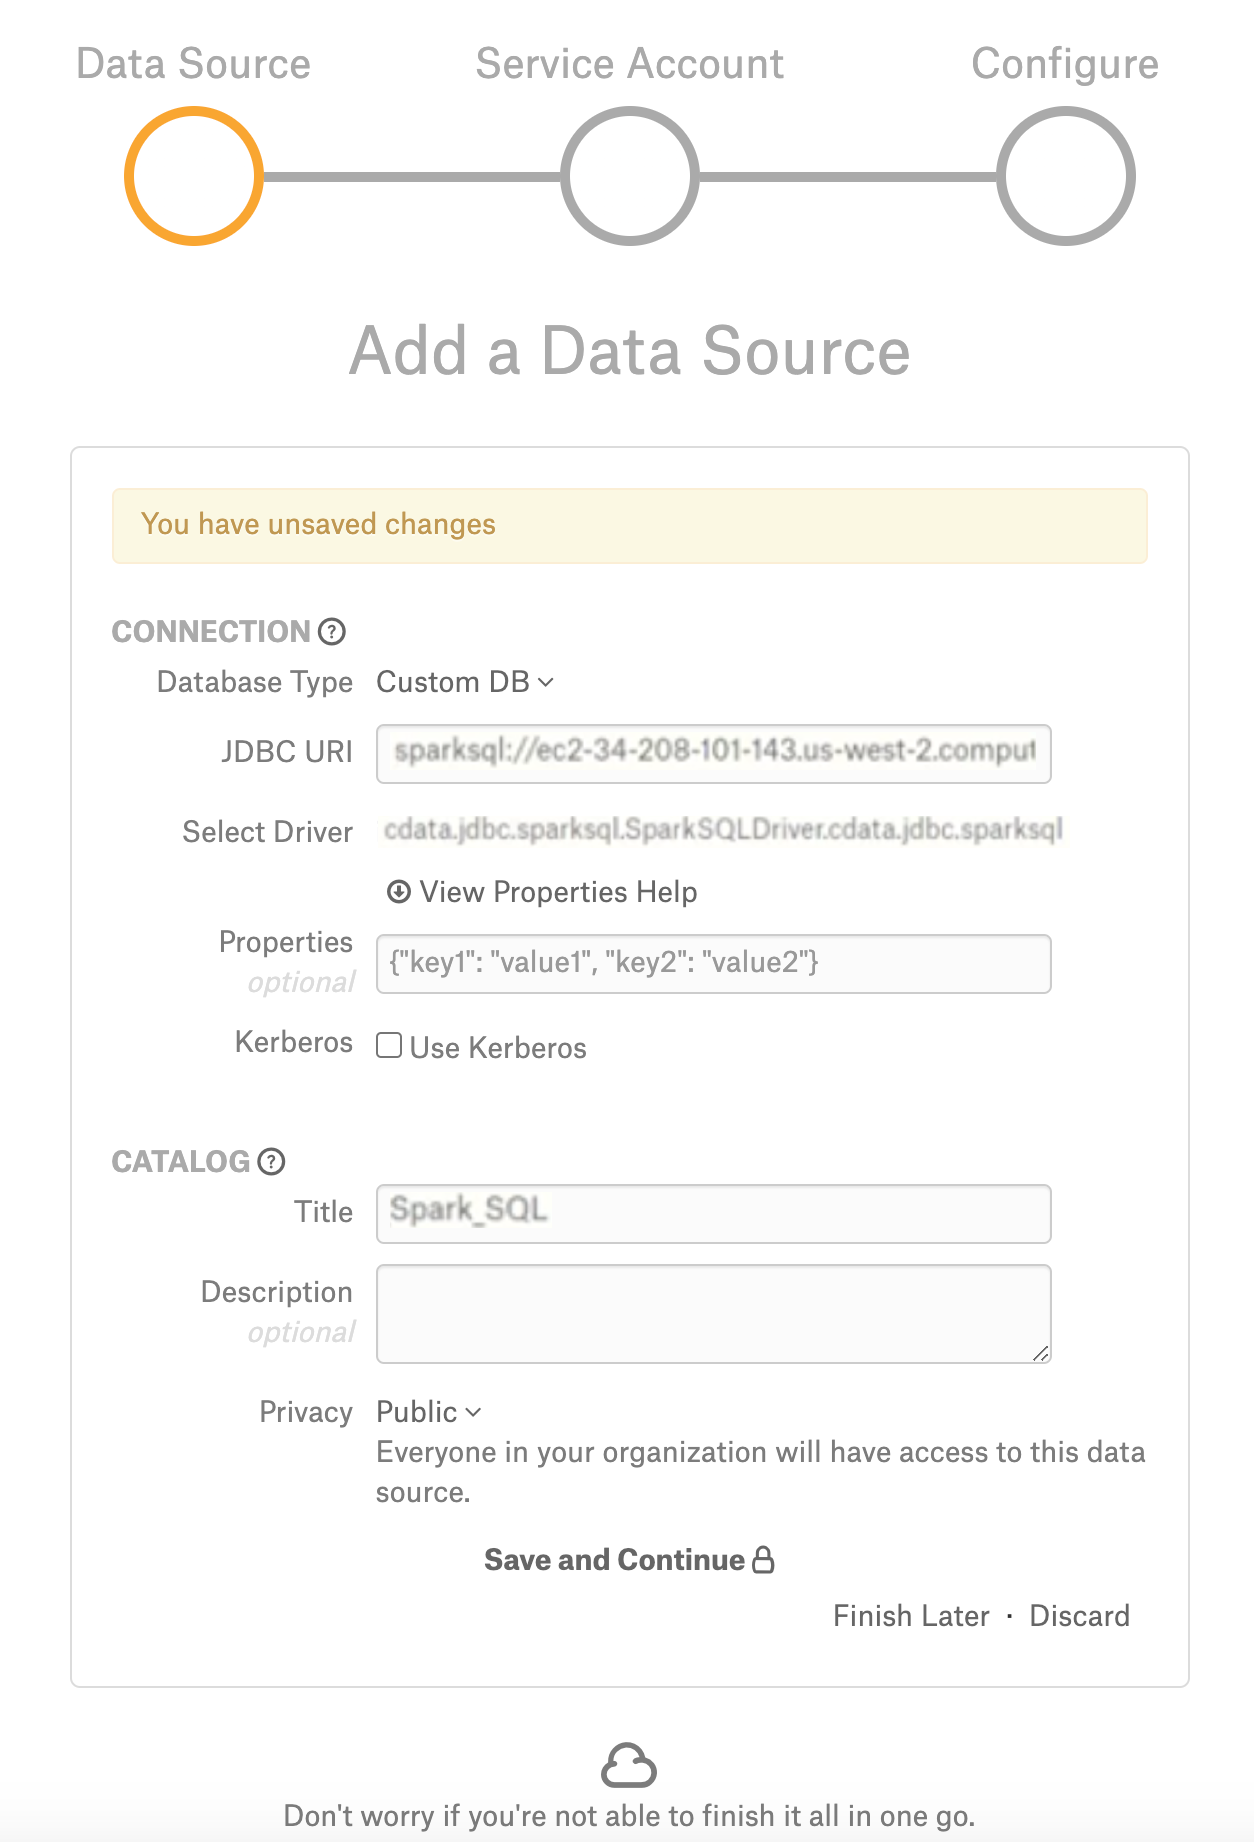
On the Add a Data Source screen of the wizard, specify:
Database Type: Custom DB
JDBC URI: URI in the required format. See JDBC URI. Example:
sparksql://ec2-34-208-101-143.us-west-2.compute.amazonaws.com:100001;KerberosSPN=hadoop/ip-172-31-42-240.us-west-2.compute.internal;AuthScheme=Kerberos;KerberosRealm=CDATA.COM;KerberosKDC=ec2-34-208-101-143.us-west-2.compute.amazonaws.com;port=1000 1;user=admin1@CDATA.COM;password=Password;RTK=444752465641535552425641454E545042424D333236323900000000000000000000000000000000414C4154494F4E5800005559475655474E4E464242370000Select Driver: select the JDBC driver for EMR SparkSQL from the Select Driver drop-down list:
cdata.jdbc.sparksql.SparkSQLDriver.cdata.jdbc.sparksql
Click Save and Continue. The next wizard screen - Set Up a Service Account - will open.
Note
Do not select the Kerberos ‘Use Kerberos’ checkbox.
Step 4: Enter Service Account Credentials
Select Yes.
Provide the username and password of the service account created for Alation.
Click Save and Continue. The next wizard screen, Configure Your Data Source, will open.
Step 5: Configure Your Data Source
Click Skip this Step. After this step, you are navigated to the Settings page of your data source.
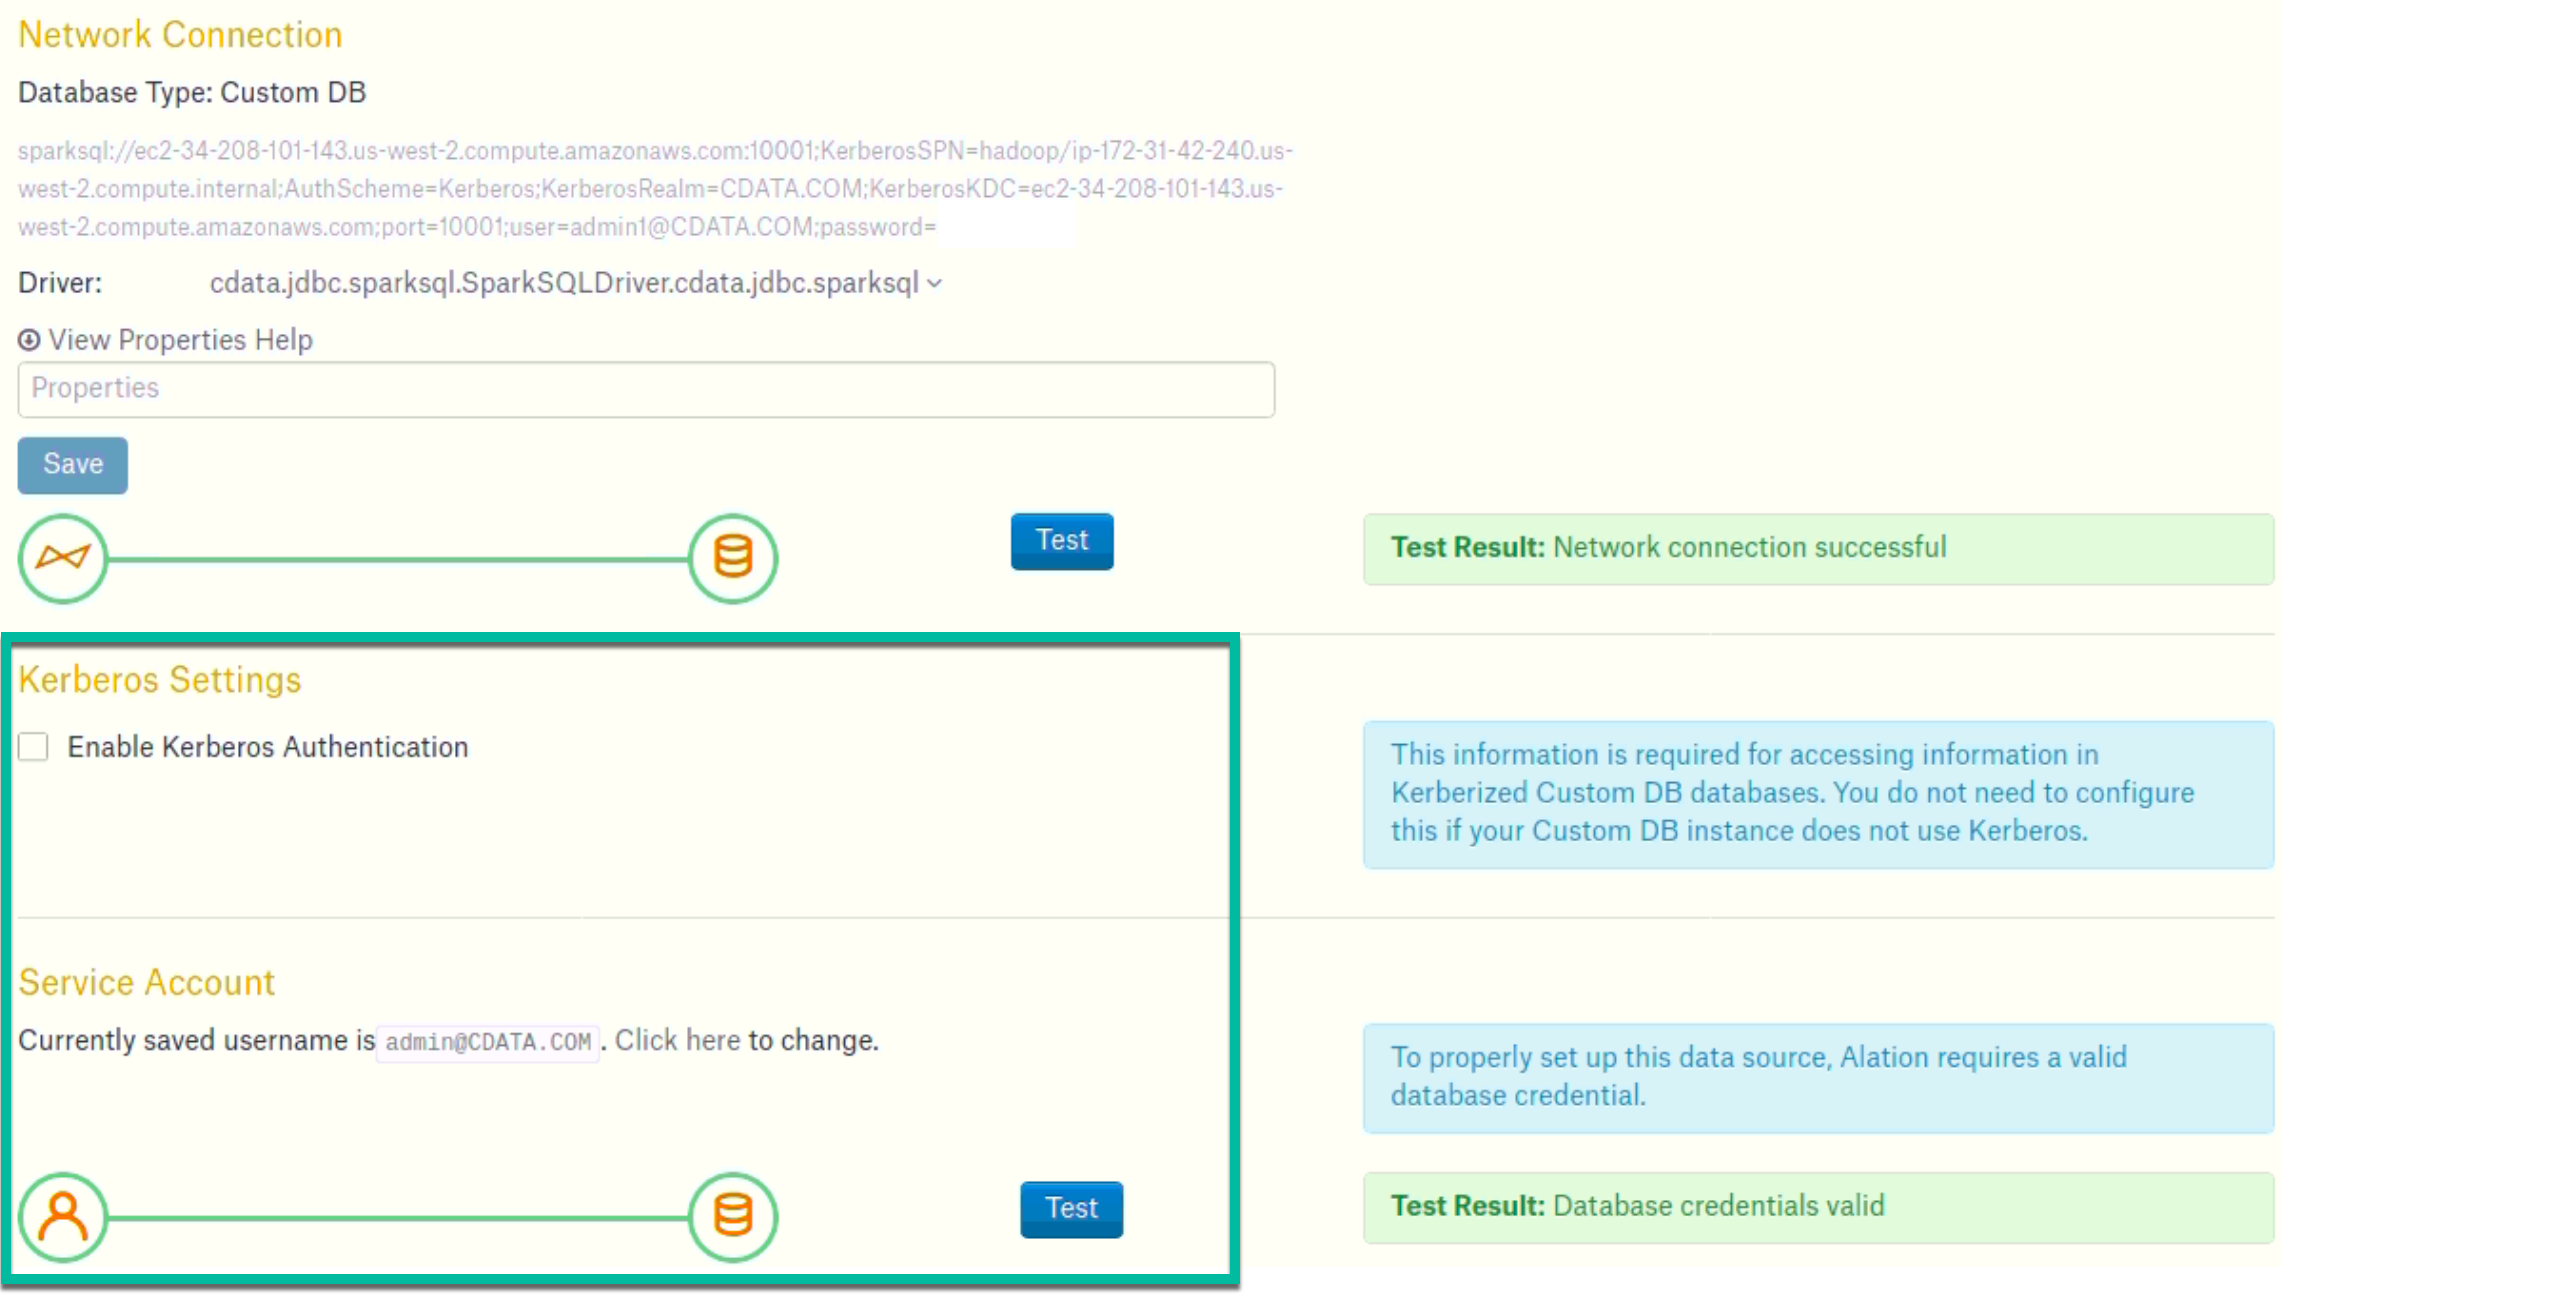
Step 6: Configuration on the Settings page
Complete the configuration on the Settings page and perform MDE, Profiling, and QLI:
Access: configure access and Privacy settings.
General Settings: verify the connection parameters and connection status.
Select Enable Kerberos Authentication checkbox.
Select Use Keytab checkbox and upload the .keytab file using the Upload Keytab button.
Metadata Extraction
Configure and perform metadata extraction and verify the results:
In Settings > Custom Settings, set the Catalog Object Definition to Catalog.Schema.Table or Schema.Table:
In Settings > Metadata Extraction, set up and perform MDE. Refer to Metadata Extraction.
Profiling
Configure and perform Sampling and Profiling :
Users can run a sample for an individual table on the Samples tab of the Table Catalog page or profile an individual column on the Overview tab of the Column page.
Automatic full and selective Profiling is supported.
Use the Per-Object Parameters in Settings tab to specify which objects to profile.
Custom query-based Sampling is supported. Custom Query-Based Sampling allows you to provide a custom query for profiling each specific table.
Deep Column Profiling (Profiling V2 ) is supported.
Query Log Ingestion
Not supported.
Compose
Log into Compose:
Authenticate compose with your MongoDB credentials.
Use the Catalog.Schema.Table or Schema.Table format for writing queries.
Troubleshooting
Logs to collect/review:
For logs related to MDE: taskserver.log, taskserver_err.log.
For logs related to Compose: connector.log, connector_err.log.
For any other errors: alation-error.log, alation-debug.log