Manual Software Update for Standalone Systems
Customer Managed Applies to customer-managed instances of Alation
Note
It is recommended to update to the latest available patch version of a release.
This article describes manual steps for updating Alation on Standalone systems when the Alation instance is not deployed on a High Availability pair:
If your Alation instance runs on a machine that uses the Red Hat Enterprise Linux, CentOS, Oracle Linux or AWS Linux operating systems, use the Updating on Red Hat Enterprise Linux, AWS Linux or CentOS section below.
If it runs on a machine with the Ubuntu or Debian operating systems, use the Updating on Ubuntu section below.
If Alation is installed with the HA Pair configuration, refer to the Upgrade on an HA Pair Configuration.
Configuring Network for Reporting Usage Data
If you have not done so yet, configure your network to allow communicating with the Alation cloud. This is required for reporting usage data to Alation automatically. For details on reporting usage data and why it is important to Alation, see Reporting Usage.
The time before an update may be a good moment to do this change because it enables usage data reporting in your updated Alation instance.
To configure the network for automatic reporting, make sure the following ports are open:
Function |
Direction |
Ports |
Destination |
|---|---|---|---|
Usage Stats |
outbound |
TCP 443 |
Alation Cloud: 52.4.59.229 |
Preparing For Update
Alation recommends updating your staging server first, verifying there are no issues, and then updating the Production server.
Verify your System Admin has SUDO privileges on the system when Alation is installed.
Verify your System Admin has access to the Alation Customer Portal and can download the Alation build.
Confirm system upgradeability by validating that a minimum of 15 GB space is free at /opt/alation/:
On the host, outside the Alation chroot, run:
df -hThe output will show the used and available disk space for the disks. Find the main data disk: it is usually called /data. Find the number in the Avail column. This number should be equal or more than 15 GB:
[root@C74X ~]# df -h

Filesystem              Size Used   Avail Use% Mounted on
/dev/mapper/centos-root 44G   17G   27G   38%   /
/dev/sdc1               69G   2.2G  67G   4%    /BACKUP
/dev/sdb1               44G   11G   34G   24%   /DATA
Inform yourself on any release-specific or configuration-specific update checks that apply to your instance.
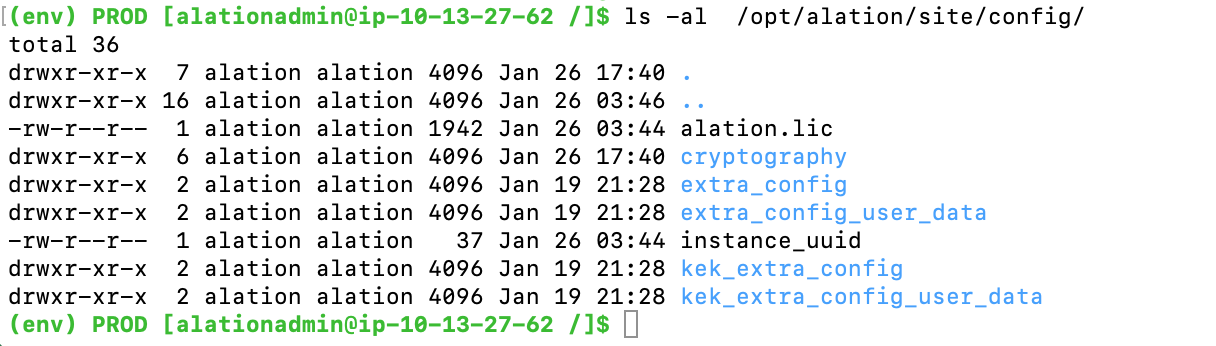
Check permissions on the folder extra_config at /opt/alation/site/config/extra_config (inside the Alation shell).
The permissions should be set to 755.
ls -al /opt/alation/site/config/
Example output:
If you see other permissions on extra_config, change to 755:
sudo chmod 755 /opt/alation/site/config/extra_config
Verify you have a valid Alation backup. For details on backup and restore, refer to Back Up and Restore.
For VM-hosted systems, Alation recommends you take a VM snapshot.
For all systems, if you can take a snapshot of the host server with the vendor-provided tools, do so, too.
Exit all active Alation shell sessions. If you are not sure all sessions are closed, restart Alation to clear all old shell sessions.
Updating on Red Hat Enterprise Linux, AWS Linux or CentOS
To update Alation on a machine running on RedHat Enterprise Linux, AWS Linux, or CentOS operating system:
Download the RPM install file from the Alation Customer Portal.
Copy the RPM file to the host server where Alation is installed to a location accessible from outside of the Alation shell.
Validate the file:
rpm -K <path_to_file>
Note
Good response: sha1 md5 OK
Bad Response: sha1 md5 NOT OK
If the file is corrupted, download the file again and make sure the
md5of the file matches themd5in the Customer Portal.
On the host system, unpackage the RPM from outside of the Alation shell:
sudo rpm -Uvh alation-####.rpm
####represents the Alation version number in the RPM file name that uses thex.y.z.nnnnformat, wherex= major,y= minor,z= patch, andnnnn= build, for example:alation-5.17.2.118938.rpmFor example:
sudo rpm -Uvh alation-4.14.7.20232.rpm
Note
If you receive an error
headerRead failed: hdr data: BAD, no. of bytes(...) out of rangeat this step, troubleshoot using recommendations in RPM Installation Error During UpdateOn the host system, run the update action from outside of the Alation shell:
sudo /etc/init.d/alation update
You can monitor the progress of the update by tailing the installer log file (this path is outside the Alation shell) in a separate terminal window:
tail -f /opt/alation/<alation-####>/var/log/installer.log
Where <alation-####> stands for the version of Alation you are updating to.
Note
The
sudo /etc/init.d/alation updatecommand may take several hours, therefore, we advise that you run it withnohupor in a Screen session.Note that after successfully completing the update, you may need to perform a number of post-update steps. The need for post-upgrade steps depends on the Alation version and the Alation instance configuration. Check the update instructions for the specific release if post-update steps are required.
Updating on Ubuntu
To update Alation on a machine running on the Ubuntu operating system:
Download the .deb file from the Alation Customer Portal. When downloading, note down the MD5 hash for the package. It is displayed on the download page under the package information.
Copy the .deb file to the server where Alation is installed.
Verify the downloaded file by checking that the output of the md5sum command for this file matches the MD5 hash that you noted down from the Customer Portal page:
md5sum <path_to_downloaded_file>
On the host system, run the .deb update from outside of the Alation shell:
sudo dpkg -i alation-####.deb
Where alation-####.deb stands for the .deb file you downloaded, and #### represent the Alation version number in the x.y.z.nnnn format (x = major, y = minor, z = patch, and nnnn = build, for example: alation-5.17.2.118938.deb).
On the host system, run the update action from outside of the Alation shell:
sudo /etc/init.d/alation update
You can monitor the progress of the update by tailing the installer log file (path outside the Alation shell):
tail -f /opt/alation/<alation-####>/var/log/installer.log
Where <alation-####> stands for the version number you are updating to.
Note
The
sudo /etc/init.d/alation updatecommand may take several hours, therefore, we advise that you run it withnohupor in a Screen session.Note that after successfully completing the update, you may need to perform a number of post-update steps. The need for post-upgrade steps depends on the Alation version and the Alation instance configuration. Check the update instructions for the specific release if post-update steps are required.
Troubleshooting Manual Update
Make sure that:
Your Authentication Token is valid. It can be found in the installation link using Customer Portal in the email you received about the new build in the ” “ after Token: under the .deb filetype.
The URL from Customer Portal is valid. A common error is missing the s after http (
https:// ....) in the URL.