Migrate Native BI Sources to OCF Connectors
Customer Managed Applies to customer-managed instances of Alation
You can migrate native BI sources to Open Connector Framework (OCF) connectors using the capabilities in the Alation UI: Migrate a Source Using the Alation UI
Important
Native BI sources can only be migrated one by one. The ability to migrate multiple sources at the same time is not supported.
Prerequisites
Before performing the migration:
Migration capabilities are available from the Alation version is 2023.3.5.
You must first install the relevant OCF connector on your Alation instance. See Manage Connectors for directions. Make sure that the connector version is the latest.
Make sure you have saved the settings information for your BI source or made screenshots of its settings of the BI sources that you want to migrate.
Make sure that the MDE jobs are not running while you perform the migration.
Limitations
For Tableau:
SSL certificates will not be migrated. Users need to upload the SSL certificate manually after the migration.
Curation information or logical metadata will not be migrated for BIReportColumns, BIDataSourceColumns, and UnpublishedDataSources. See the Post Migration Activity to restore that curation data.
For MicroStrategy:
Only GBM v2 enabled MicroStrategy servers can be migrated to MicroStrategy OCF connector.
Supported Data Sources
The BI sources listed in the following table are supported for single data source migration to OCF connectors:
Native BI Source |
Equivalent OCF Connector |
|---|---|
Tableau (Built-in) |
Tableau OCF connector |
MicroStrategy |
MicroStrategy OCF |
Single Data Source Migration
You can use the single data source migration method if you want to migrate only one data source at a time. Single data source migration can be performed for on-premise installations of Alation or Alation Cloud Service instances, you can migrate using the user interface.
Note
Migration to an OCF connector is irreversible.We recommend saving the settings of your source or taking screenshots of the Settings page before performing the migration.
Migrate a Source Using the Alation UI
To use this method, a Server Admin must first enable it:
As a Server Admin, click the gear icon in the top right corner to open the Admin Settings page.
Click Feature Configuration.
Enable the Enable Native Connector Migration to OCF Connector toggle.
Click Save Changes.
You must be a Server Admin to perform the migration. To migrate your data source to OCF using the Alation interface:
Note
Migration to an OCF connector is irreversible.We recommend saving the settings of your source or taking screenshots of the Settings page before performing the migration.
Select the RDBMS data source or BI Source or File System source that you want to migrate.
Go to the General Settings page of the RDBMS or File System source. For BI Source, go to the catalog page to perform the migration.
Important
This is a good time to take screenshots or otherwise take note of the current settings for your data source. Some settings will not be migrated. You will need to manually reconfigure any settings that aren’t migrated.
To migrate:
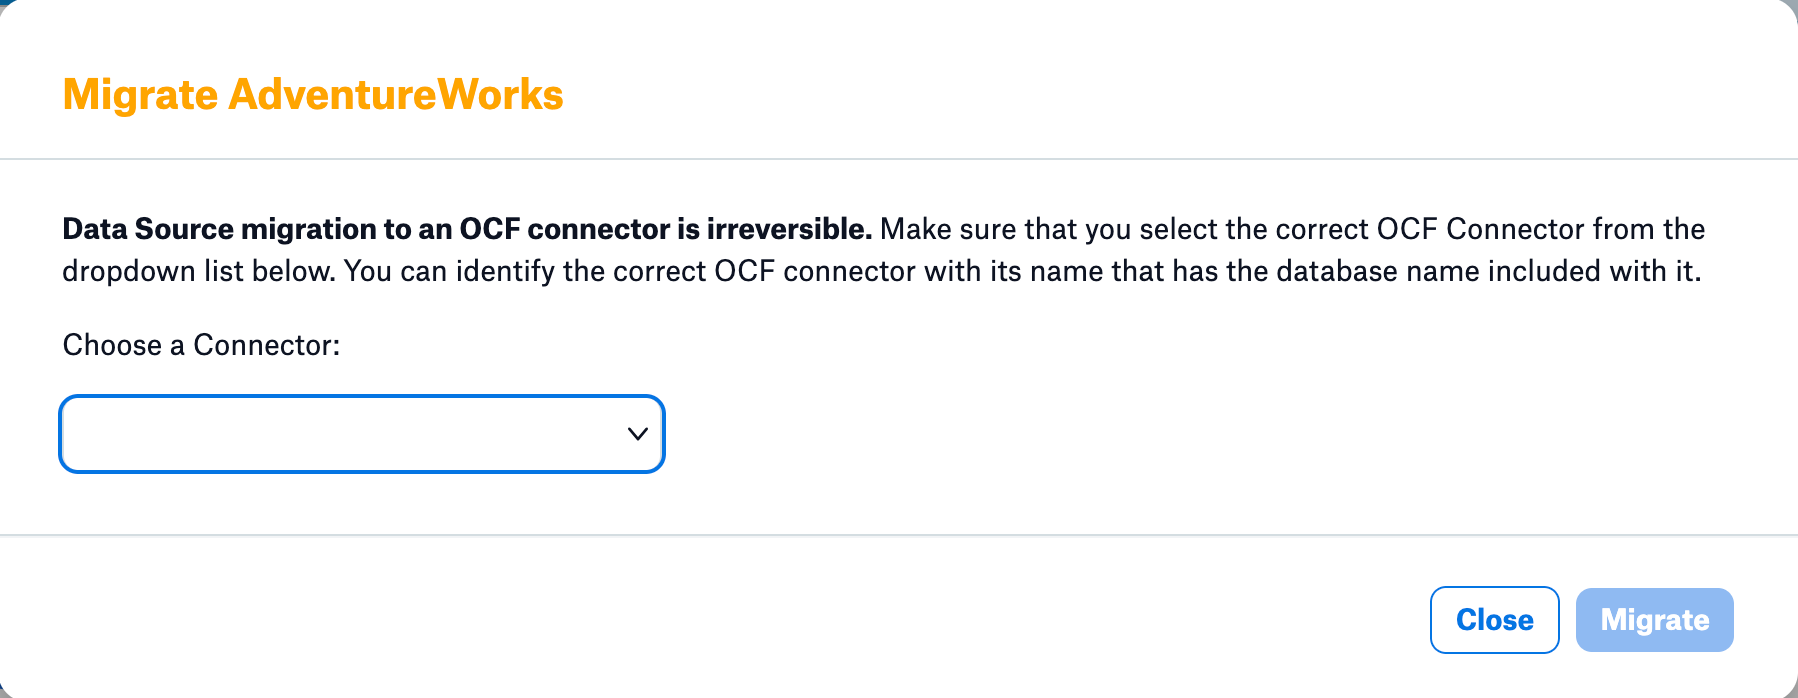
For RDBMS and File System sources - Scroll down to the bottom of the page and Click Migrate. The migration dialog appears.
For BI Source - On the catalog page, click Migrate on the top right. The migration dialog appears.
Using the Choose a Connector drop-down menu, select the OCF connector you’re migrating to. The connector name indicates what type of database it supports. If the needed OCF connector is unavailable in the drop-down list, you must first install the connector. See Manage Connectors for directions.
Important
Data source migration to an OCF connector is irreversible. If you select the wrong OCF connector, your data source could become permanently broken.
To verify that you’ve chosen the right connector, type in the entire connector name and version in capital letters in the Connector Name field. Type the exact name as shown in the Choose a Connector drop-down menu. This will enable the Migrate button.
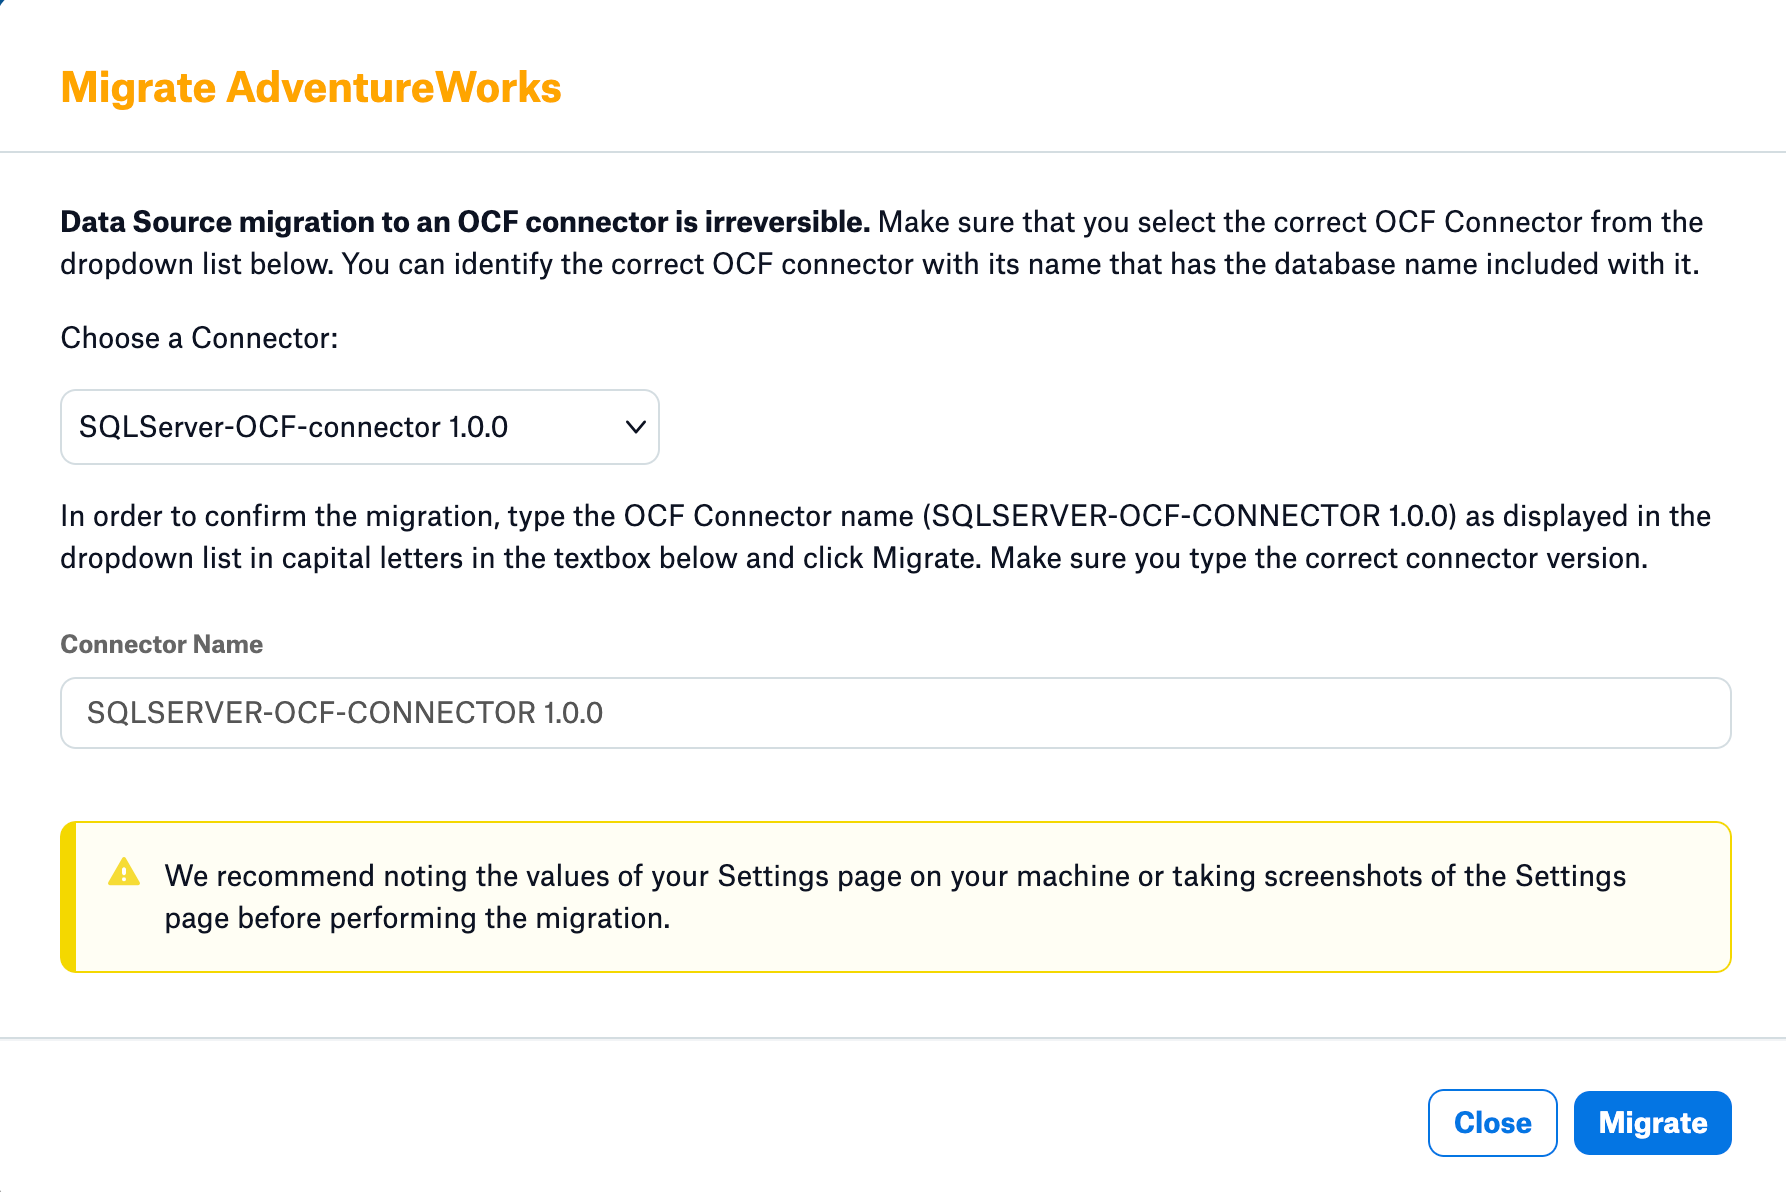
Click Migrate.
The data source will be migrated to the chosen OCF connector, and the OCF data source settings page will open. Check the notes you made of your previous settings and reconfigure any settings that were not migrated.
Migration Log Location
For on-premise installations of Alation, the migration logs are available in the ocf.log file at /opt/alation/site/logs location within the alation shell.
Validate Connection after Migration
After the migration, validate the connection between Alation and the database. To test the connection:
In the Alation user interface, go to the Settings page of the source that was migrated.
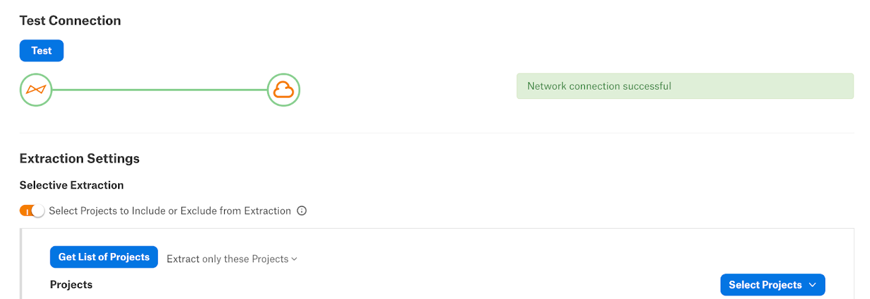
Scroll down to the Test Connection section.
Under Test Connection, click Test. The test should return the message Network connection successful.
If the connection fails, check and update the connection settings and try again. You can also check the connector logs for any specific connection errors. For RDBMS data sources, to view the connector logs, click the link on top of the Settings page to go to the corresponding connector page in Admin Settings > Manage Connectors.
Troubleshooting
For on-premise instances, the migration logs are available in the ypireti.log, ypireti ocf.log file at /opt/alation/site/logs location within the alation shell. For migration failure, check logs from this file and reach out to the Alation Support for further assistance.
Post Migration Activity
Upload the SSL certificates in the Additional Settings page of your OCF BI source if the native BI source is authenticated with SSL.
For Tableau, see Tableau Post Migration Activity.