Informatica PowerCenter Connector: Install and Configure
Alation Cloud Service Applies to Alation Cloud Service instances of Alation
Customer Managed Applies to customer-managed instances of Alation
Follow these steps to perform the required configuration for the Informatica PowerCenter connector on the Informatica PowerCenter side and in Alation. This connector can be used to perform only Metadata Extraction and other features are not supported.
Preliminaries
Create a User
Create a user for the Informatica PowerCenter repository, refer to Creating a User.
Permissions
The following permission is required for the Informatica PowerCenter repository to access the metadata:
Read access
JDBC URI
When building the URI, include the following components:
Host
Port
Oracle - 1521
DB2 - 50000
SQL Server - 1433
Database name
URI Format for Oracle Data Source
oracle:thin:@<Host>:<Port>/<Database_Name>
Example:
oracle:thin:@11.132.126.242:1521/Data
URI Format for DB2 Data Source
db2://:<Host>:<Port>/<Database_Name>
Example:
db2://52.64.198.47:50000/data
URI Format for SQL Server Data Source
sqlserver://<Host>:<Port>;databaseName=<Database_Name>
Example:
sqlserver://10.22.146.138:1433;databaseName=data
Alation Setup and Authentication
STEP 1: Install the Connector
Important
Installation of an OCF connector requires Alation Connector Manager to be installed as a prerequisite.
If this has not been done on your instance, install Alation Connector Manager using the steps in: Install Alation Connector Manager.
Make sure that the OCF connector Zip file that you received from Alation is available on your local machine.
Install the connector on the Connectors Dashboard page: refer to Manage Connector Dashboard.
STEP 2: Create and Configure a New Informatica PowerCenter Data Source
Log in to the Alation instance and add a new Informatica PowerCenter source: Apps > Sources > Add > Data Source.
Provide the Title for data source and click on Continue Setup.
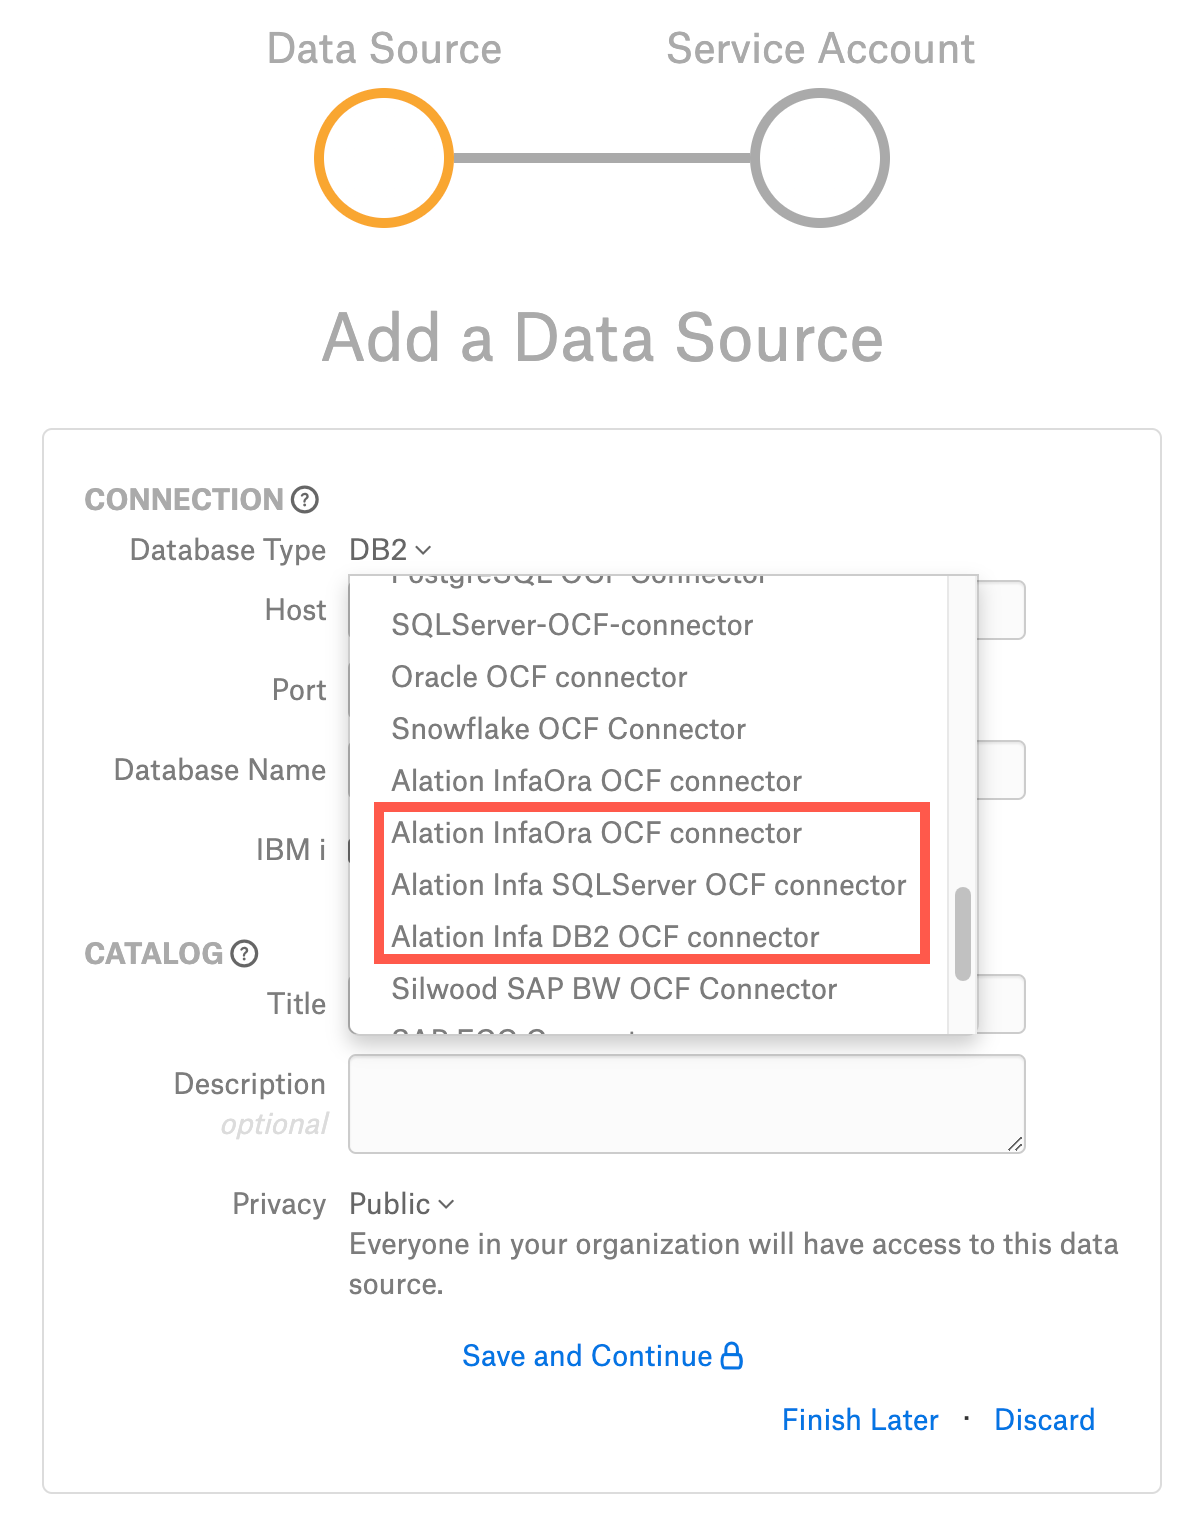
Select Database Type as follows based on the data source types from the dropdown menu:
Alation InfaOra OCF Connector
Alation Infa DB2 OCF Connector
Alation Infa SQLServer OCF Connector
You will be navigated to your new Informatica PowerCenter connectors Settings page.
General Settings
Note
This section describes configuring settings for credentials and connection information stored in the Alation database. If your organization has configured Azure KeyVault or AWS Secrets Manager to hold such information, the user interface for the General Settings page will change to include the following icons to the right of most options:

By default, the database icon is selected, as shown. In the vault case, instead of the actual credential information, you enter the ID of the secret. See Configure Secrets for OCF Connector Settings for details.
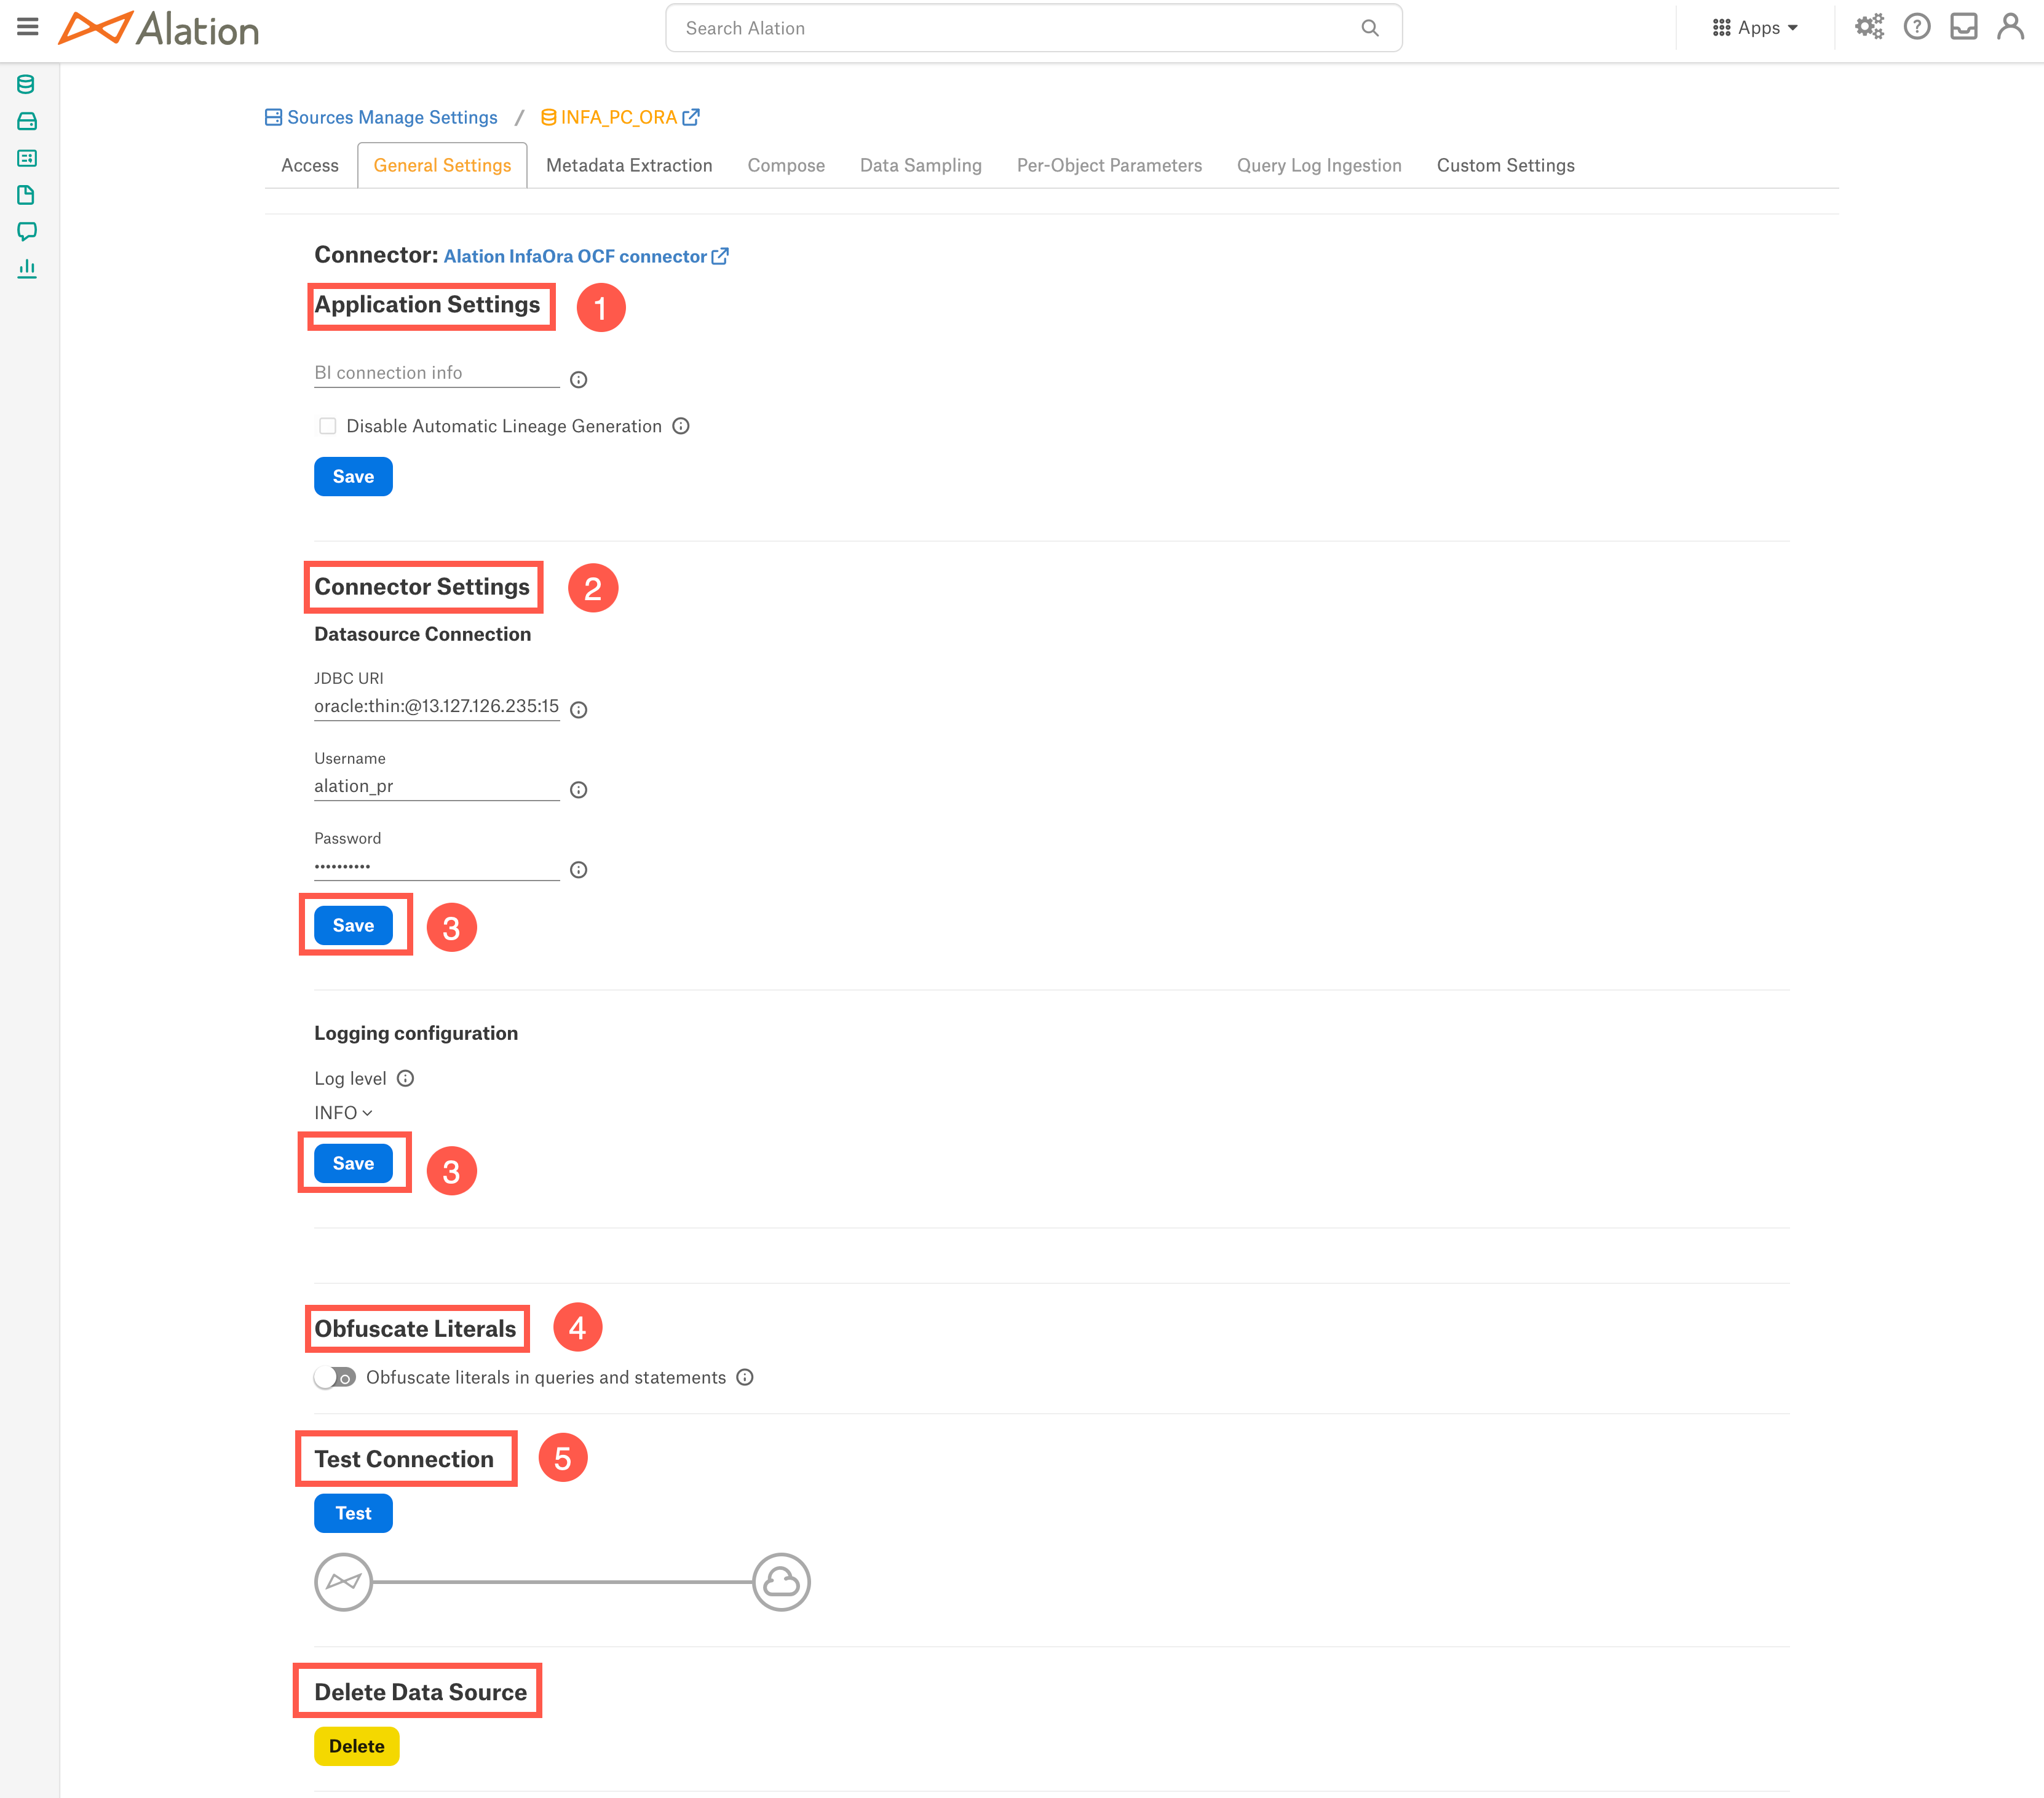
Perform the configuration on the General Settings tab:
Application Settings - Skip the Application Settings section because it is not relevant to this data source.
Specify Connector Settings:
Parameter
Description
Data Source Connection
JDBC URI
Provide the JDBC URI :
For Oracle data source, use URI Format for Oracle Data Source
For DB2 data source, use URI Format for DB2 Data Source
For SQL Server data source, use URI Format for SQL Server Data Source
Username
Provide the Informatica PowerCenter repository username.
Password
Provide the Informatica PowerCenter repository password.
Logging Information
Log Level
Select the Log Level to generate logs. The available log levels are based on the log4j framework.
Click Save.
Skip the Obfuscate Literals toggle because it is not relevant to this data source.
Under Test Connection, click Test to validate network connectivity.
Deleting the Data Source
You can delete your data source from the General Settings tab. Under Delete Data Source, click Delete to delete the data source connection.
Metadata Extraction
You can perform automated extraction or run a manual extraction for the data source.
Application Settings
Enable Raw Metadata Dump or Replay: The options in this drop list can be used to dump the extracted metadata into files in order to debug extraction issues before ingesting the metadata into Alation. This feature can be used during testing in case there are issues with MDE. It breaks extraction into two steps: first, the extracted metadata is dumped into files and can be viewed; and second, it can be ingested from the files into Alation. It is recommended to keep this feature enabled only if debugging is required.
Enable Raw Metadata Dump: Select this option to save the extracted metadata into a folder for debugging purposes. The dumped data will be saved in four files (attribute.dump, function.dump, schema.dump, table.dump) in the folder opt/alation/site/tmp/ inside Alation shell.
Enable Ingestion Replay: Select this option to ingest the metadata from the dump files into Alation.
Off - Disable the Raw Metadata Dump or Replay feature. Extracted metadata will be ingested into Alation.
Connector Settings
Datasource Connection
Not applicable.
Query Based Extraction
Not applicable.
Selective Extraction
Not applicable.
Automated and Manual Extraction
If you wish to automatically update the metadata extracted into the Catalog, under Automated and Manual Extraction, turn on the Enable Automated Extraction switch and select the day and time when metadata must be extracted. The metadata extraction will be automatically scheduled to run on the selected schedule.
Troubleshooting
Refer to Troubleshooting.