Install OCF BI Connectors
Customer Managed Applies to customer-managed instances of Alation
Applies from release 2020.3.x
Note
In releases 2020.3.x up to 2021.2.x, the installation of OCF connectors is done on the backend of the Alation server. Starting with release 2021.3, connectors can be installed using the Connectors Dashboard in Admin Settings > Server Admin > Manage Connectors.
Connector Manifest File
Each out-of-the-box OCF connector package includes a manifest file with metadata about the connector in the JSON format. In the manifest file, the value of the key name in the source JSON object of the name of the connector as it will appear in the Alation UI.
Example:

Installation
Important
Installation of an OCF connector requires Alation Connector Manager to be installed as a prerequisite. If this has not been done on your instance, install the Connector Manager before installing any OCF connectors: Install Alation Connector Manager.
STEP 1: Install an OCF Connector
Copy the Zip file with the connector package to a directory on the Alation host accessible from inside the Alation Chroot, for example /tmp.
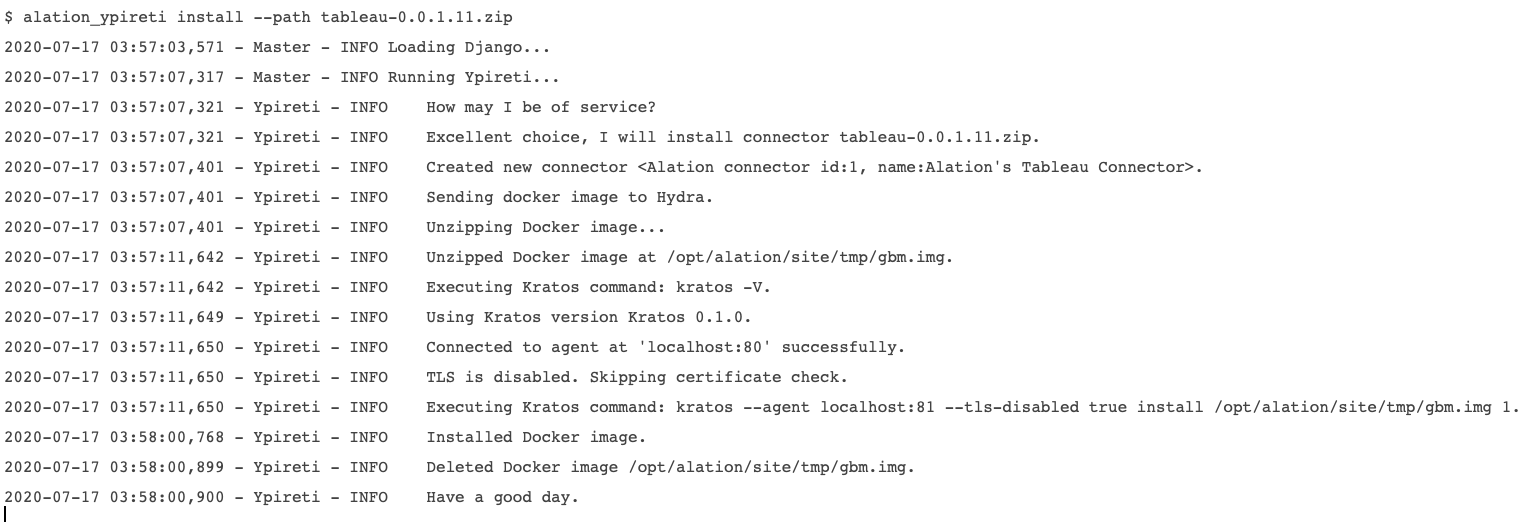
On the Alation host, install the connector from the Alation shell:
sudo /etc/init.d/alation shell
sudo su alation
cd /tmp
alation_ypireti install --path <connector-x.x.x.x.zip>
An example of a successful output message is shown below:
Important
OCF connectors that are installed or updated on the Alation version 2021.2 or newer are copied to the backup path at /opt/alation/site/site_data/ocf/connectors/ (path inside the shell) and backed up by the Alation backup process.
STEP 2: Enable OCF Connector Usage
If this has not been done yet on your instance, enable the OCF connector-based BI Servers in Alation.
In order to use OCF connectors in Alation, the following two alation_conf parameters must be set to True:
alation.feature_flags.enable_gbm_v2_connector_strategy
alation.feature_flags.enable_lineage_v2
To check their values on your instance, run the following commands from the Alation shell:
alation_conf alation.feature_flags.enable_gbm_v2_connector_strategy
alation_conf alation.feature_flags.enable_lineage_v2
This will print the current parameter values to the console.
To set the values:
To set the parameter
alation.feature_flags.enable_gbm_v2_connector_strategy, from the the Alation shell, run the following command:alation_conf alation.feature_flags.enable_gbm_v2_connector_strategy -s True
Note that the parameter alation_conf alation.feature_flags.enable_lineage_v2 enables the Lineage V2 framework in the Alation Catalog. On how to set it, see Enable Lineage V2. This parameter does not need enabling in release 2021.2 and newer releases (enabled by default).
After the OCF connector was installed and the required parameters were enabled, you can add BI sources to the Alation Catalog using this OCF connector.
Configuration in Alation
Add an OCF BI Source to Alation
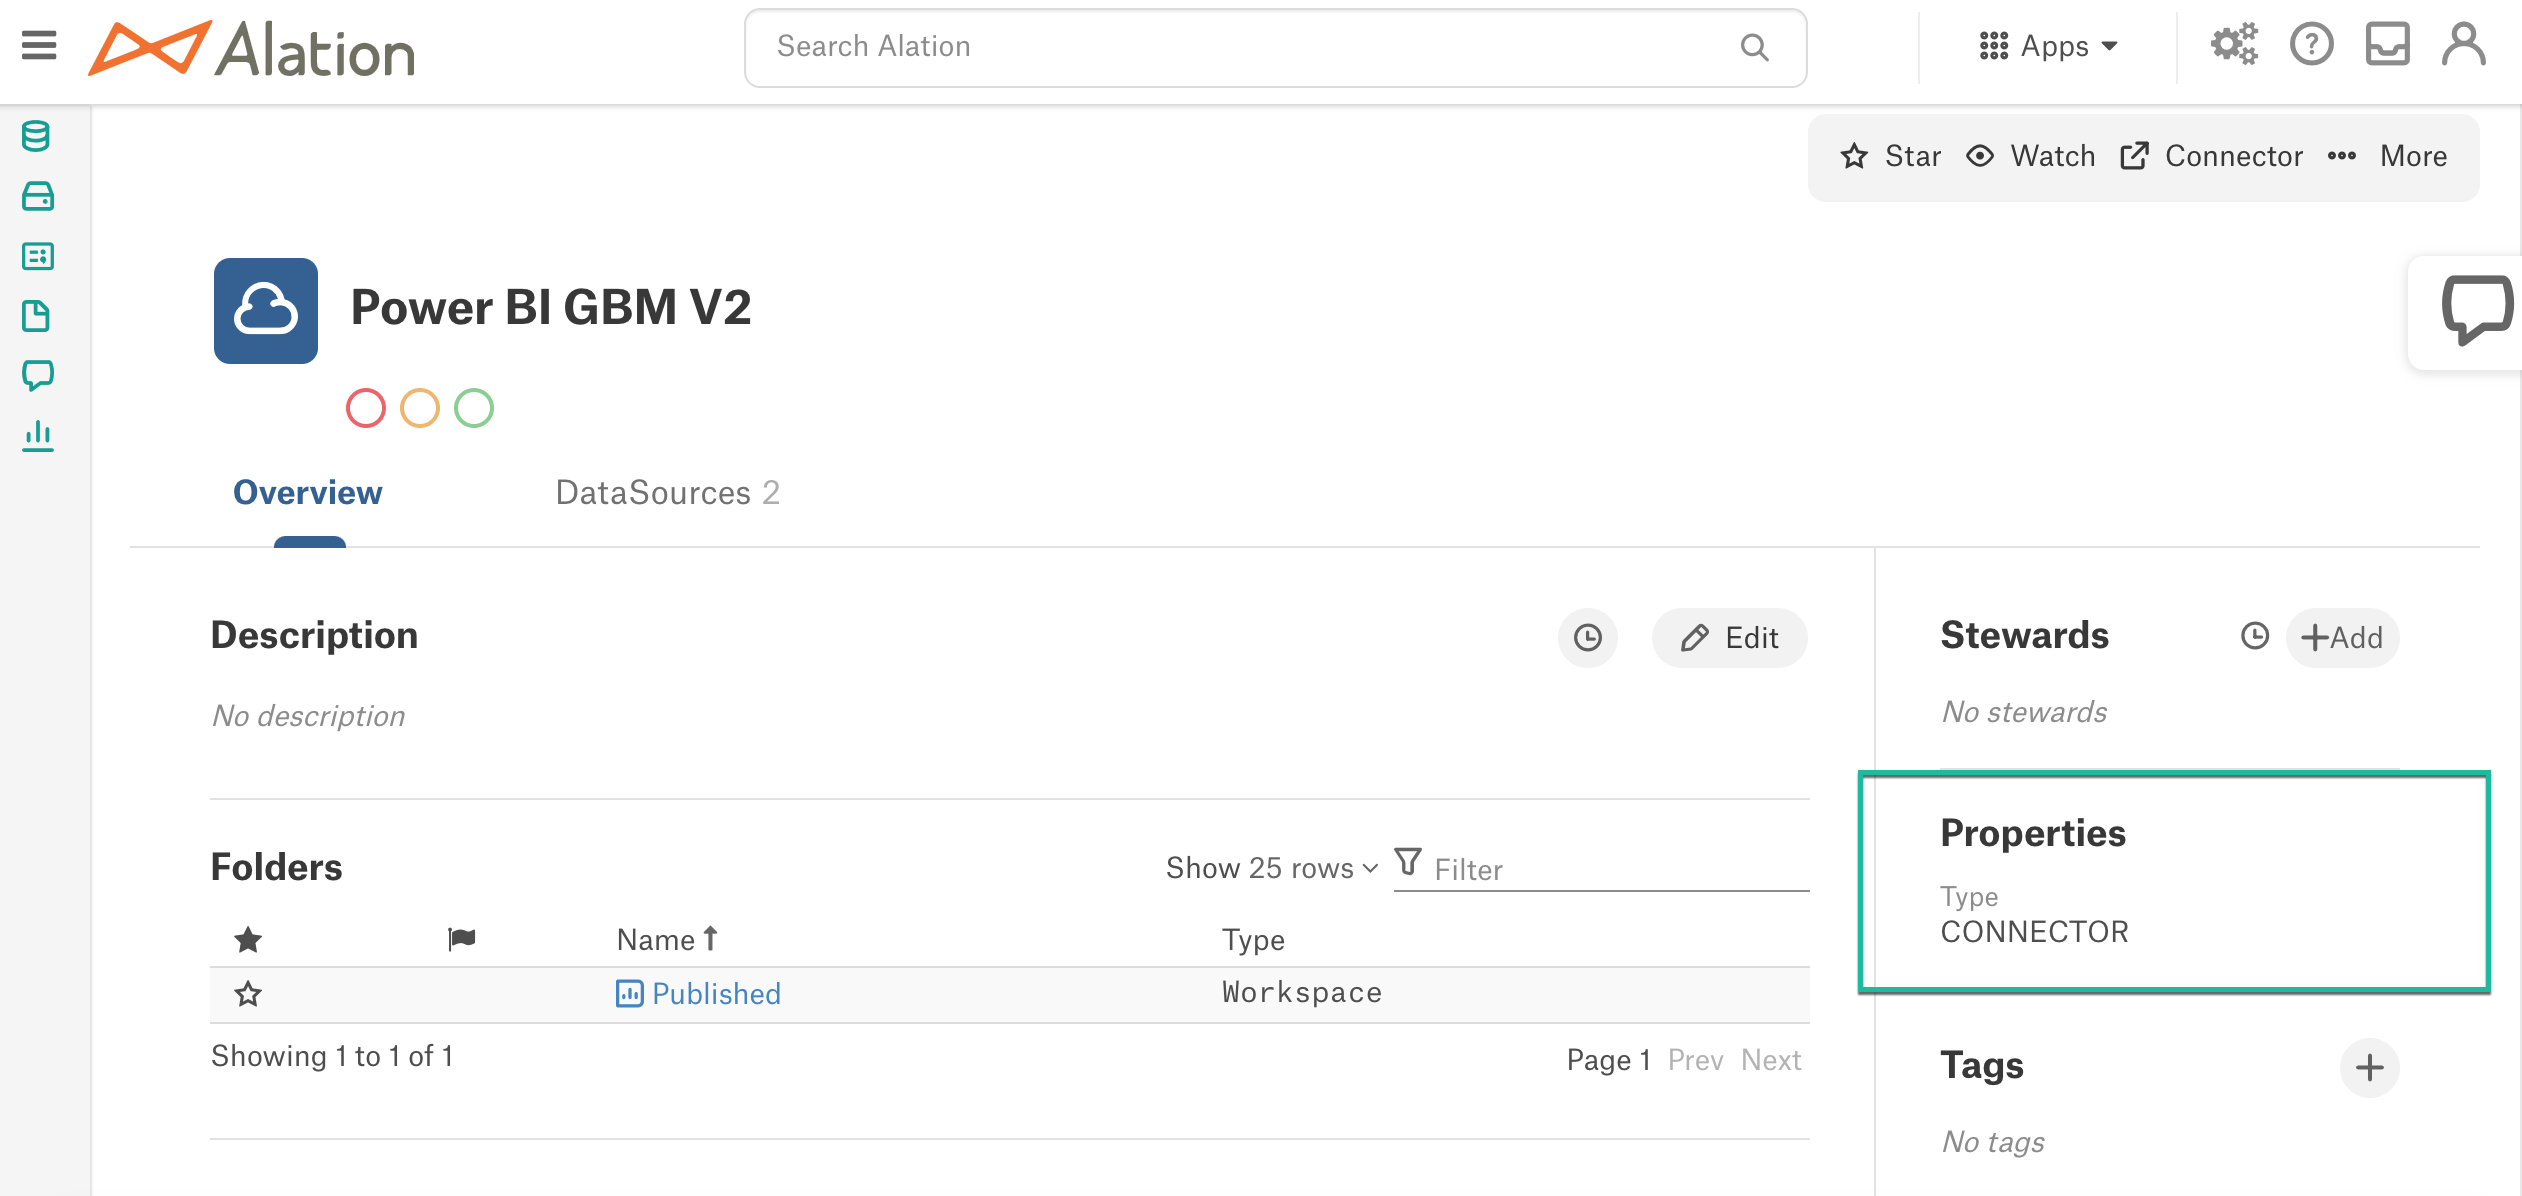
This section describes the steps to add an BI source that uses an installed OCF connector. Such sources will have the type CONNECTOR in Alation. The type is displayed in the Properties field of the BI server catalog page:
To add a BI source:
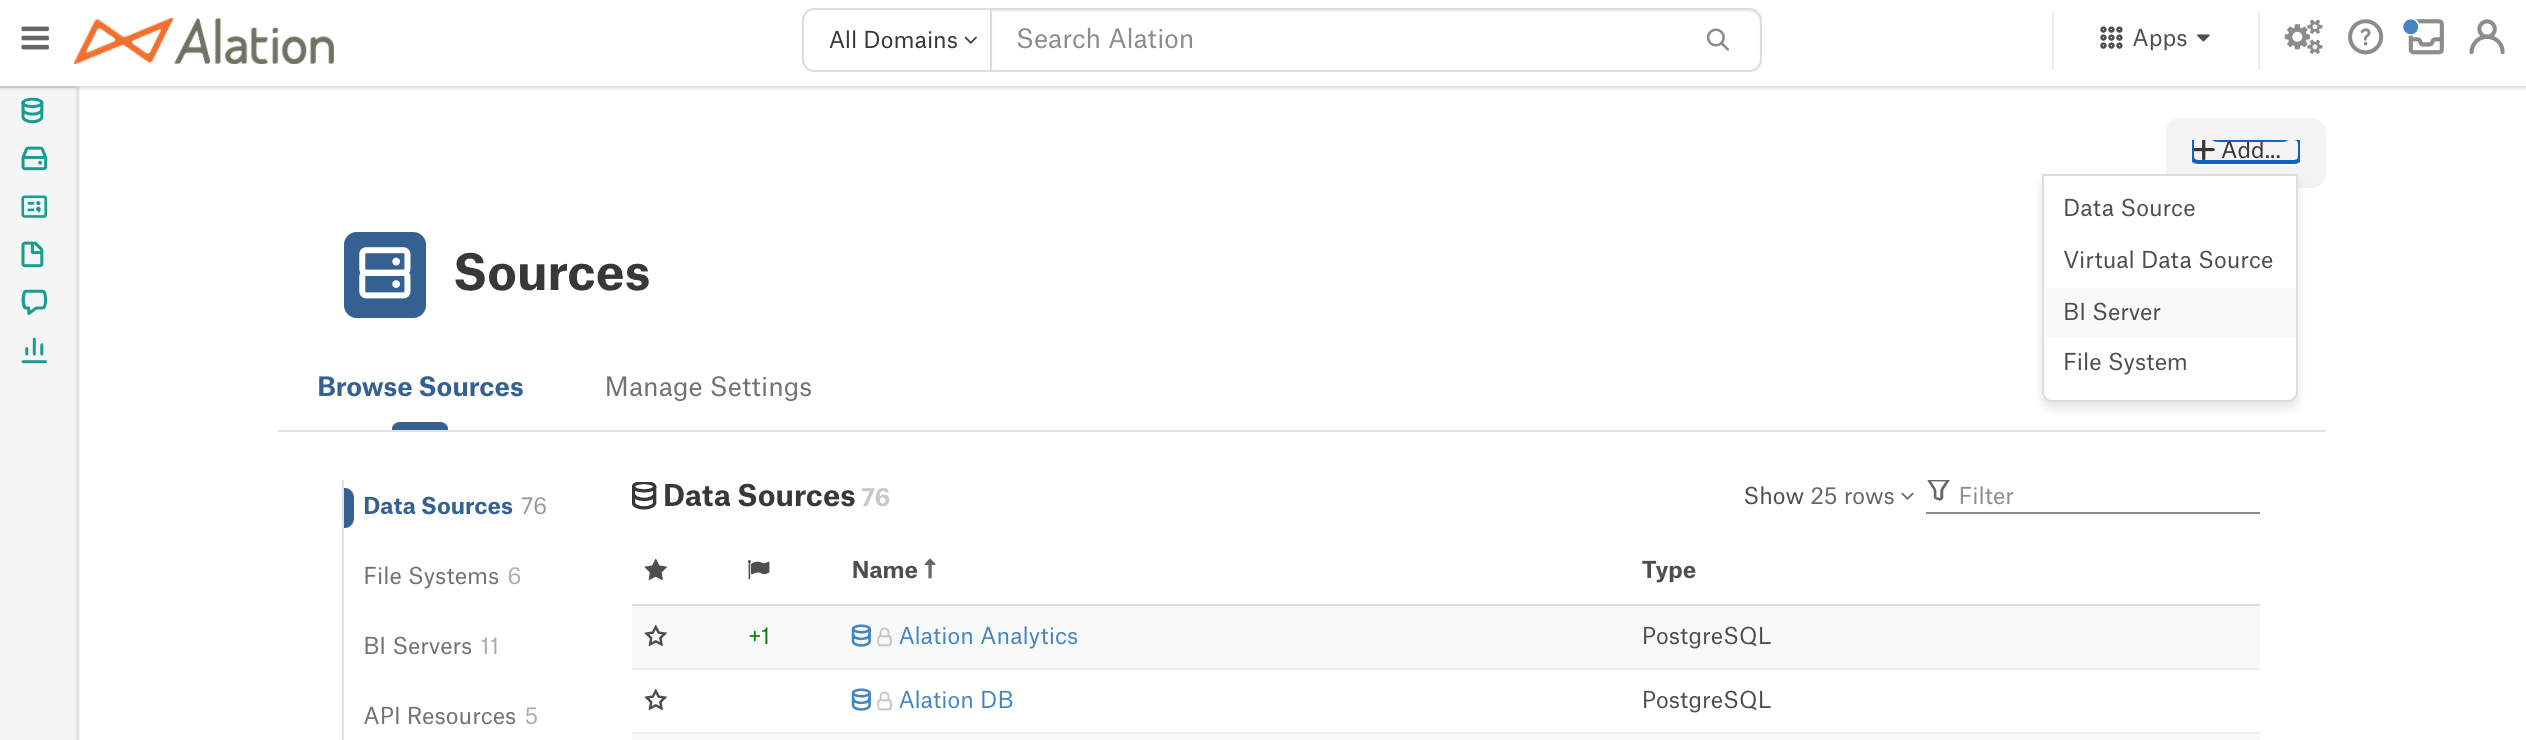
Create a new BI server source in Alation: click Apps > Sources > Add > BI Server:
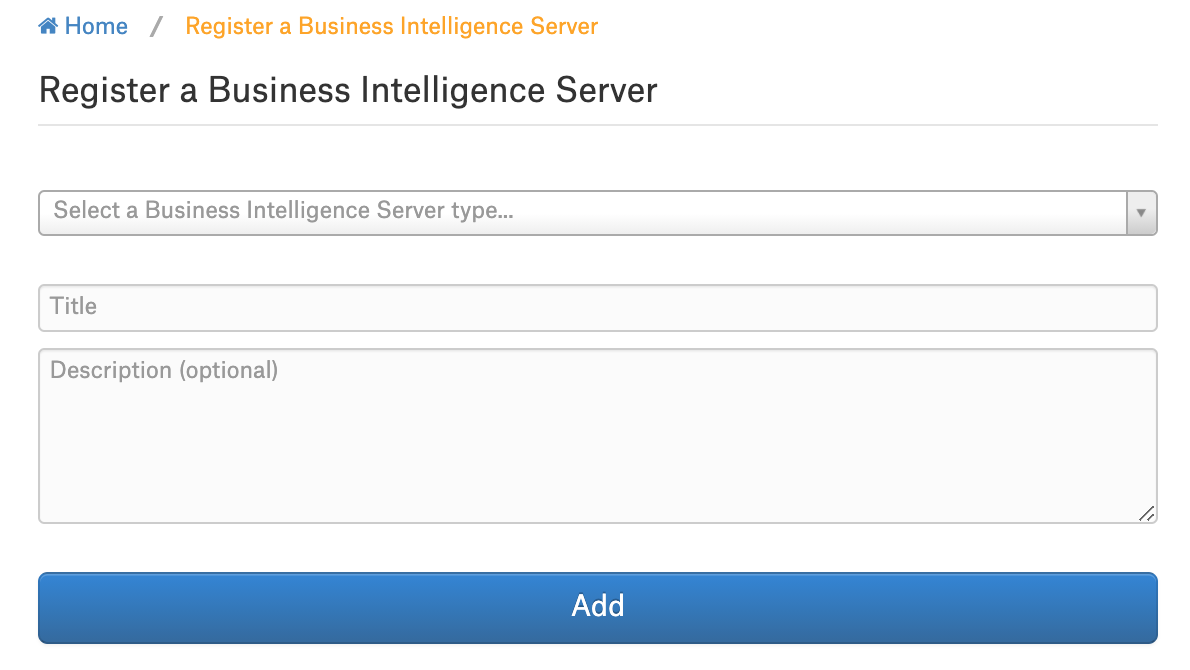
From the Select a Business Intelligence server type list, select the name of the connector you have installed. Provide a Title and a Description for the new BI server source and click Add:
The BI source Settings page will open. Specify the settings and perform extraction. For information about settings of specific OCF connectors, refer to documentation describing each available connector: