Create Lineage Data Manually
Alation Cloud Service Applies to Alation Cloud Service instances of Alation
Customer Managed Applies to customer-managed instances of Alation
Applies from version 2021.4
Users with the Catalog Admin, Source Admin, and Server Admin roles can create lineage data manually. To provide this capability, your Server Admin must enable the Manual Lineage Curation feature. See Enable Manual Lineage Curation for details about activating this functionality.
Admin users creating manual lineage do not have to be assigned as Data Source Admins to a data source to be able to create lineage for the source. They can create lineage on the catalog pages of all data objects they are allowed to access:
Public data sources
Private data sources they are granted access to
BI sources they are granted access to
Both table-level and column-level lineage can be created manually.
Open the Lineage Editor
To open the manual lineage editor:
Log in to Alation as an admin user.
Open the catalog page of the data object for which you want to create lineage, for example a table or a BI report.
Click the Lineage tab to open it. If lineage data already exists, you will see the Edit button on the top right of the chart.
Note
On the compound layout view of the lineage chart, the Edit button is available from version 2024.1 as a beta feature.
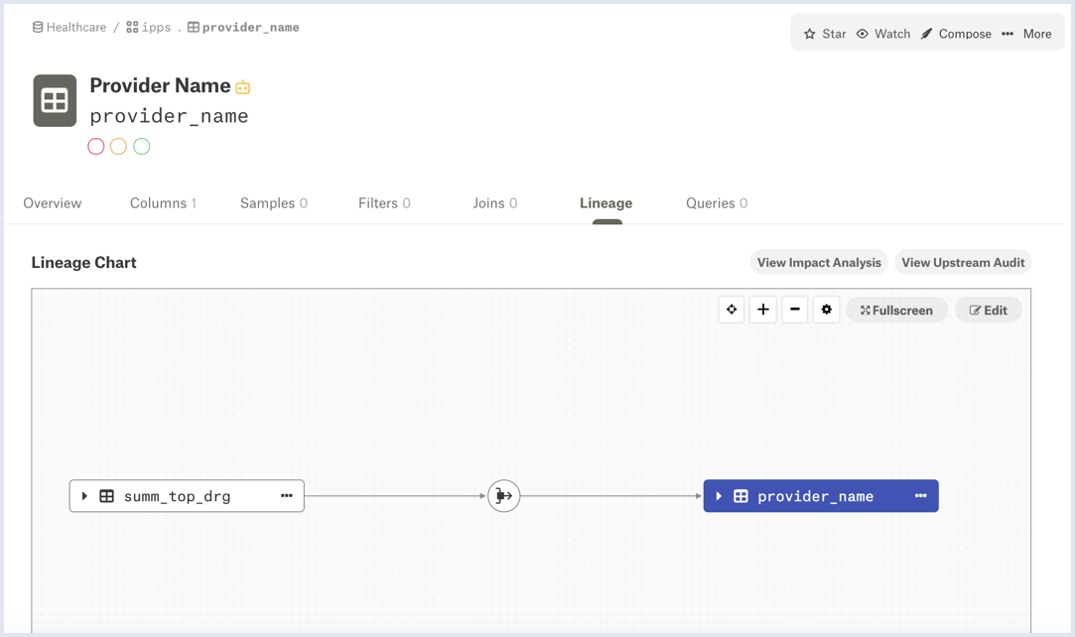
If no lineage data exists, there will be the Manually Create Lineage button:

To begin creating lineage either click Edit or Manually Create Lineage. This will open the lineage data editor:
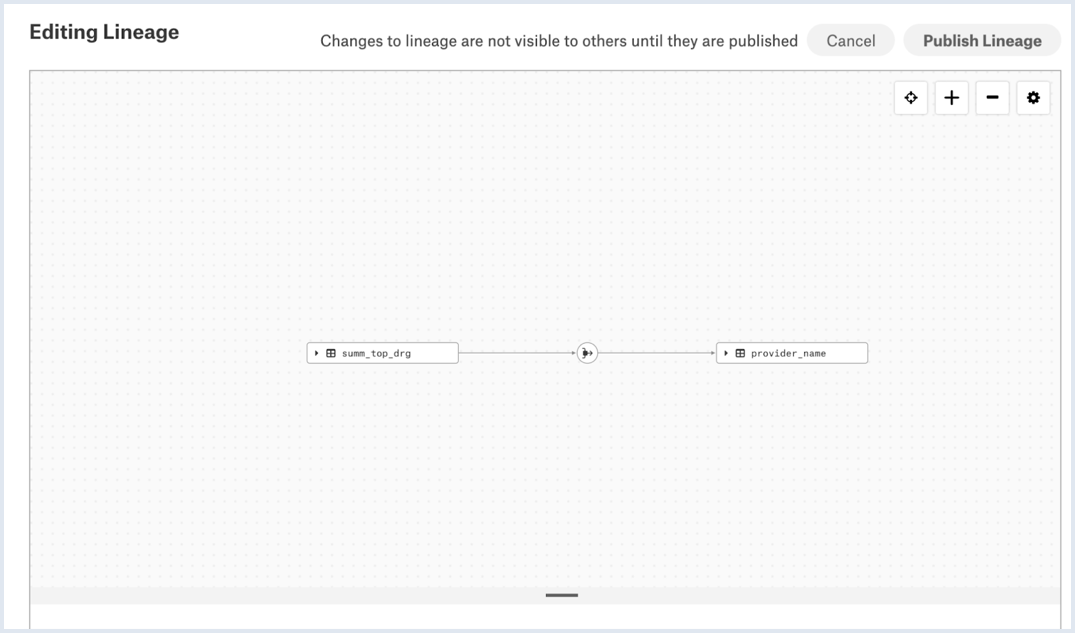
You can close the lineage editor anytime by clicking Cancel and then Close on top right. In this case, your unpublished changes will not be saved. Currently, the only way to save your work in the lineage editor is to publish the lineage data you created. There is no ability to save manually created lineage for later or any other way to preserve your work.
Create Table-Level Lineage Manually
To create table-level lineage:
In the lineage editor, click on the data object for which you want to create lineage. This will add two plus icons, upstream and downstream from the object:
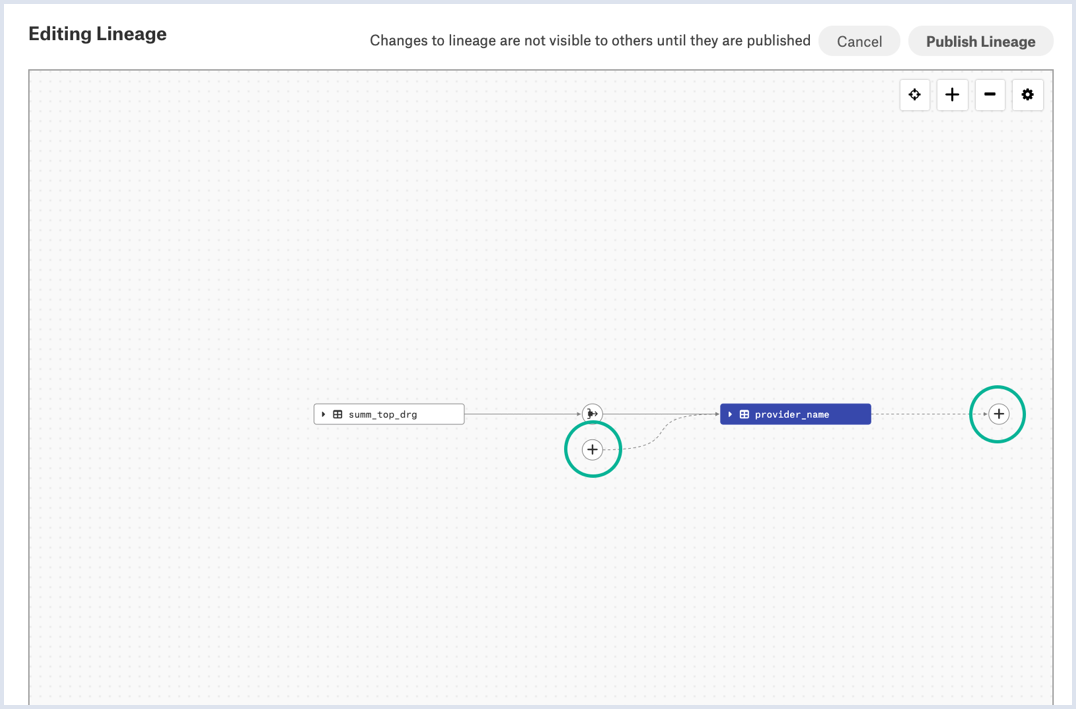
Click on any of the plus icons, depending on what kind of lineage links you want to create, upstream or downstream. The icon will be highlighted and a dataflow object editor will open on the right. Note that the object for which you are creating lineage will be automatically added to either Sources or Targets depending on which plus icon you clicked:
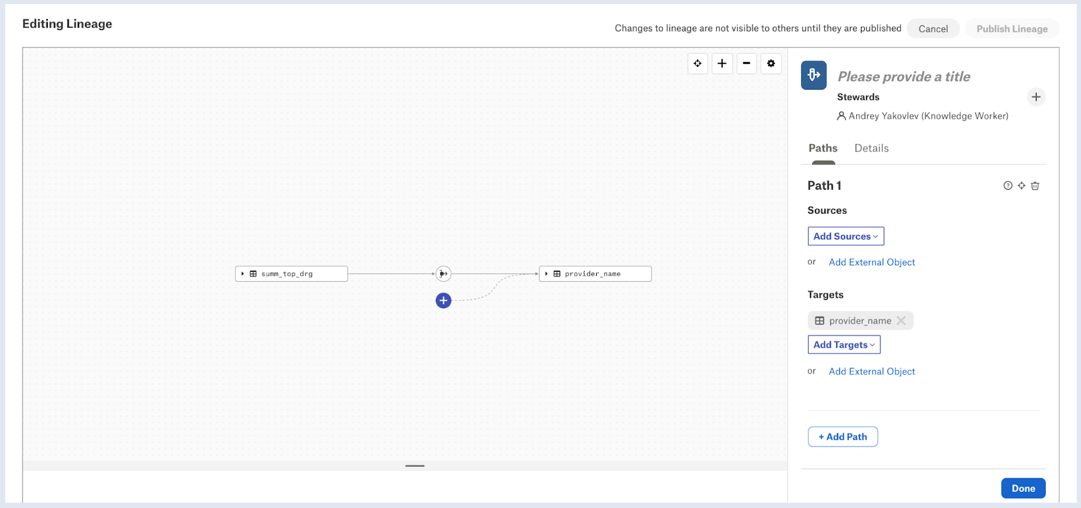
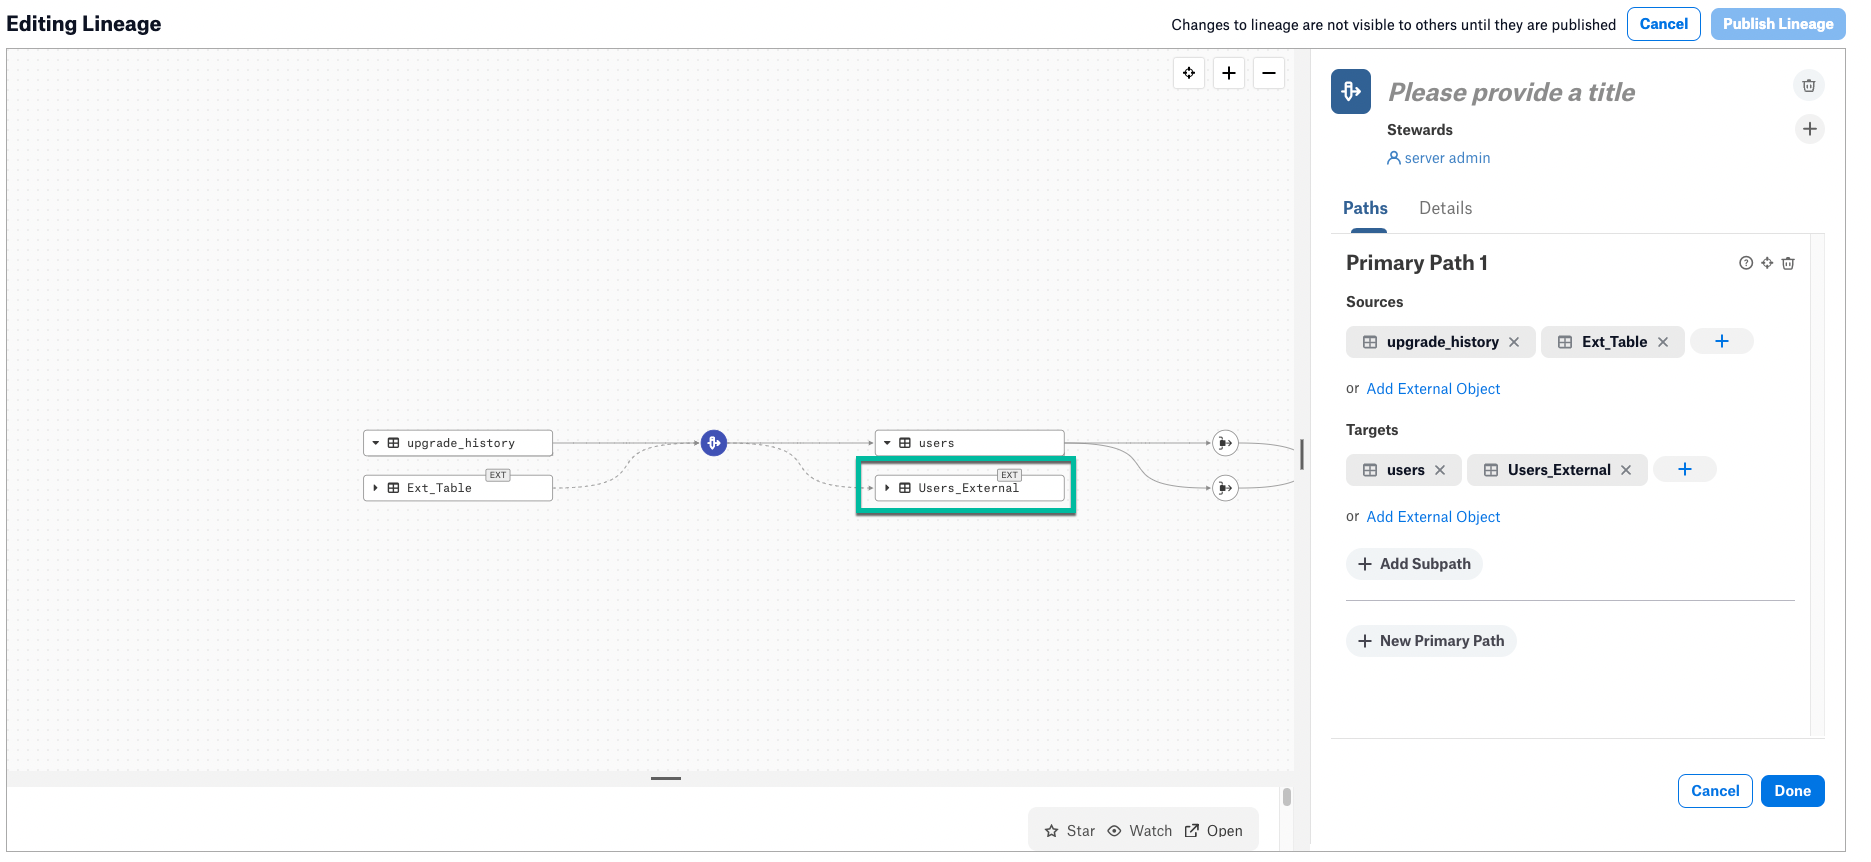
In the dataflow editor, specify a Title instead of the placeholder text.
You can add values to the Steward field of your dataflow object. This adds values to the Steward field on the Dataflow catalog page. The Source Admin creating the dataflow object is the first Steward who is added automatically. To add other users or groups as Stewards, click the plus icon to the right of the Stewards field and in the Quick Search dialog, find and click a user or a group to add them:
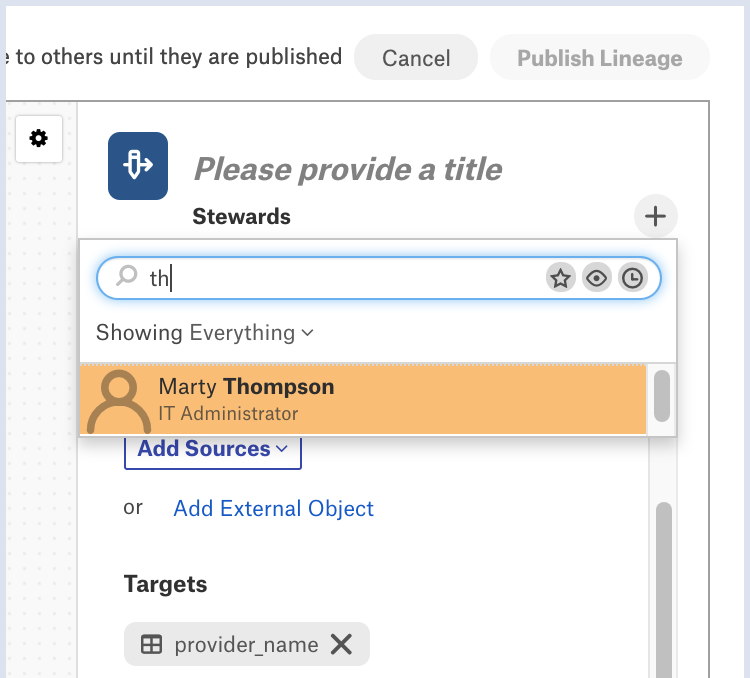
To remove a Steward, hover over a name in the Stewards list and then click the cross icon to the right of the name.
Next, add paths and other lineage details.
Add Paths
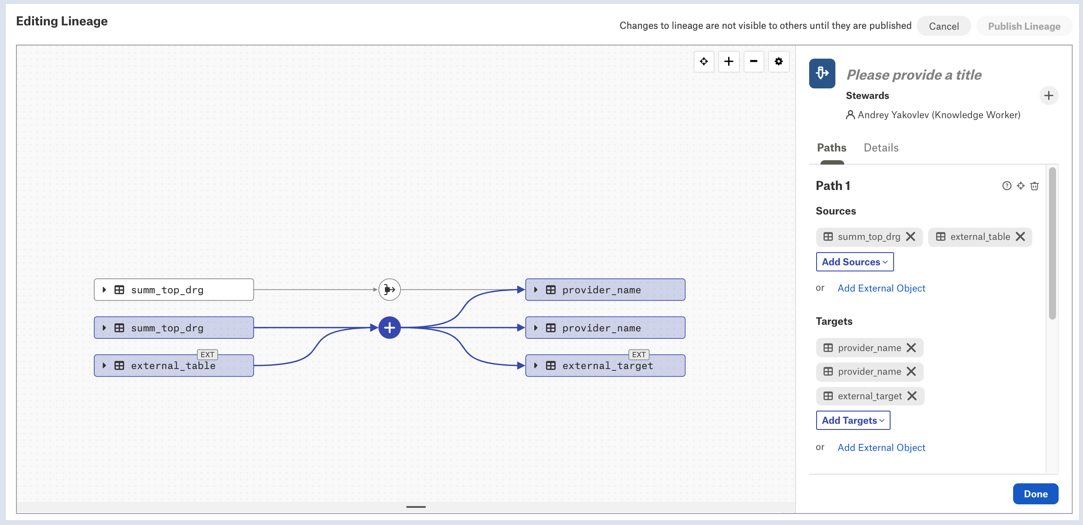
The Paths tab of the dataflow properties is selected by default. Under Paths, you can add one or multiple lineage paths from source to target data objects.
A path is a lineage link from the upstream source object to the Dataflow object or from the dataflow object to the downstream target object. Each path requires at least one source data object and at least one target data object.
Add Sources
To add a Source object, click on Add Sources and use the Quick Search dialog to find the source object in the catalog:
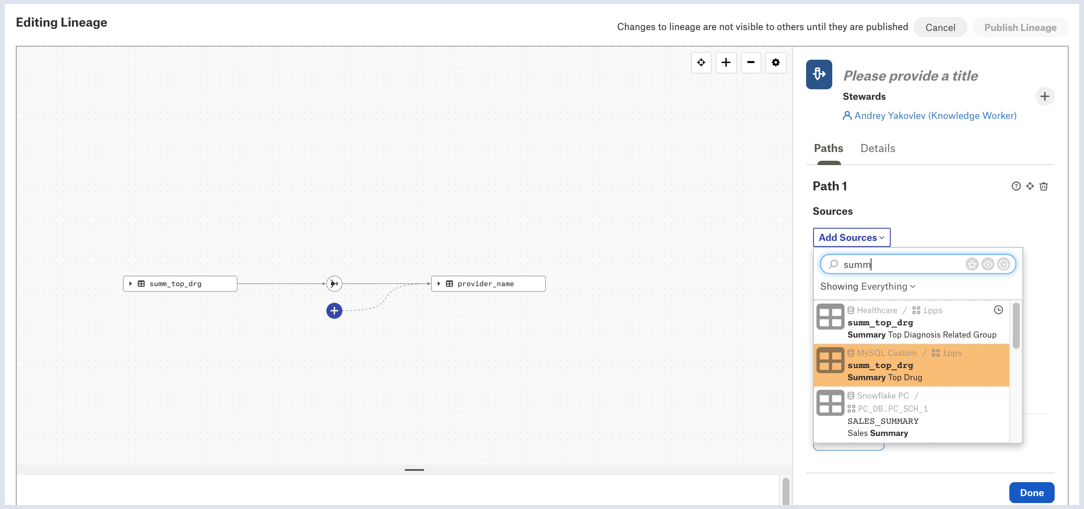
Note the changes on the lineage chart after you have added the source object: the editor will display the link from the source object to the dataflow object:
Add an External Source
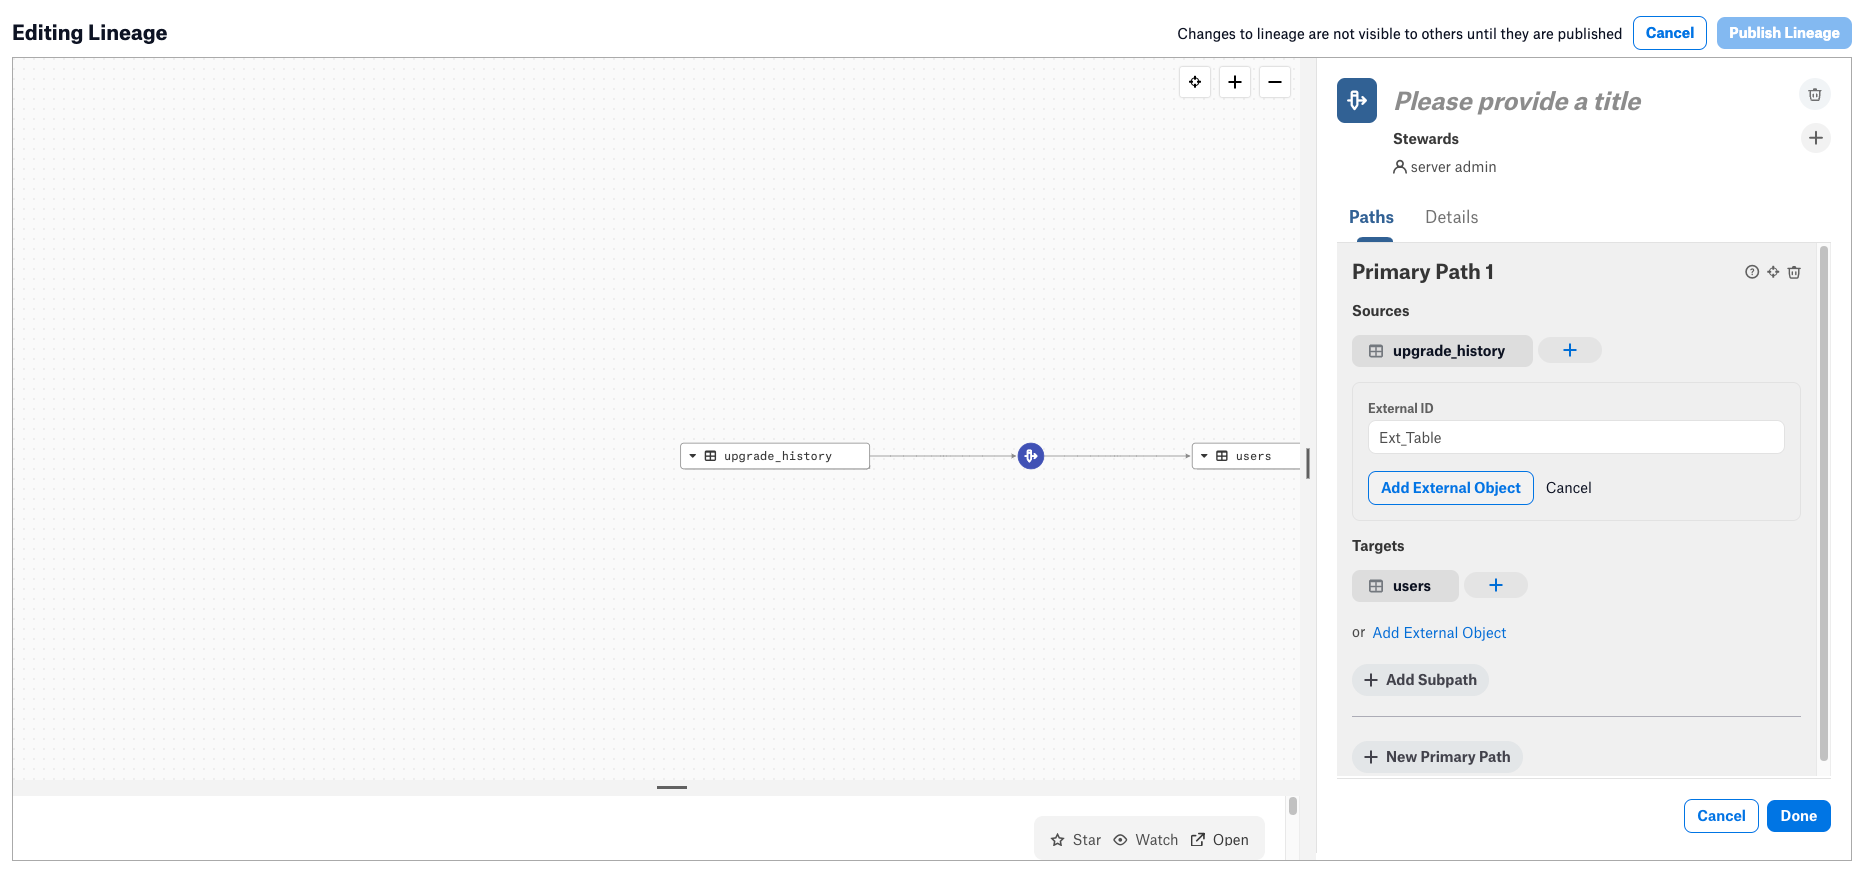
You also have the ability to add source objects that are not represented in the Alation catalog, or external objects. This provides Source Admins with the ability to insert objects into lineage without having to create a virtual data source to represent those external objects. To add a Source object that is an external object, click Add External Object and specify an ID for the external object. The ID field is used to identify the external object in Alation and must be unique. Do not leave the ID unspecified and do not leave the default value of zero.
After providing the ID, click Add External Object:
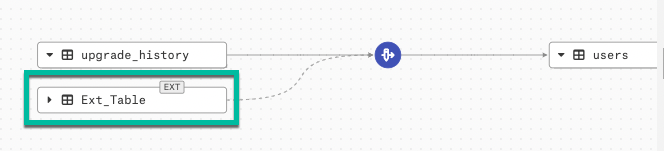
External sources will display the EXT label on the chart:
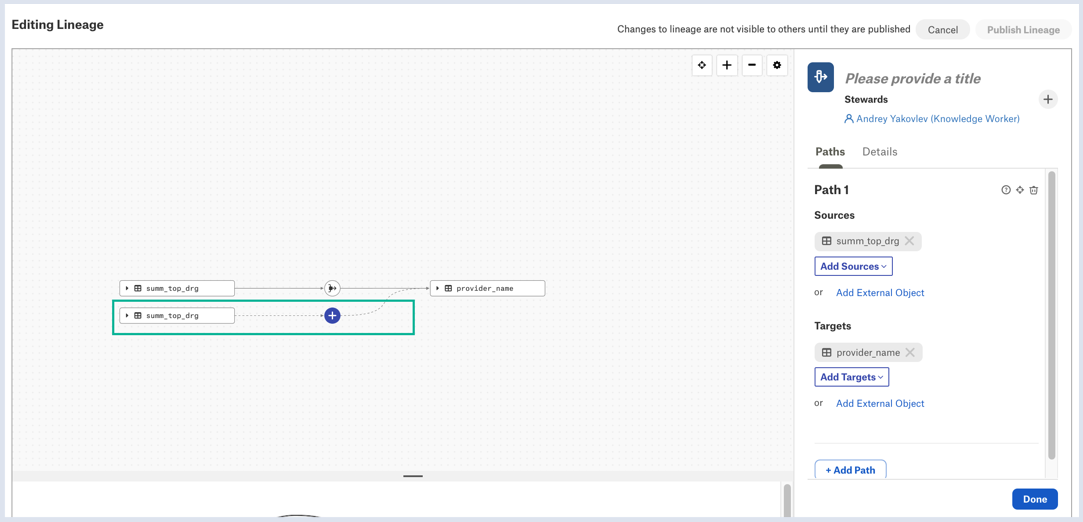
Add Targets
To add a target object, click Add Targets and use the Quick Search dialog to search for the catalog object to add:
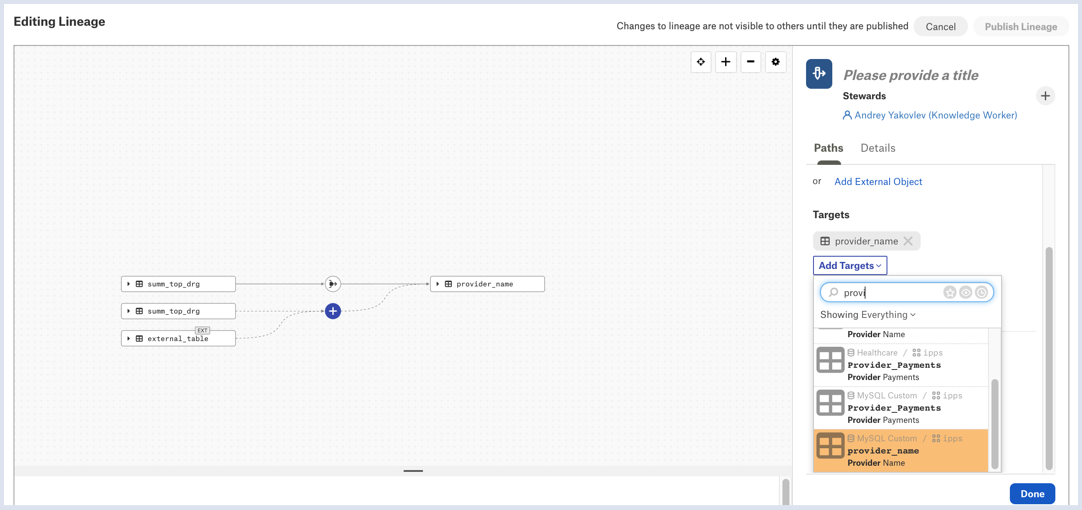
You can add several targets if multiple targets are affected by the current dataflow object.
Add an External Target
You also have the ability to add target objects that do not exist in the Alation catalog, or external objects. This provides Source Admins with the ability to insert objects into lineage without having to create a virtual data source to represent those external objects. To add a target object that is an external object, click Add External Object under Targets and specify an ID for the external object. The ID field is used to identify the external object in Alation and must be unique. The value can be a reference to external objects such as external folders or files. Do not leave the ID unspecified and do not leave the default value of zero.
After providing the ID, click Add External Object. The external target object will have the EXT label on the chart:
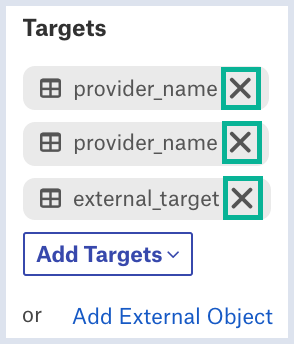
Remove Source and Target Objects
To remove a source or target object from lineage data, click the cross icon for this object:
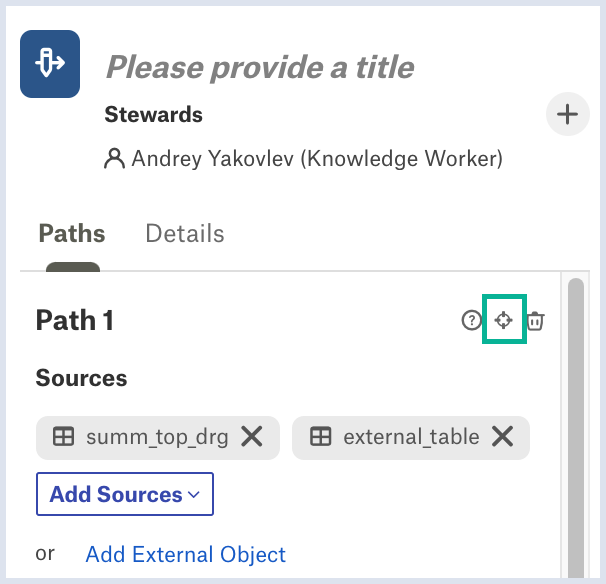
Highlight Paths
You can highlight a path by clicking the Highlight icon to the right of the path number:
This will highlight this specific path in the working area of the editor:
Add Multiple Paths
To add another path, click Add Path at the bottom of the Paths tab. This will add another path, “Path 2”, to the currently edited dataflow object:
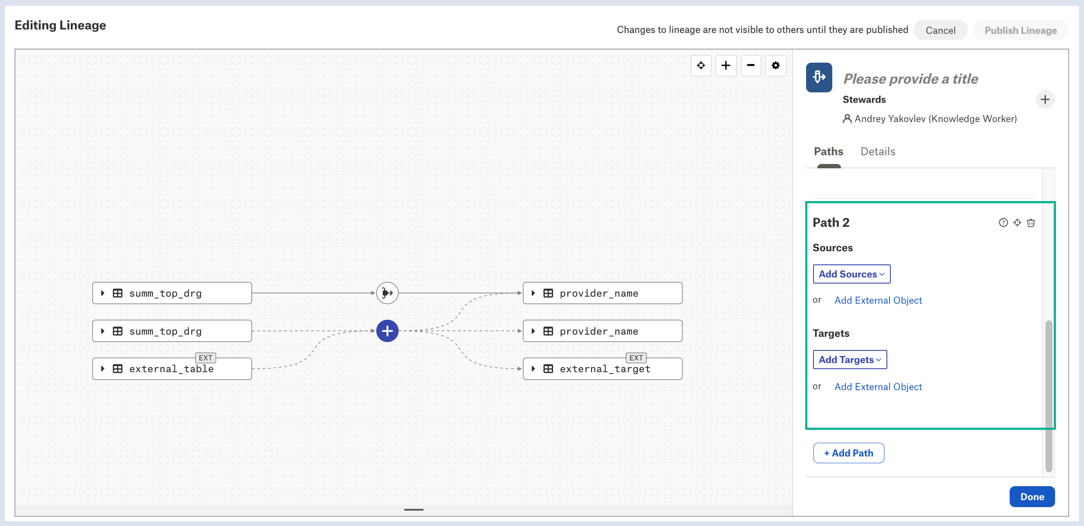
Add source and target objects to the new path using the Add Sources and Add Targets buttons.
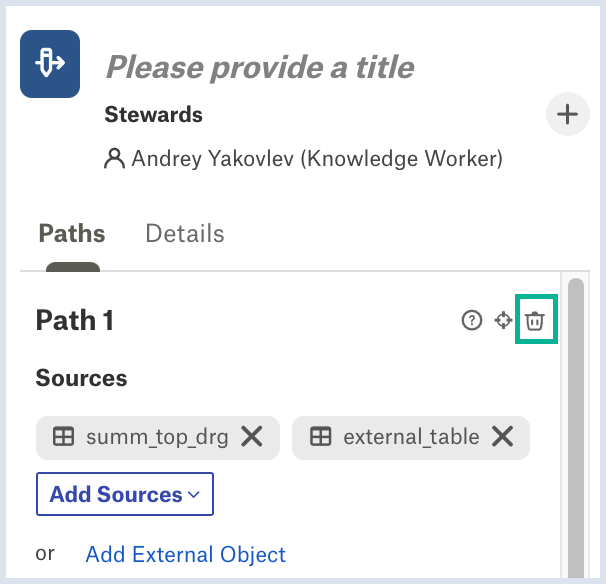
Delete a Path
To delete a path, click the trash can icon to the right of the path number. This will remove the path from the dataflow editor and from the working area.
Add Lineage Details
On the Details tab of the dataflow object editor, you can add a description of the lineage data you are adding and the SQL for lineage paths. Click the Details tab of the editor to open it:
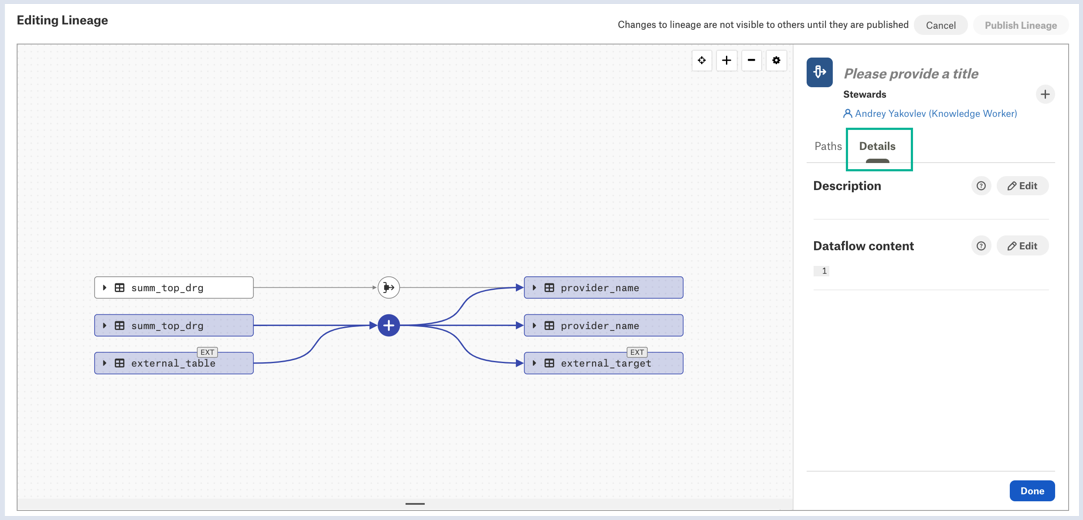
To add a description, click Edit for the Description field, add a description and save.
To add the SQL code, click Edit for the Dataflow content field, provide the SQL code and save.
You also use the Details tab to assign a group source for the dataflow object. See Group Dataflow Paths.
Stage Table-Level Lineage for Publishing
After creating paths and adding details, click Done on the bottom left of the dataflow object editor. This closes the editor and stages your changes for publishing: the Publish Lineage button on top right of the working area becomes active.
Publish Table-Level Lineage
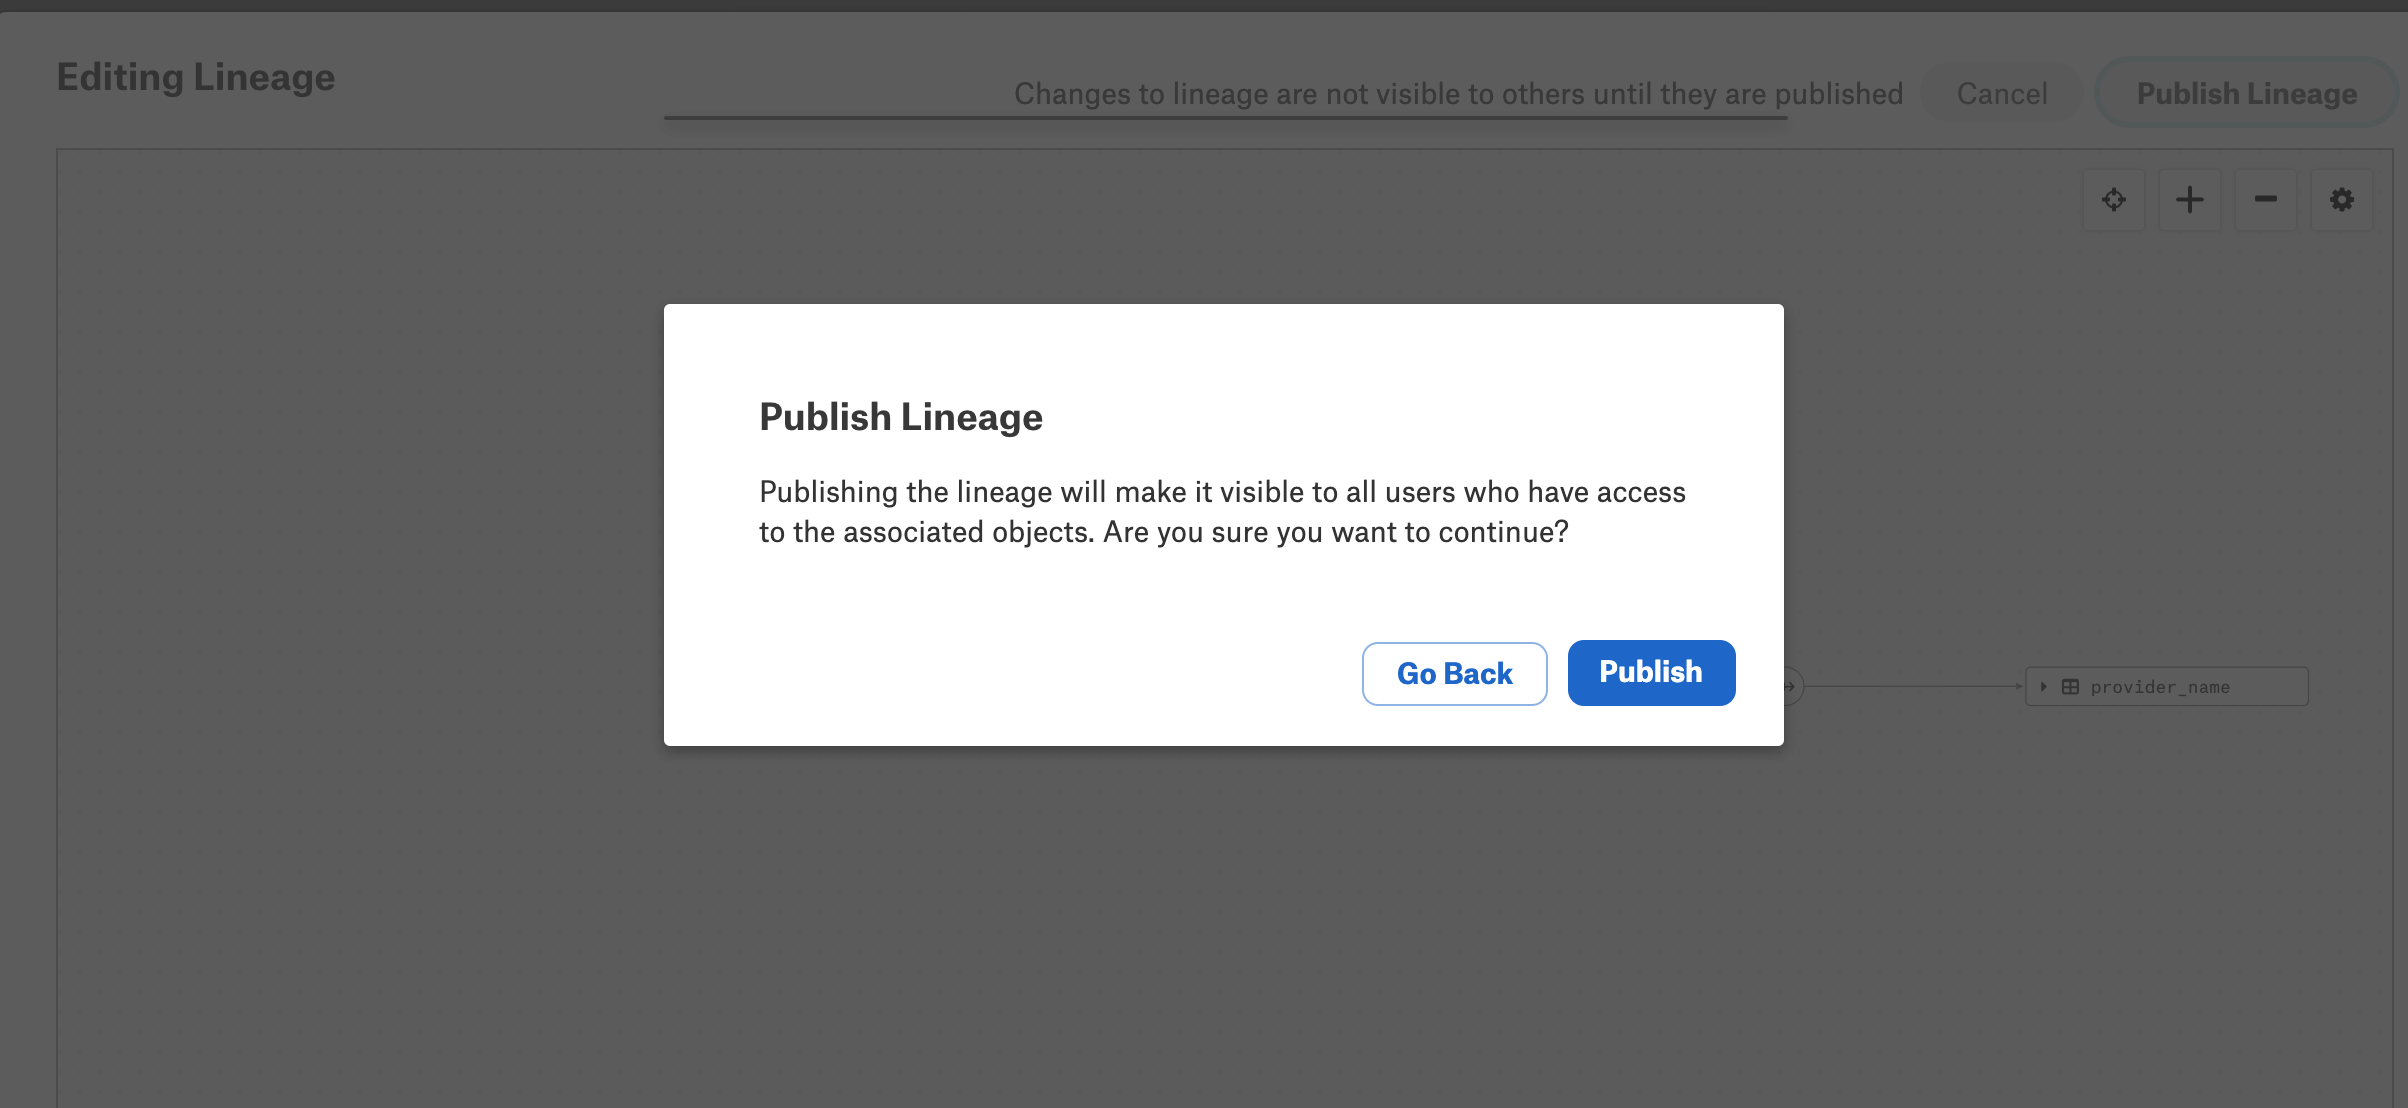
Changes are not visible to other catalog users until they are published.
Publish the lineage data to save your work and to make the lineage data visible to all catalog users.
Important
If you click Cancel at this point or refresh or close the browser window, you will lose your work. Publishing is the only way to save the lineage data you created manually.
To publish the lineage data you created, click Publish Lineage and confirm this action in the confirmation dialog that pops up:
This will add your manually created lineage to the lineage chart.
Create Column-Level Lineage
Available from version 2021.4.5
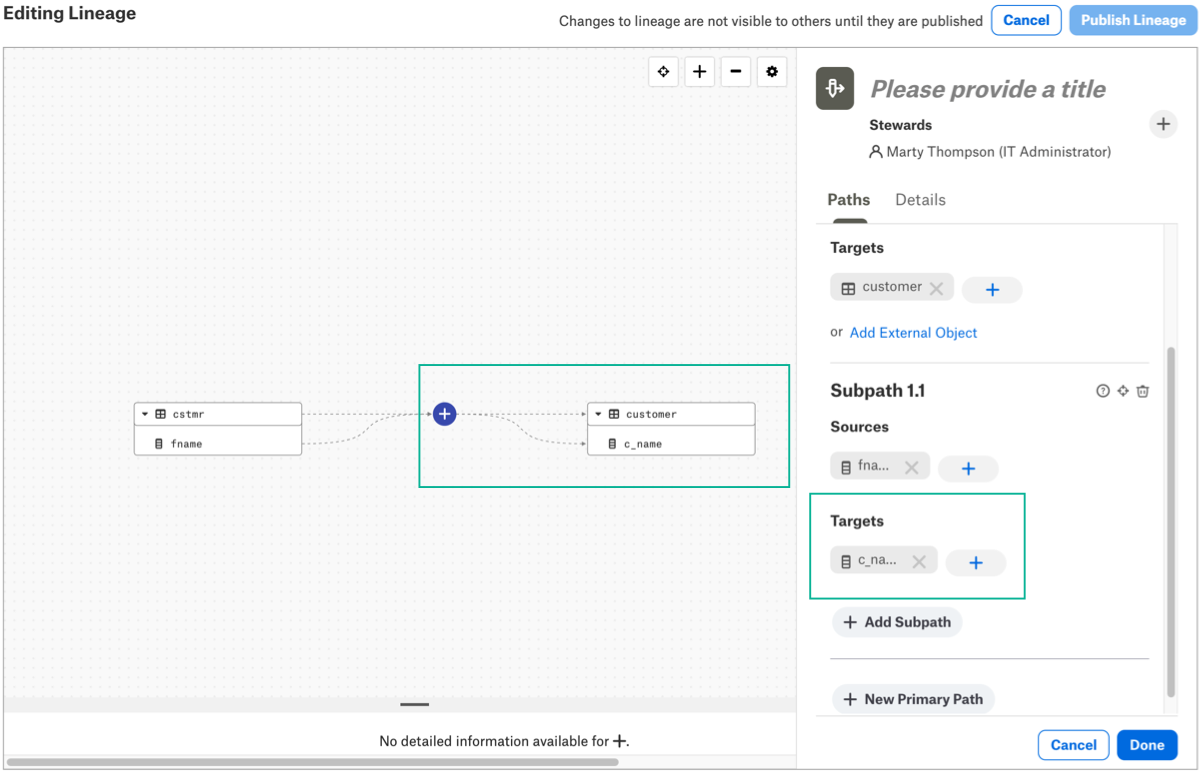
Column-level lineage can be created using subpaths within each primary path. To create column-level lineage:
In the lineage editor, click on the dataflow for which you want to create column-level lineage. This will open the property editor on the right.
In the editor, locate the primary path where you want to add column-level lineage. For this path, click Add Subpath at the bottom of the path section.
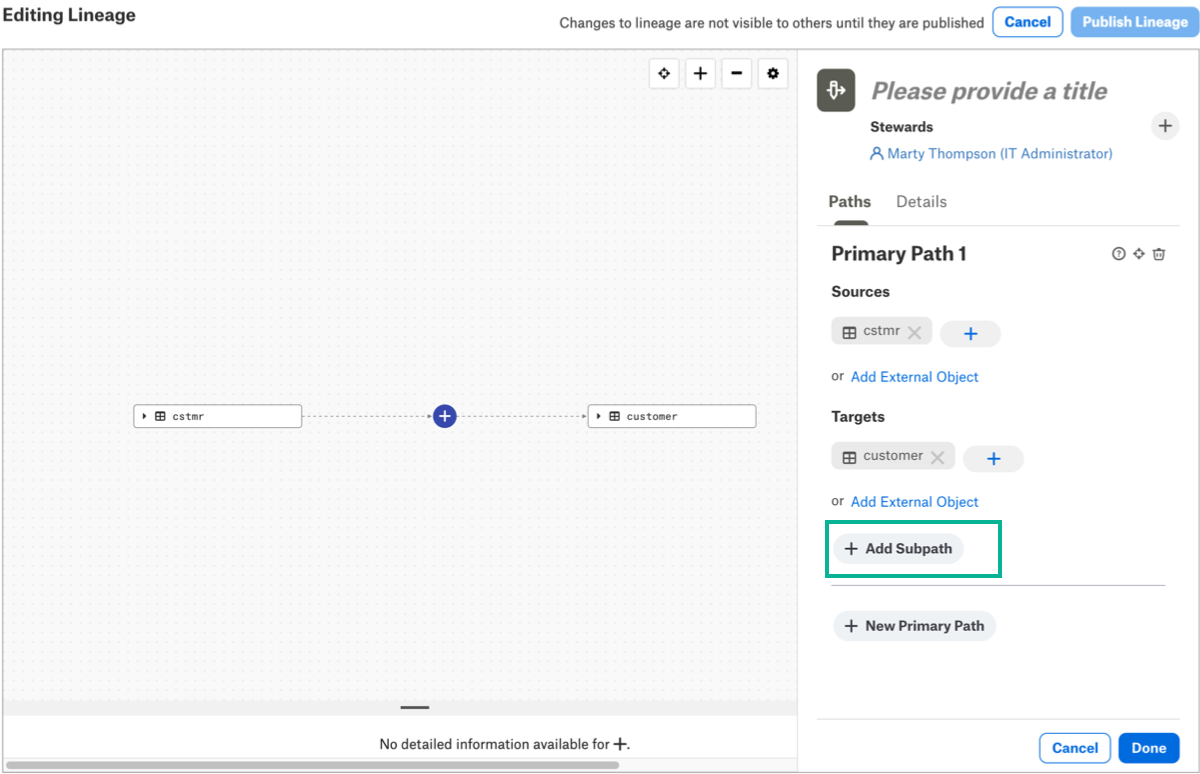
This will add a subpath editor to the primary path.
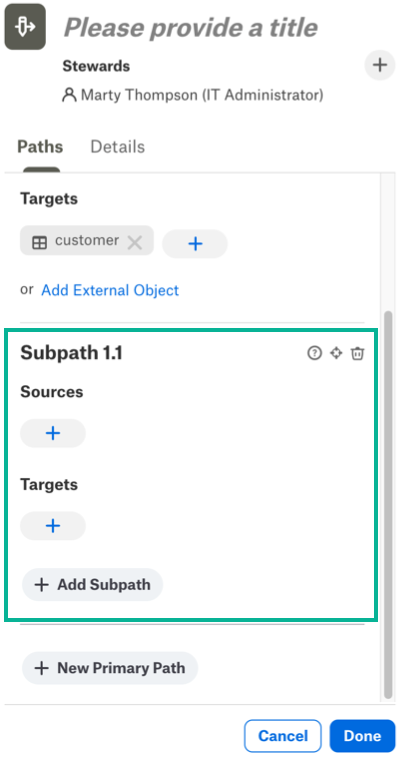
For every subpath you create, you will need to add Sources and Targets. A source is the source column that is used to create another column. A target is the column created from the source through the dataflow object. To add a source column, click the plus button under Sources and search for and select a source column.

When you click on the column in the quick search, it will be added to your lineage chart. Note that the newly created lineage links are shown with dashed lines.

Next, add a target. Click the plus button under Targets to begin adding the target column.
In the Quick Search field, search for the target column and click its name to add it to the subpath. The column will be added as a target column and will appear on the chart under the target table:
Repeat this process if you want to show lineage for multiple columns. Begin with creating a new subpath under the primary path and add sources and targets to the subpaths.
After completing all column-level lineage links, click Done on bottom right to stage your lineage data for publishing.
Click Publish Lineage on top right to publish your changes and make them available to other users. You will see the following message:
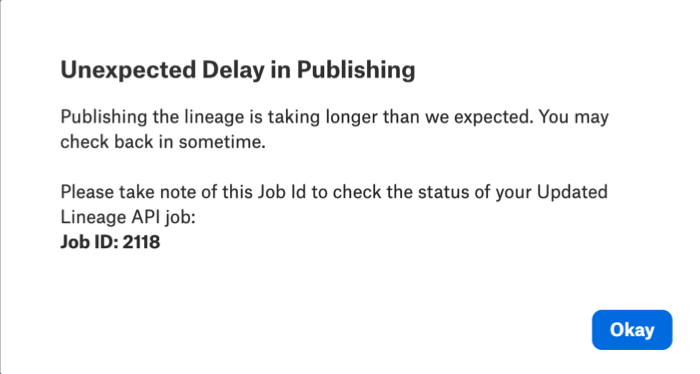
This is expected. Take note of the Job ID. It will be required if you encounter problems publishing the lineage you just created. Click Okay to close the message.
Note
When you click Publish Lineage, all changes to the lineage chart that you made in the editor are sent for processing. If processing succeeds, you will see the updated lineage chart. However, if for some reason processing fails, then all the changes will be lost and the details will be available in the job status. The job status can be retrieved using the Jobs API and the Job ID from the Publish Lineage message. See How to use the Job ID below for more details.
Click Cancel on the upper right or use the back button of your browser window to go back to the catalog page. This will close the editor. The lineage links you created should be displayed on the lineage chart.
Note
If you do not see your changes on the chart, wait for about 30 seconds, go back to the Overview tab and refresh the page. Then click on the Lineage tab to view the updated graph.
Creating Multiple Subpaths vs. Creating Multiple Sources and Targets Within One Subpath
If you want to show column-level lineage for multiple source columns of the source table that are linked to multiple target columns of the target table, you can either use multiple subpaths under the same primary path or create multiple source and target columns within one subpath. This depends on what kind of lineage you want to add. The user interface of the lineage editor provides enough flexibility to support various cases of lineage.
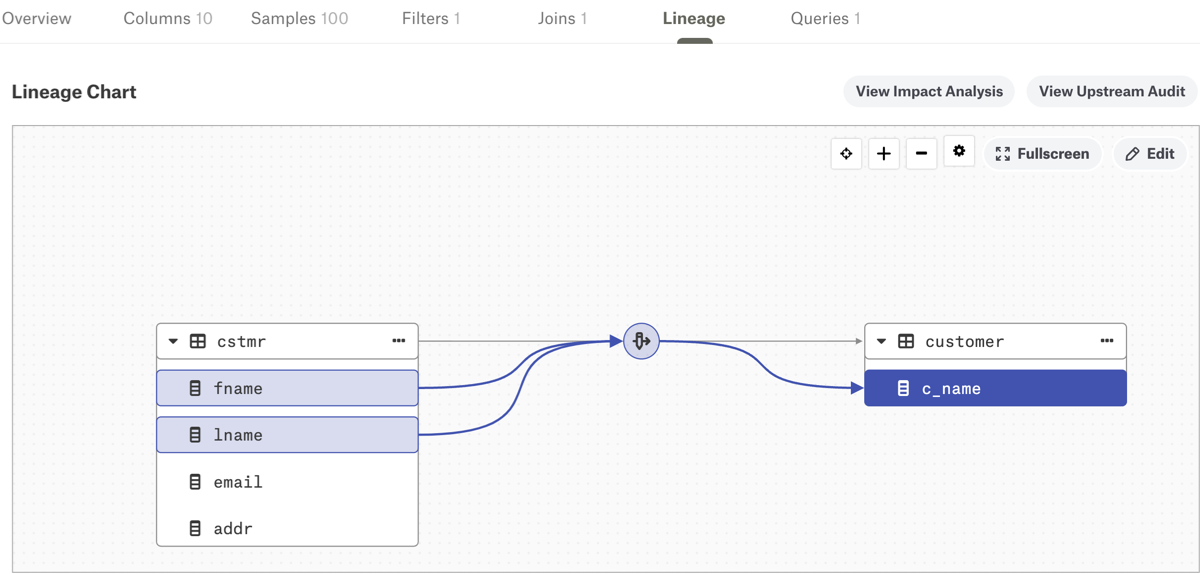
For example, if you want to show that multiple source columns are used for creating one target column, you should create multiple source columns and a single target within the same subpath. Note that when you publish your lineage and click on a specific object, the full subpath will be highlighted, and you will see multiple highlighted sources.
The screenshot below shows a target column that has multiple source columns. In this configuration, there are multiple source columns and a single target column in the lineage subpath.
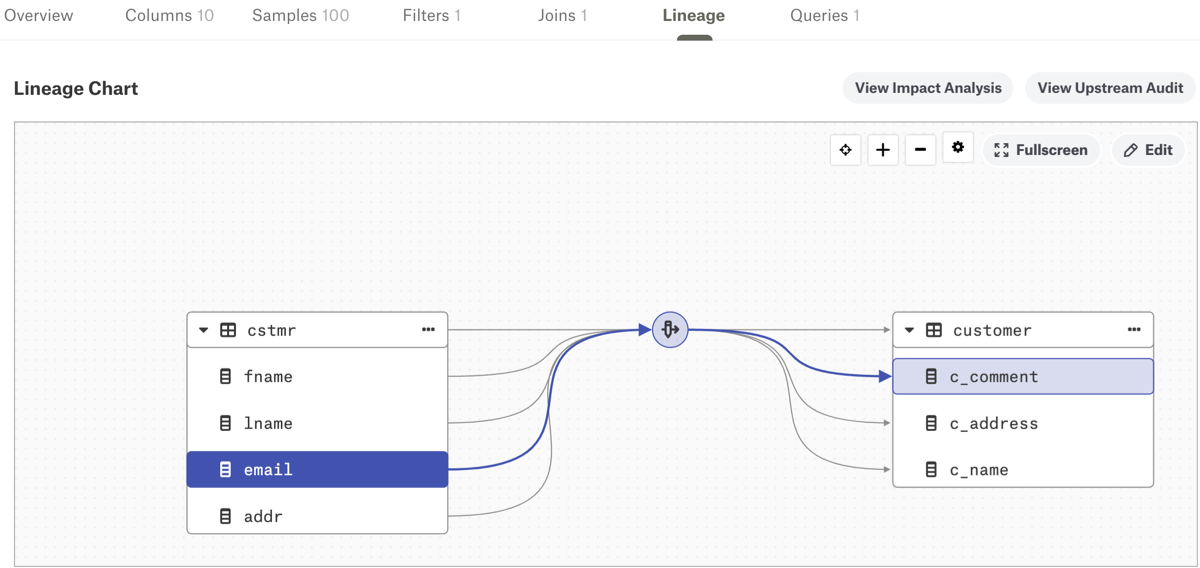
If you want to show that each source column in the source table has one corresponding target column in the target table, you should create multiple subpaths within the primary path that connects the source and target tables. The following screenshot shows a subpath that has a single source and a single target:
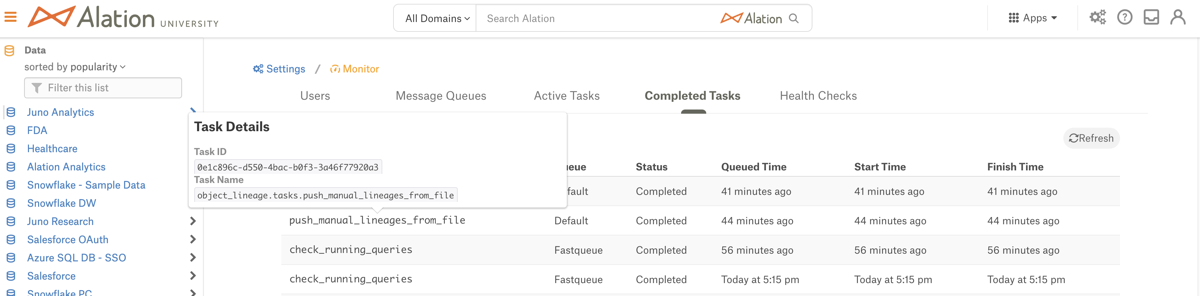
How to Use the Job ID
When you publish new lineage data, Alation creates a job on the server that processes it and writes the changes to the internal lineage database. This job has an ID that is exposed in the message that pops up when you click the Publish Lineage data. You can use this job ID with the Jobs API to retrieve the status of the publishing job.
If the lineage you are trying to publish does not appear on the lineage chart, Alation recommends checking the job status using the Jobs API. Delays in publishing lineage data may be caused by other processes running on the system, such as metadata extraction or query log ingestion jobs.
The lineage job is also logged in Admin Settings > Monitor > Completed Tasks. A completed job will appear on the Completed Tasks tab. The name of the lineage publishing job is push_manual_lineages_from_file.
Differentiate Automatic and Manual Lineage
On a Lineage chart that has both automatically generated lineage data and manually added lineage paths, you can differentiate between the type of lineage data by looking at the dataflow object icons:

Automatically generated lineage or lineage added using the Lineage V2 API:
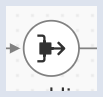
Manually added lineage:

When you edit a lineage chart that already has automatically generated lineage or lineage added using the Lineage V2 API, you won’t be able to edit these generated paths. From version 2022.3, however, you can add or edit details for automatically generated lineage.
Group Dataflow Paths
You can assign specific dataflow paths to group sources that you define. You can then filter your paths using those sources.
To assign a dataflow path to a group, you can use the Source field in the Properties section on the Details tab of the lineage editor or the dataflow object’s catalog page. Click the pencil icon to assign or edit the group source; you are given a choice to Select from existing sources or Create new source.
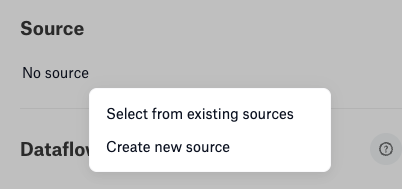
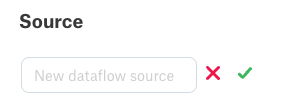
If no sources have been defined, the first option is unavailable. To select from existing sources, choose from one of the already-defined sources:
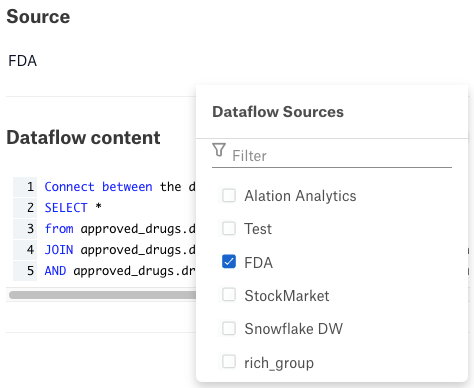
To create a new source, type a source name in the provided field, then select the green check mark to the right of the field:
If you are making your changes in the lineage editor, click Done and then Publish Lineage to publish your changes.