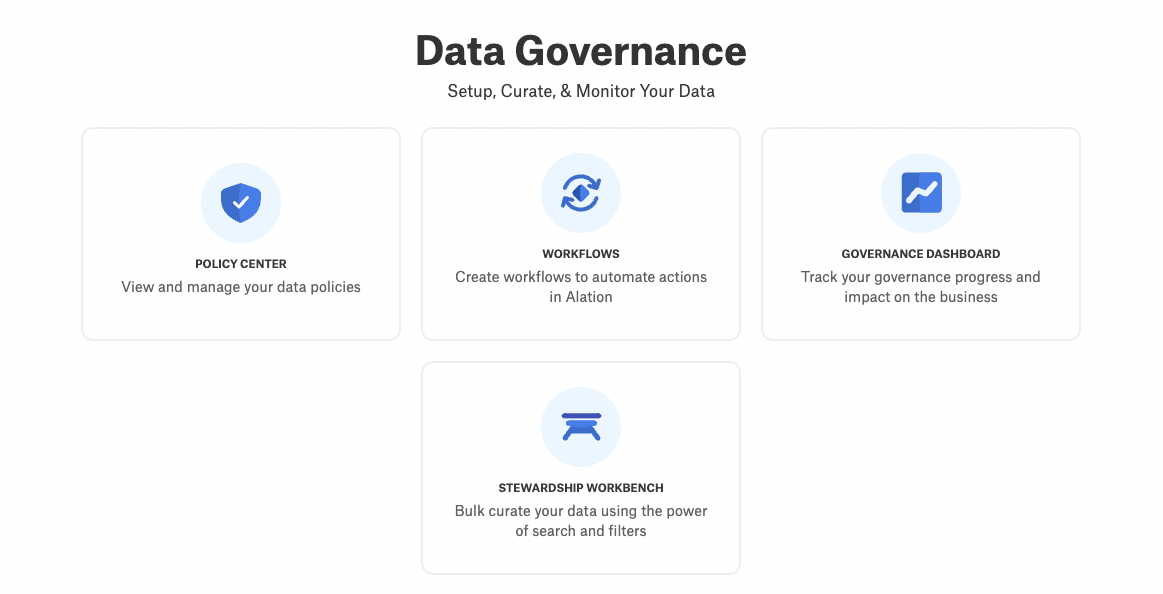
Managing Workflows
Alation Cloud Service Applies to Alation Cloud Service instances of Alation
Customer Managed Applies to customer-managed instances of Alation
Alation currently supports two types of workflows:
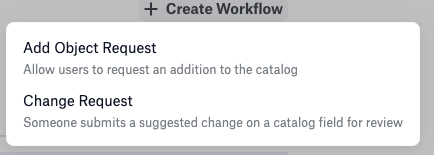
Add Object Request: An Add Object Request is used when a new object is to be added to the catalog. Currently, Add Object Requests are supported only for new glossary terms. This workflow has two major use cases:
Creation of new terms: ensuring that any new term created inside a glossary goes through a review process.
Association of existing terms to a glossary: ensure that for a glossary under a workflow any new or existing terms added to the glossary go through a review process before being included in the glossary.
Change Request: A Change Request is used when someone has a suggested change to title, description, or any custom field available on the catalog pages of objects under the workflow.
Create an Add Object Request Workflow
To create an Add Object Request workflow:
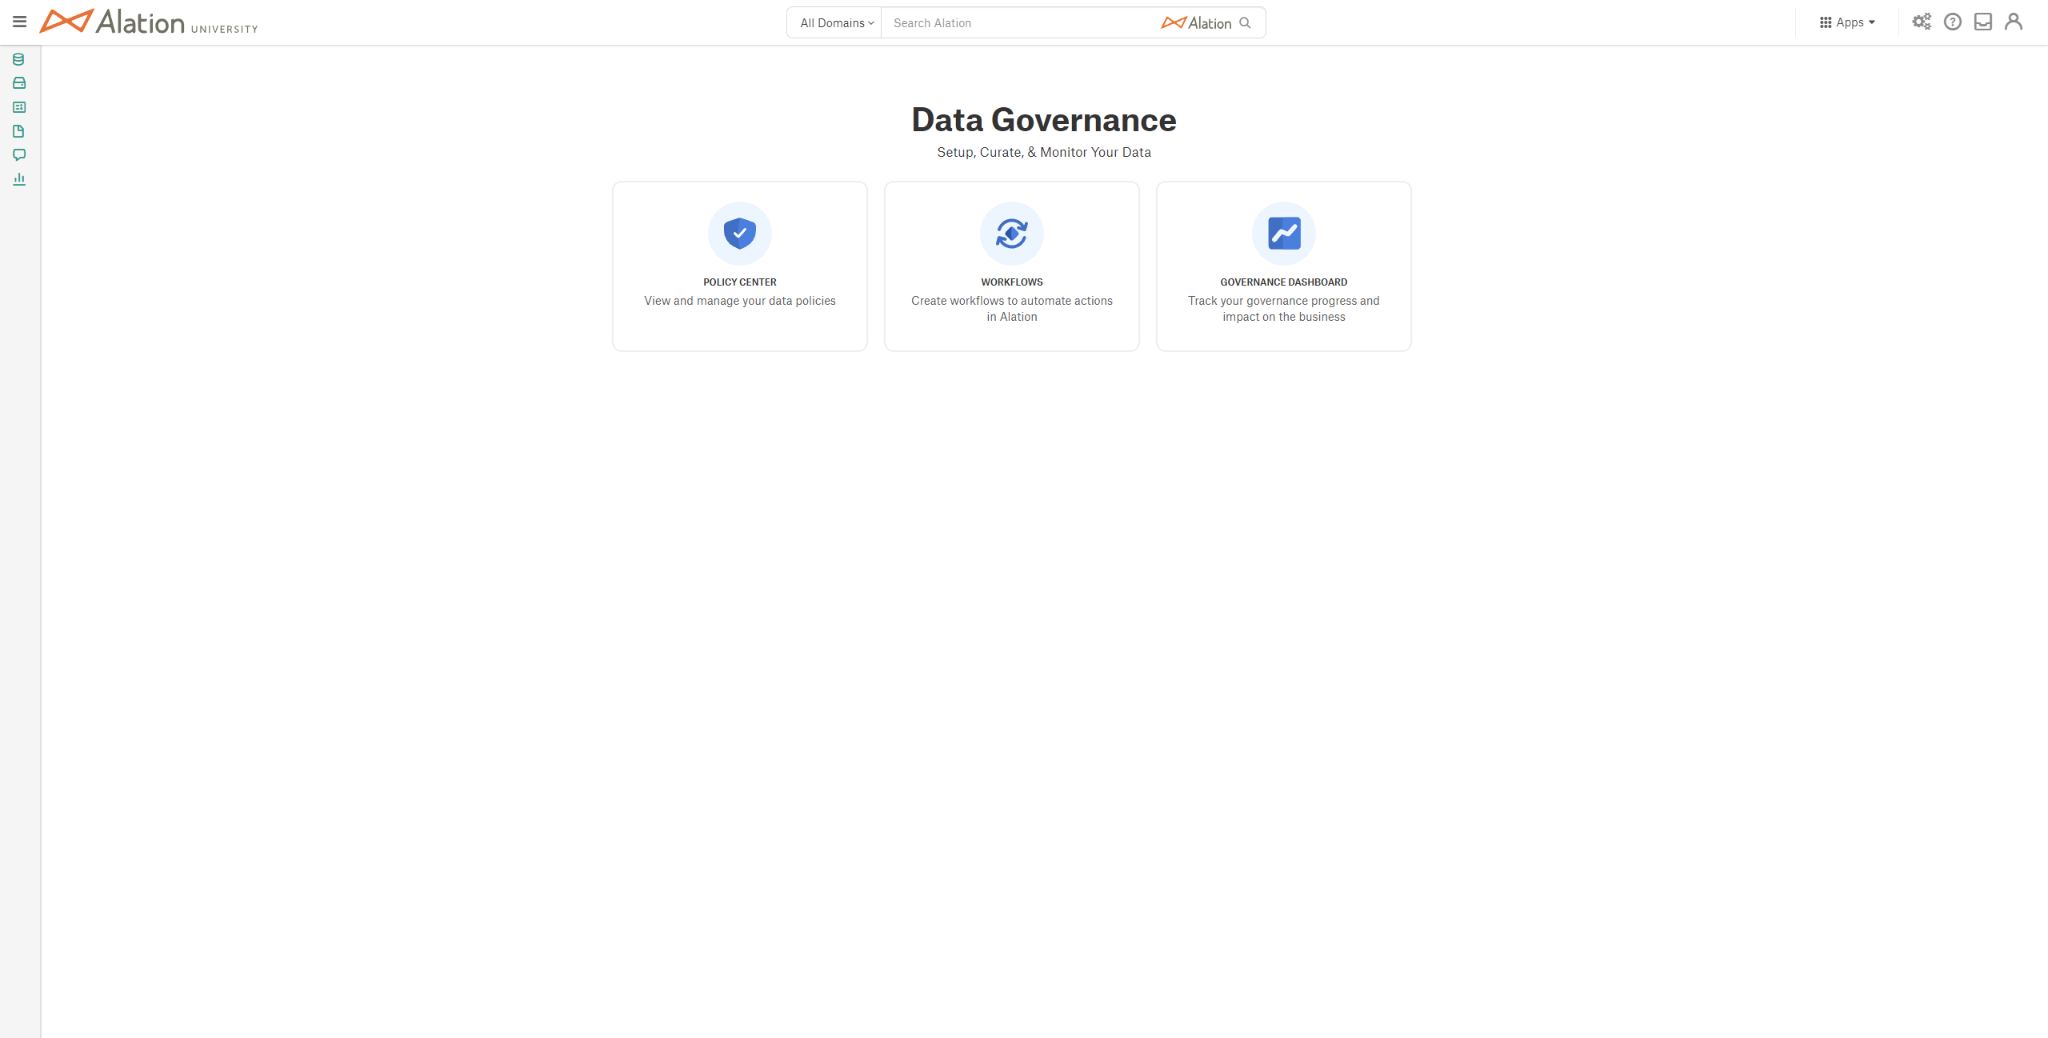
From the Apps menu, click Govern.
Click WORKFLOWS to access the Workflow Center.
Click the + Create Workflow button, then select Add Object Request.
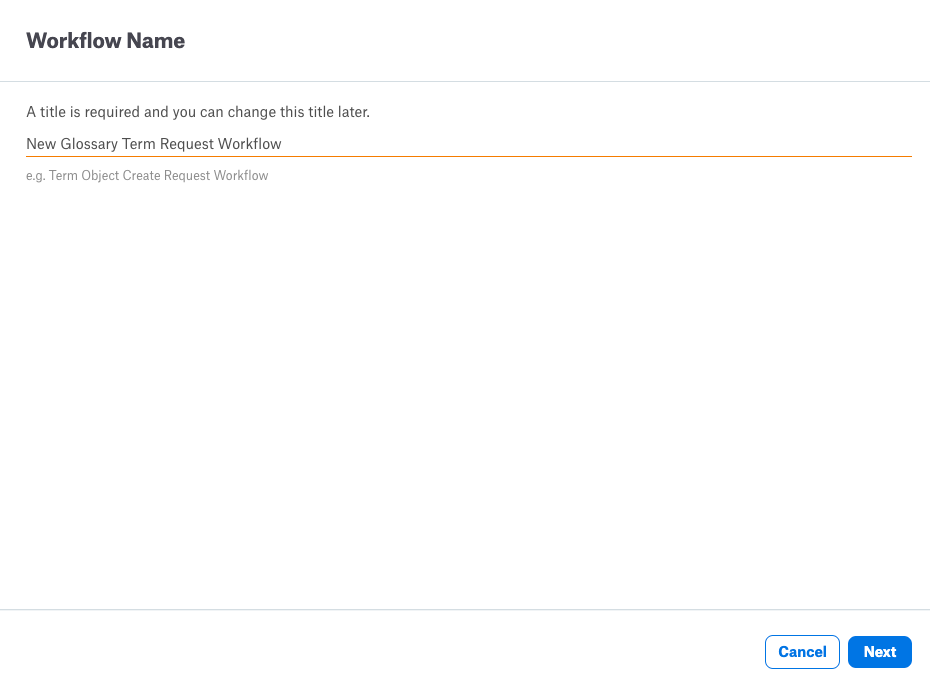
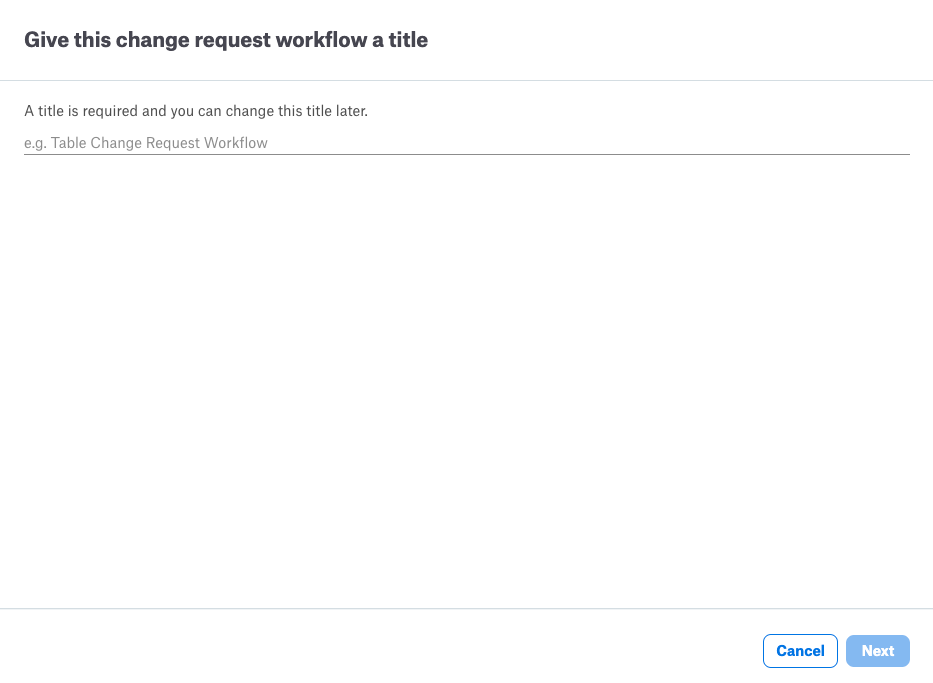
Enter a desired title for the workflow. The title of the workflow must be unique and the field will alert you if a duplicate title already exists. Click the Next button.
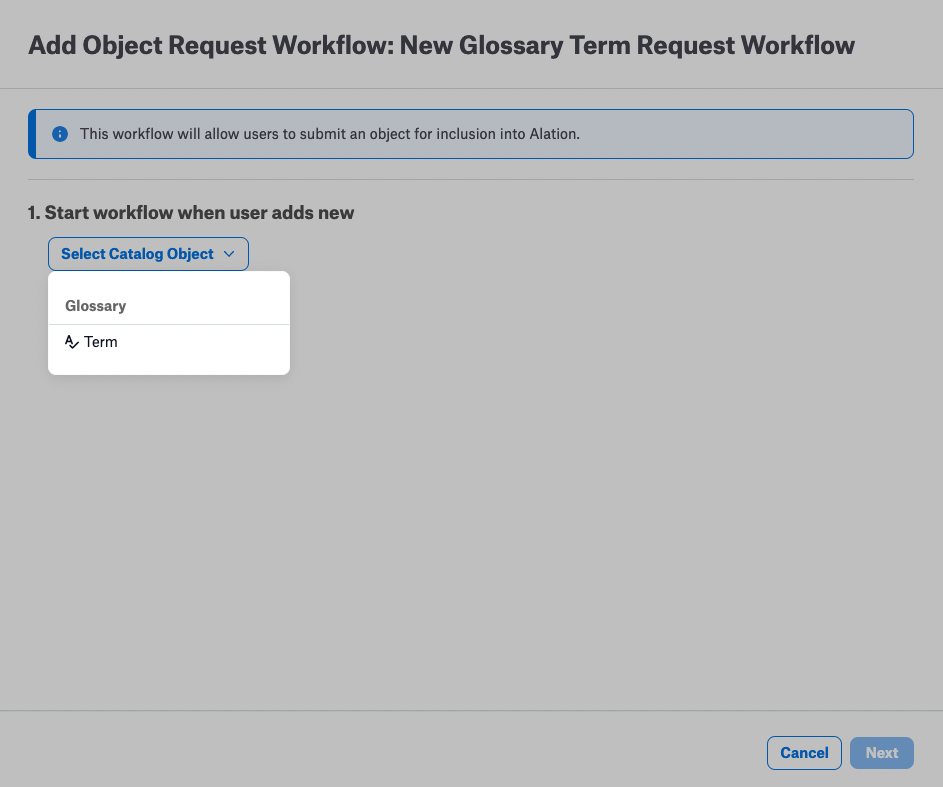
Under Start workflow when user adds new, select the one available option, Term, and then click Next.
Under Select Glossary objects to include under this workflow, choose All or Select to select specific glossaries:

If you chose All, you are given the choice to exclude specific items from the workflow:
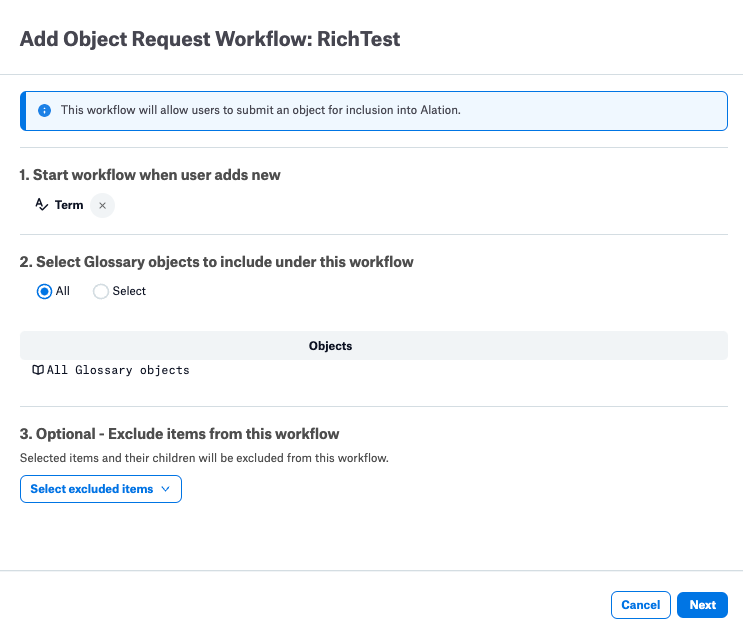
Click Next.
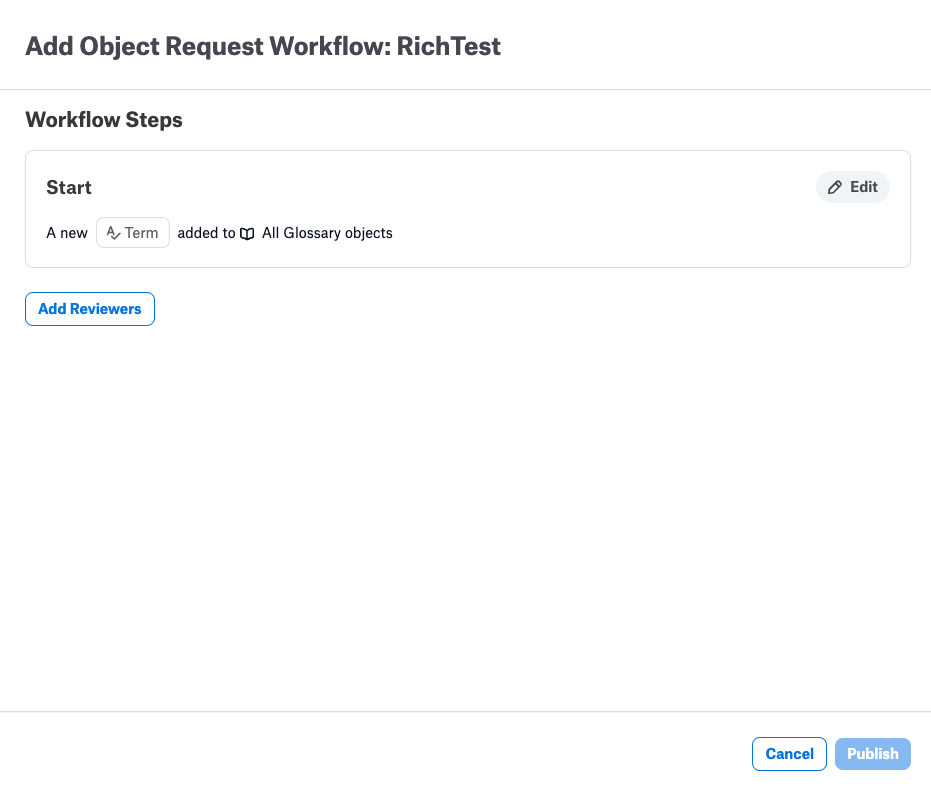
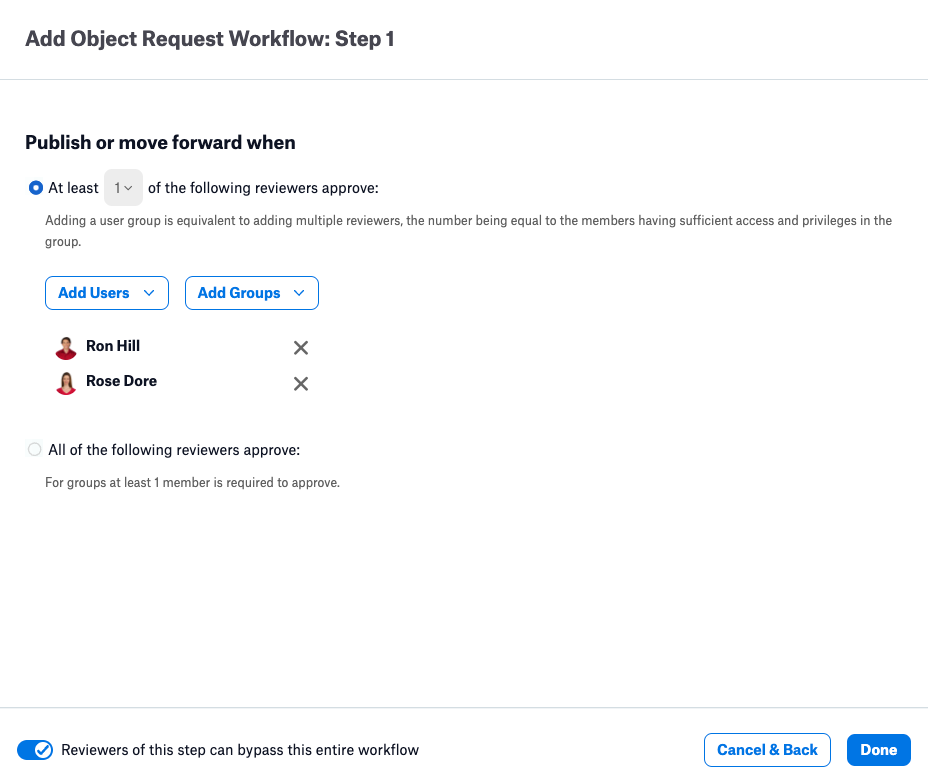
A summary of the workflow appears. Click the Add Reviewers button to specify the names or user groups from whom approval is required.
Specify a minimum number of reviewers (from 1 to 9 inclusive), or specify that all reviewers are required to approve. Click Add Users to specify individual users by name, or Add Groups to specify user groups as reviewers.
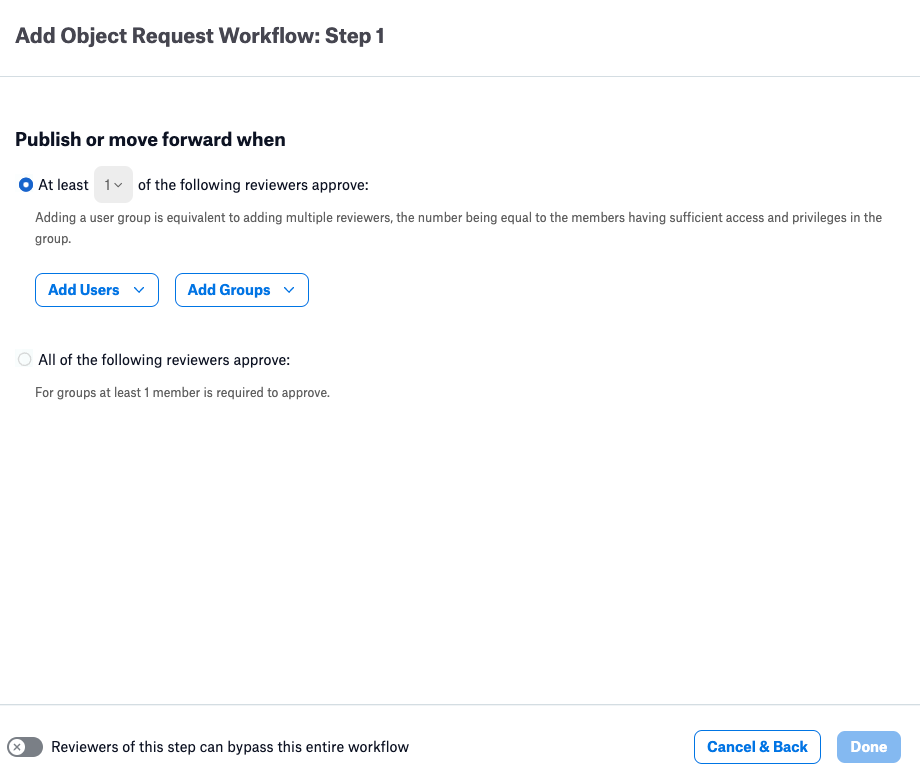
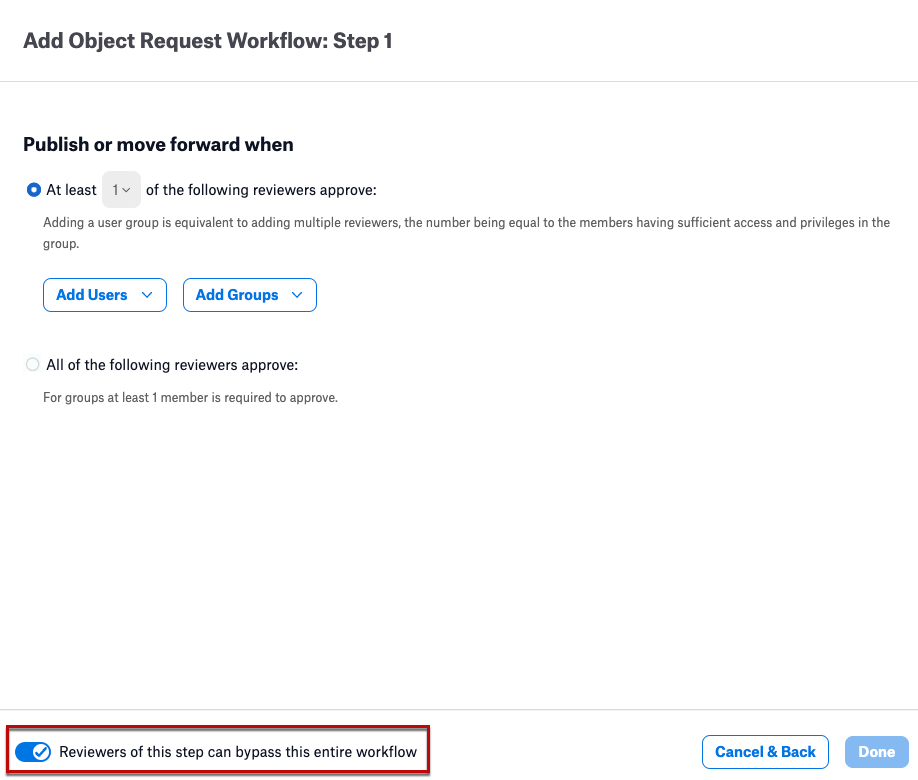
You can allow your reviewers to skip the workflow by switching the toggle labeled Reviewers of this step can bypass the entire workflow.
When you have finished adding reviewers, click Done.
Additional review steps can also be added at this point if desired by clicking the Add a Step button. When you are satisfied that the workflow is complete, click Publish.
Create a Change Request Workflow
To create a Change Request Workflow:
From the Apps menu, click Govern.
Click WORKFLOWS to access the Workflow Center.
Click the + Create Workflow button, then select Change Request.
Enter a desired title for the workflow. The title of the workflow must be unique and the field will alert you if a duplicate title already exists. Click the Next button.
The initial workflow dialog appears. It contains a single menu, labeled Select Catalog Object. Click the label to expand the menu:
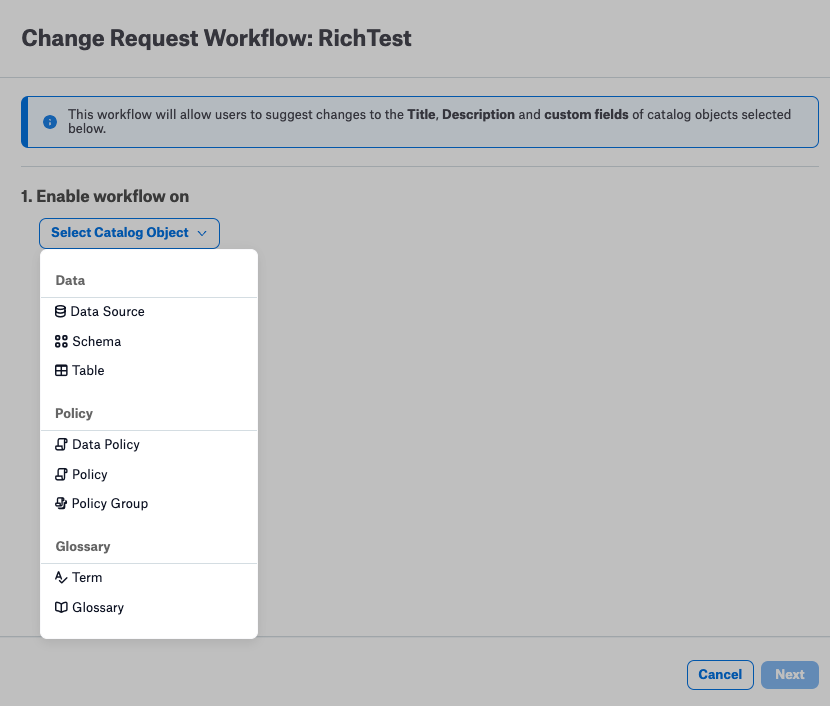
Select a catalog object type from the menu to see the main dialog:
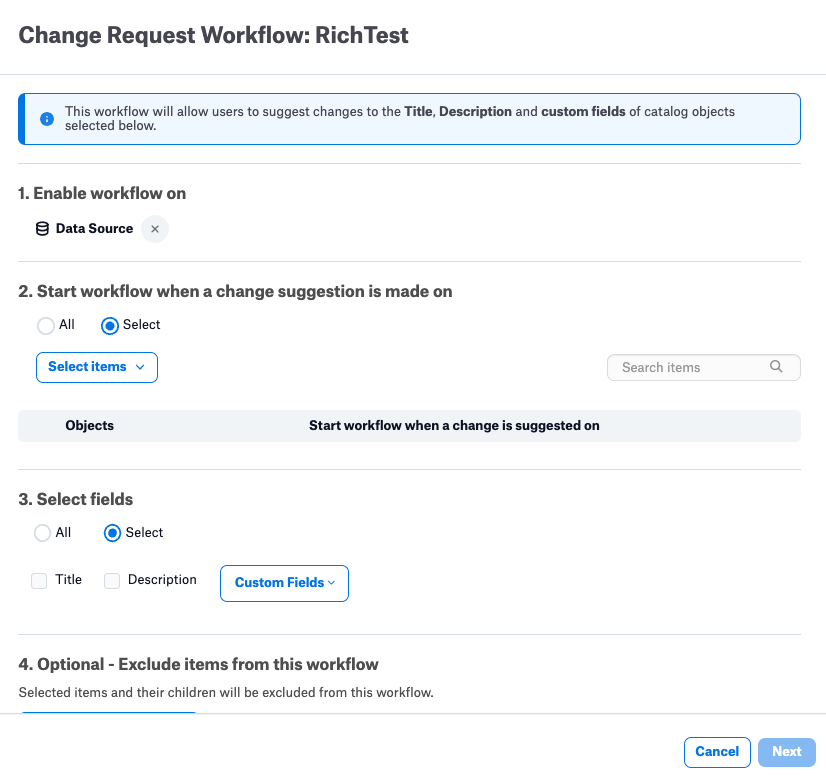
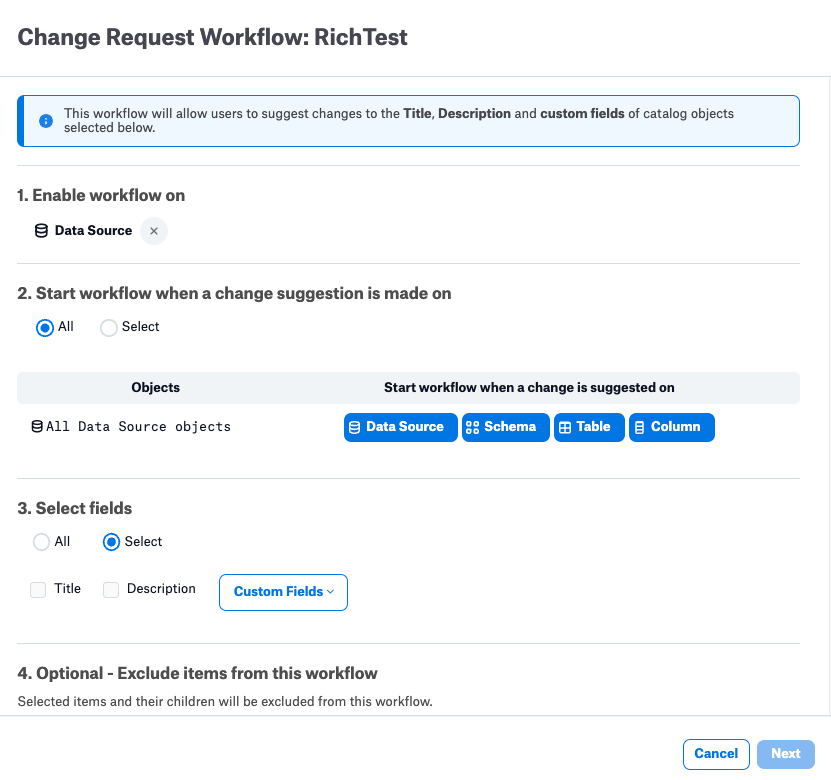
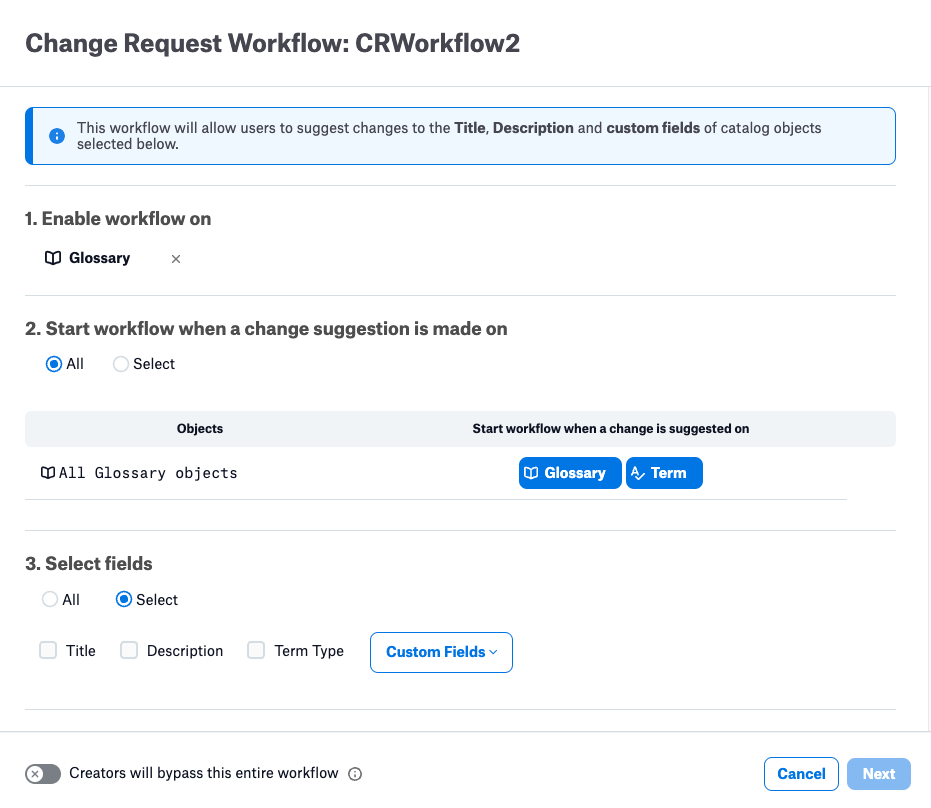
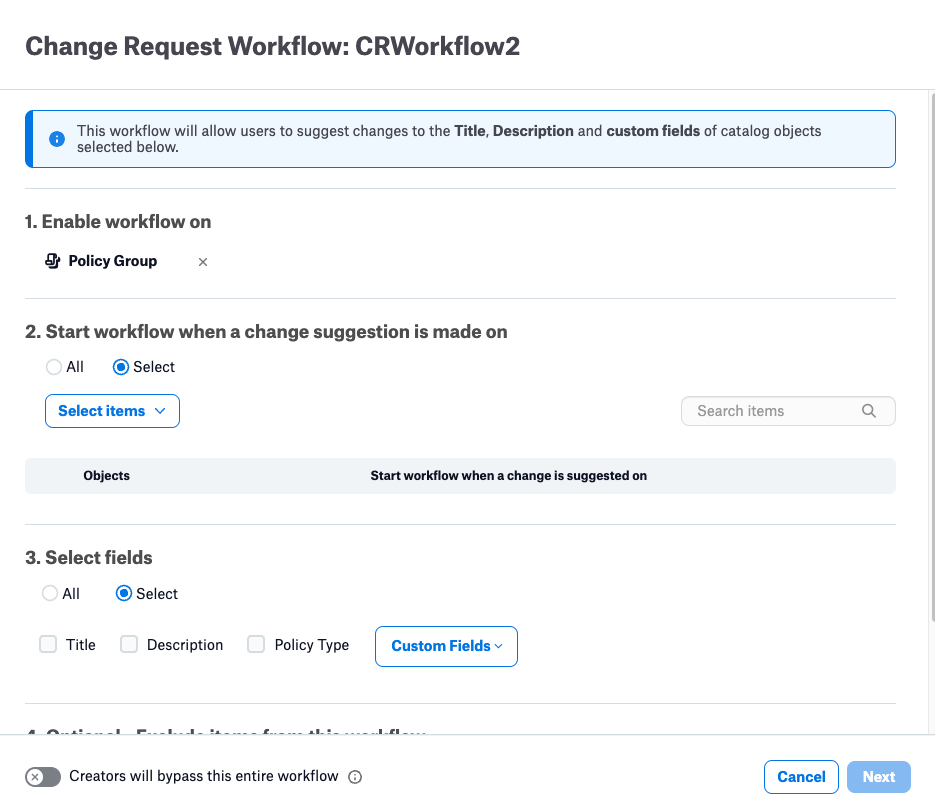
Under Start workflow when a change suggestion is made on, either select one or more objects from the Select items menu or select All. The dialog changes to reflect the object type and any objects that can be contained within the selected object type. Data sources contain schemas, tables, and columns. Glossaries contain terms. Policy groups contain policies and data policies. Sample screenshots are shown for reference:
Data source dialog example (version 2023.1.5 and later)
Glossary dialog example (version 2023.1.7 and later)
Policy group dialog example (version 2023.1.7 and later)
By default, the workflow starts when a change is suggested on an object of the selected type or any of the types contained within it. You can choose which objects trigger the workflow by clicking the object type to clear a given type. At least one type must be selected. In the following example, the workflow starts when a change is suggested on a table or column:
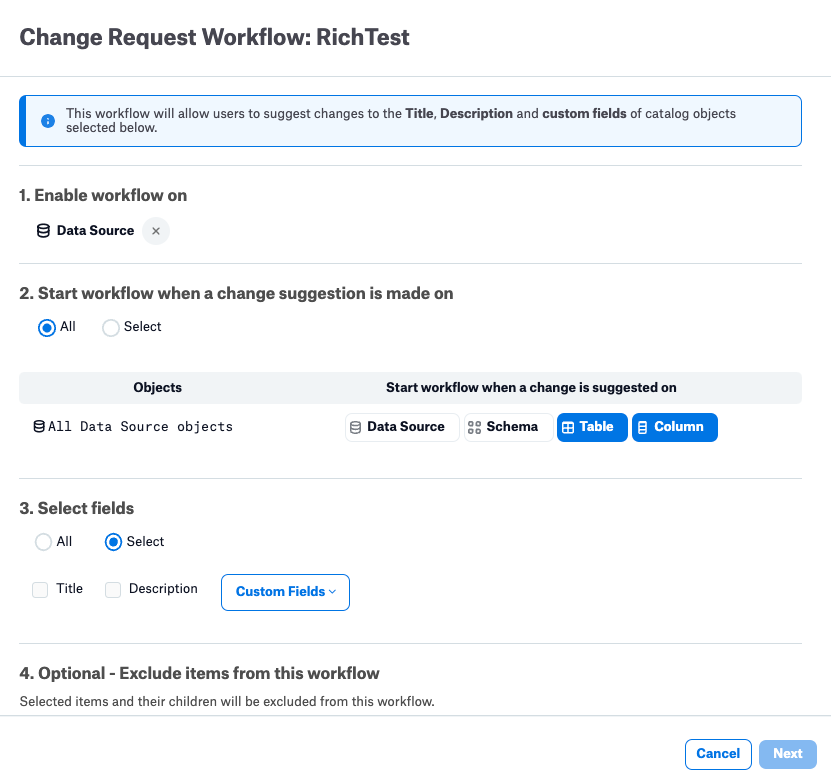
From Alation version 2023.1.5, you can specify individual fields to be included in the workflow: Title and Description fields for all object types, Policy Type or Term Type if applicable, and arbitrary custom fields. Select the specific fields you want to track, or select All to include all fields.
Once you have selected the objects and fields you are tracking, you may optionally choose to exclude some specific objects from the workflow. The following example shows a Glossary workflow with two terms excluded:
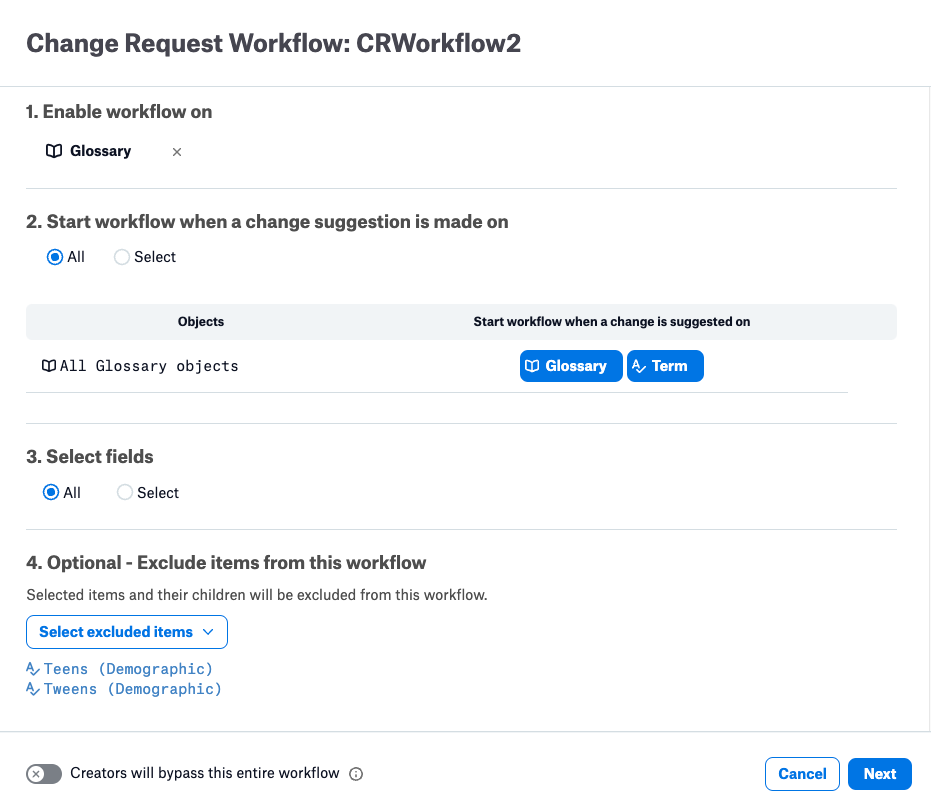
From Alation version 2023.1.7, if you are creating or editing a workflow for Glossaries, Terms, Policies, or Policy Groups, you may allow creators to bypass the workflow by setting the toggle Creators will bypass this entire workflow. If the toggle is set, any changes to a glossary, term, policy, or policy group by the author of that item will not go through the review process and will be published directly. (This meaning of creator is unrelated to the licensing concept of a Creator.)

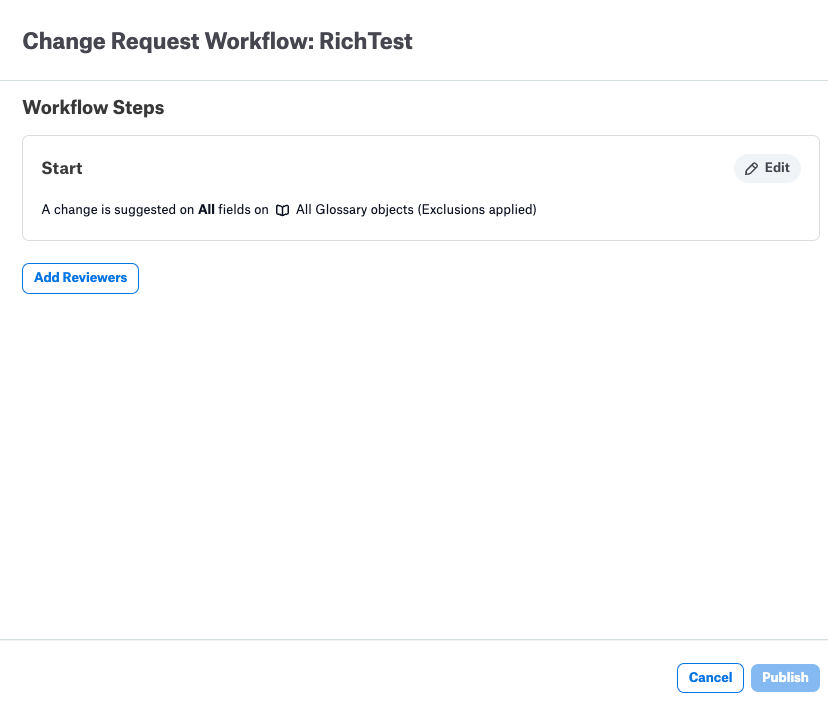
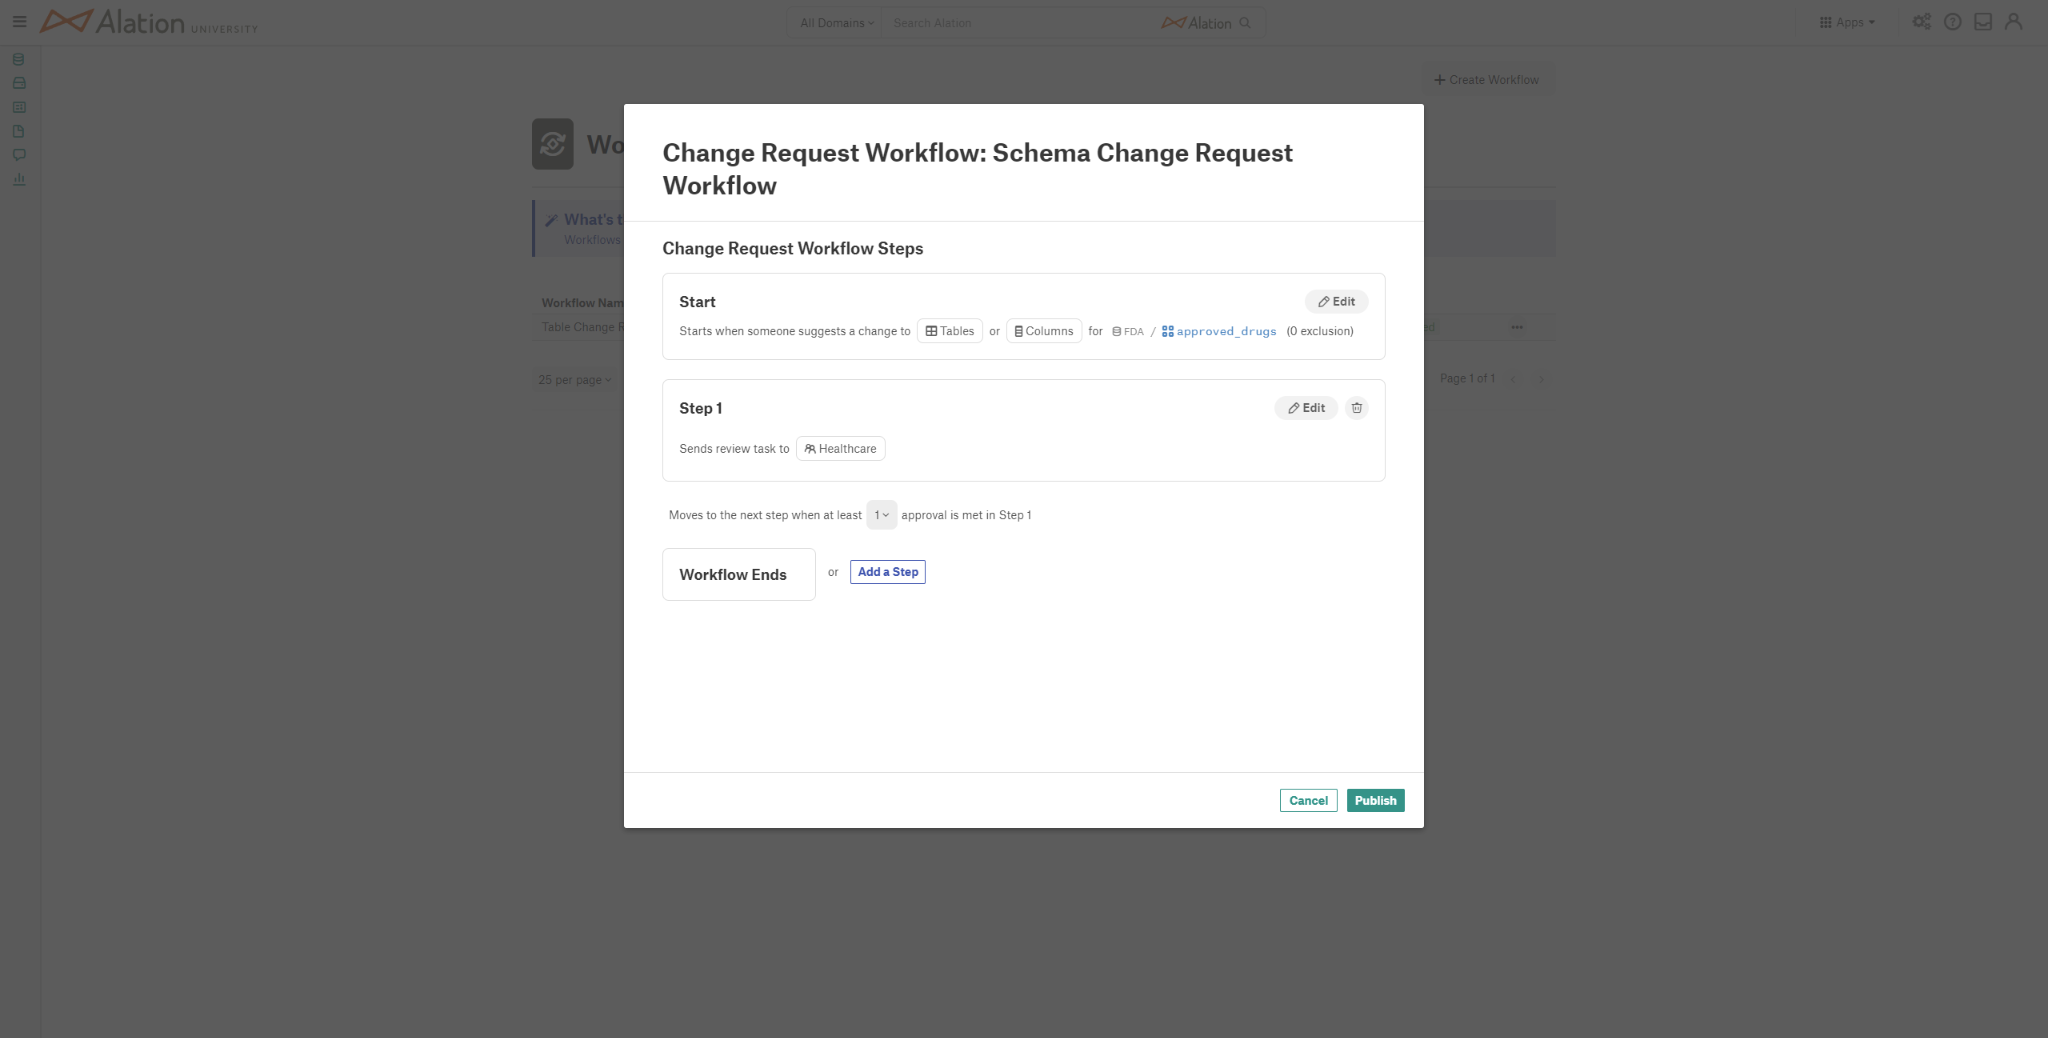
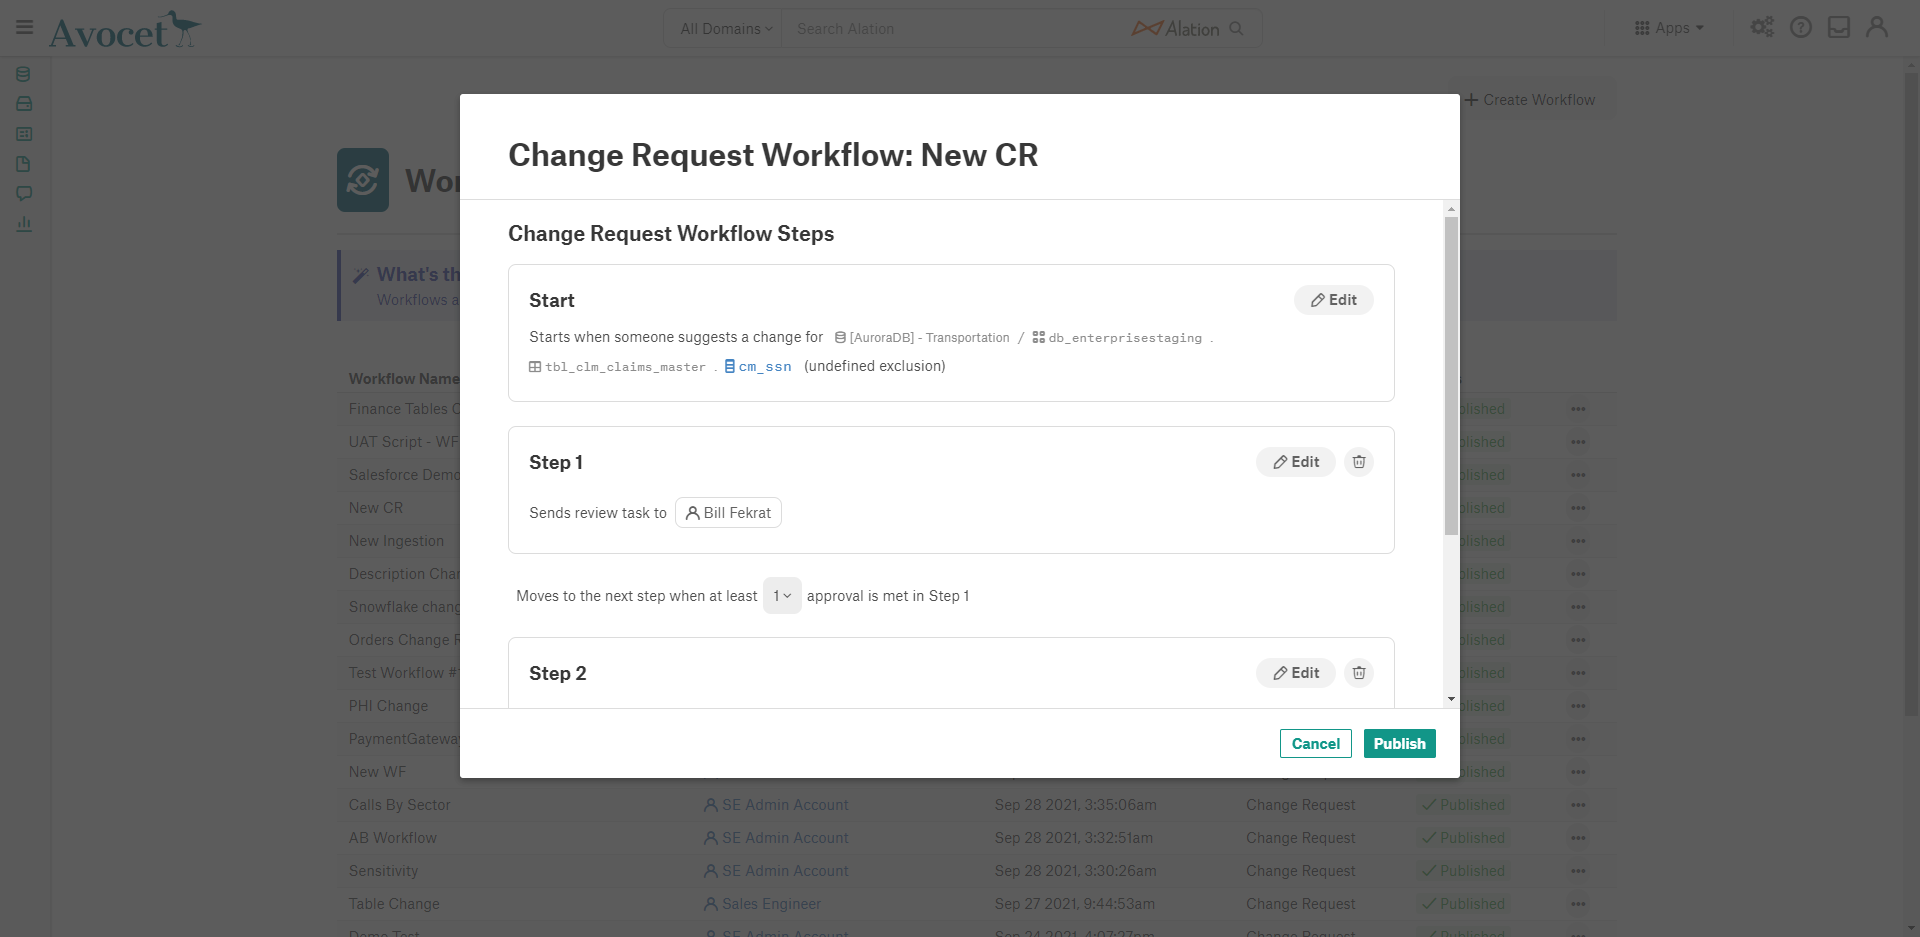
Confirm your selections and click Next. A dialog appears describing the steps of the workflow with a button to Add Reviewers:
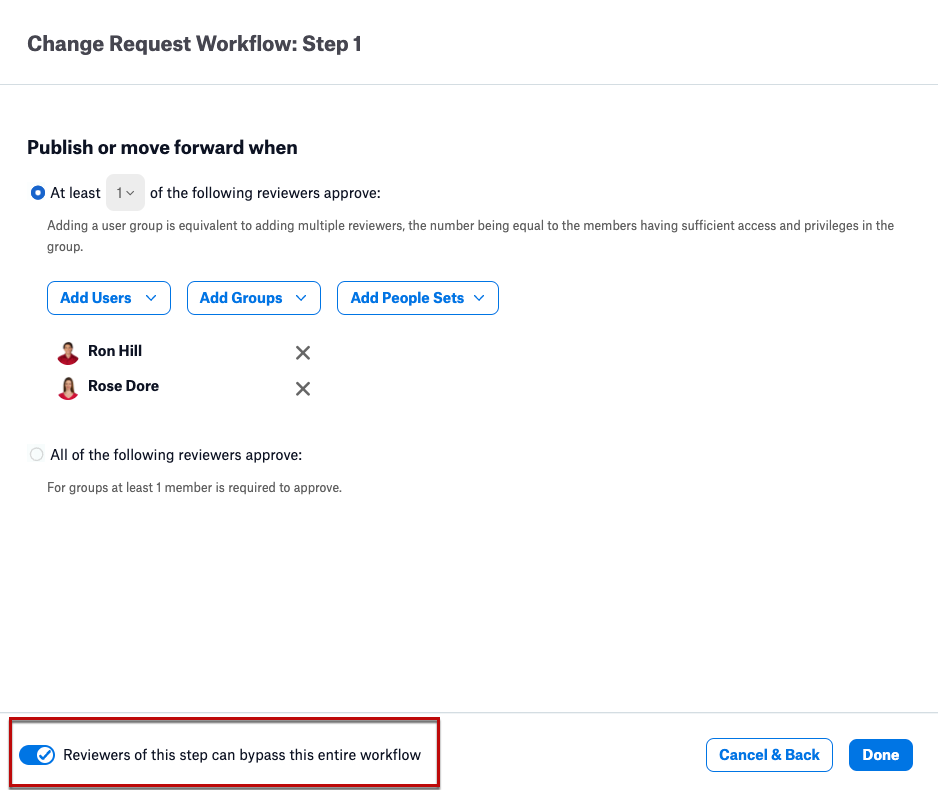
Add desired reviewers by clicking the Add Reviewers button. The Change Request Workflow: Step 1 dialog opens. You can specify a set of reviewers and a minimum number of reviews needed to move the review forward, or require that all reviewers approve before moving forward. Reviewers can be individual users, groups, people sets, or a combination of all three.
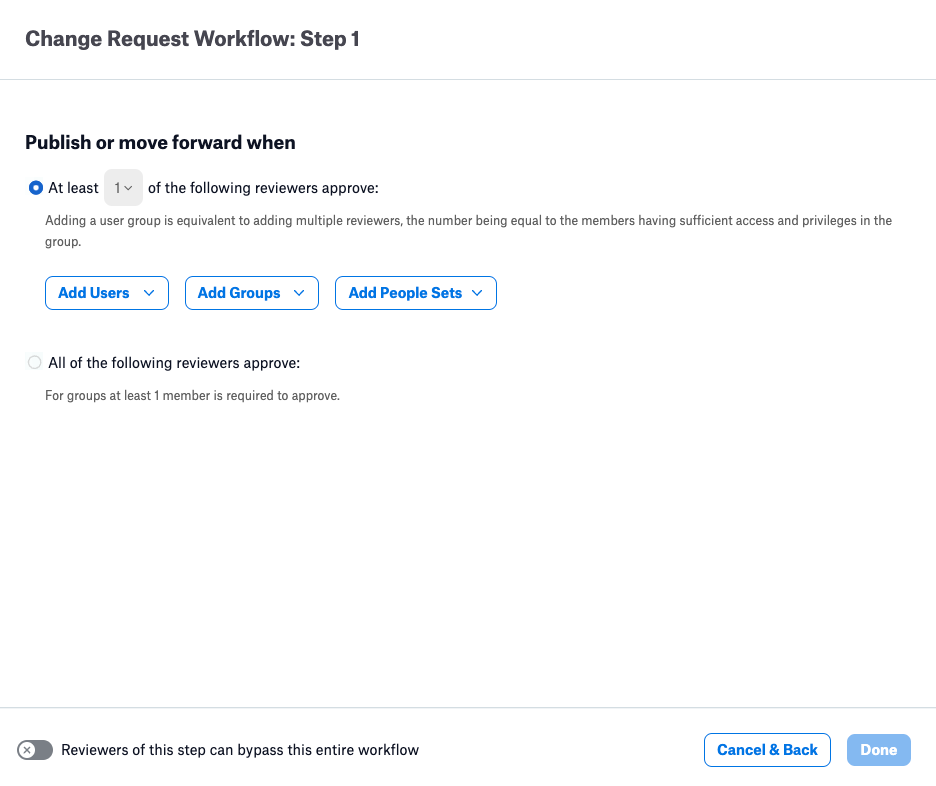
Note
It is recommended that you not use only people sets as reviewers. People set reviewers are per object and in some cases may not be defined or have too few members to reach the threshold alone. If only people sets are selected as reviewers and the threshold is not met, a warning message will display.
You can allow your reviewers to skip the workflow by switching the toggle labeled Reviewers of this step can bypass the entire workflow.
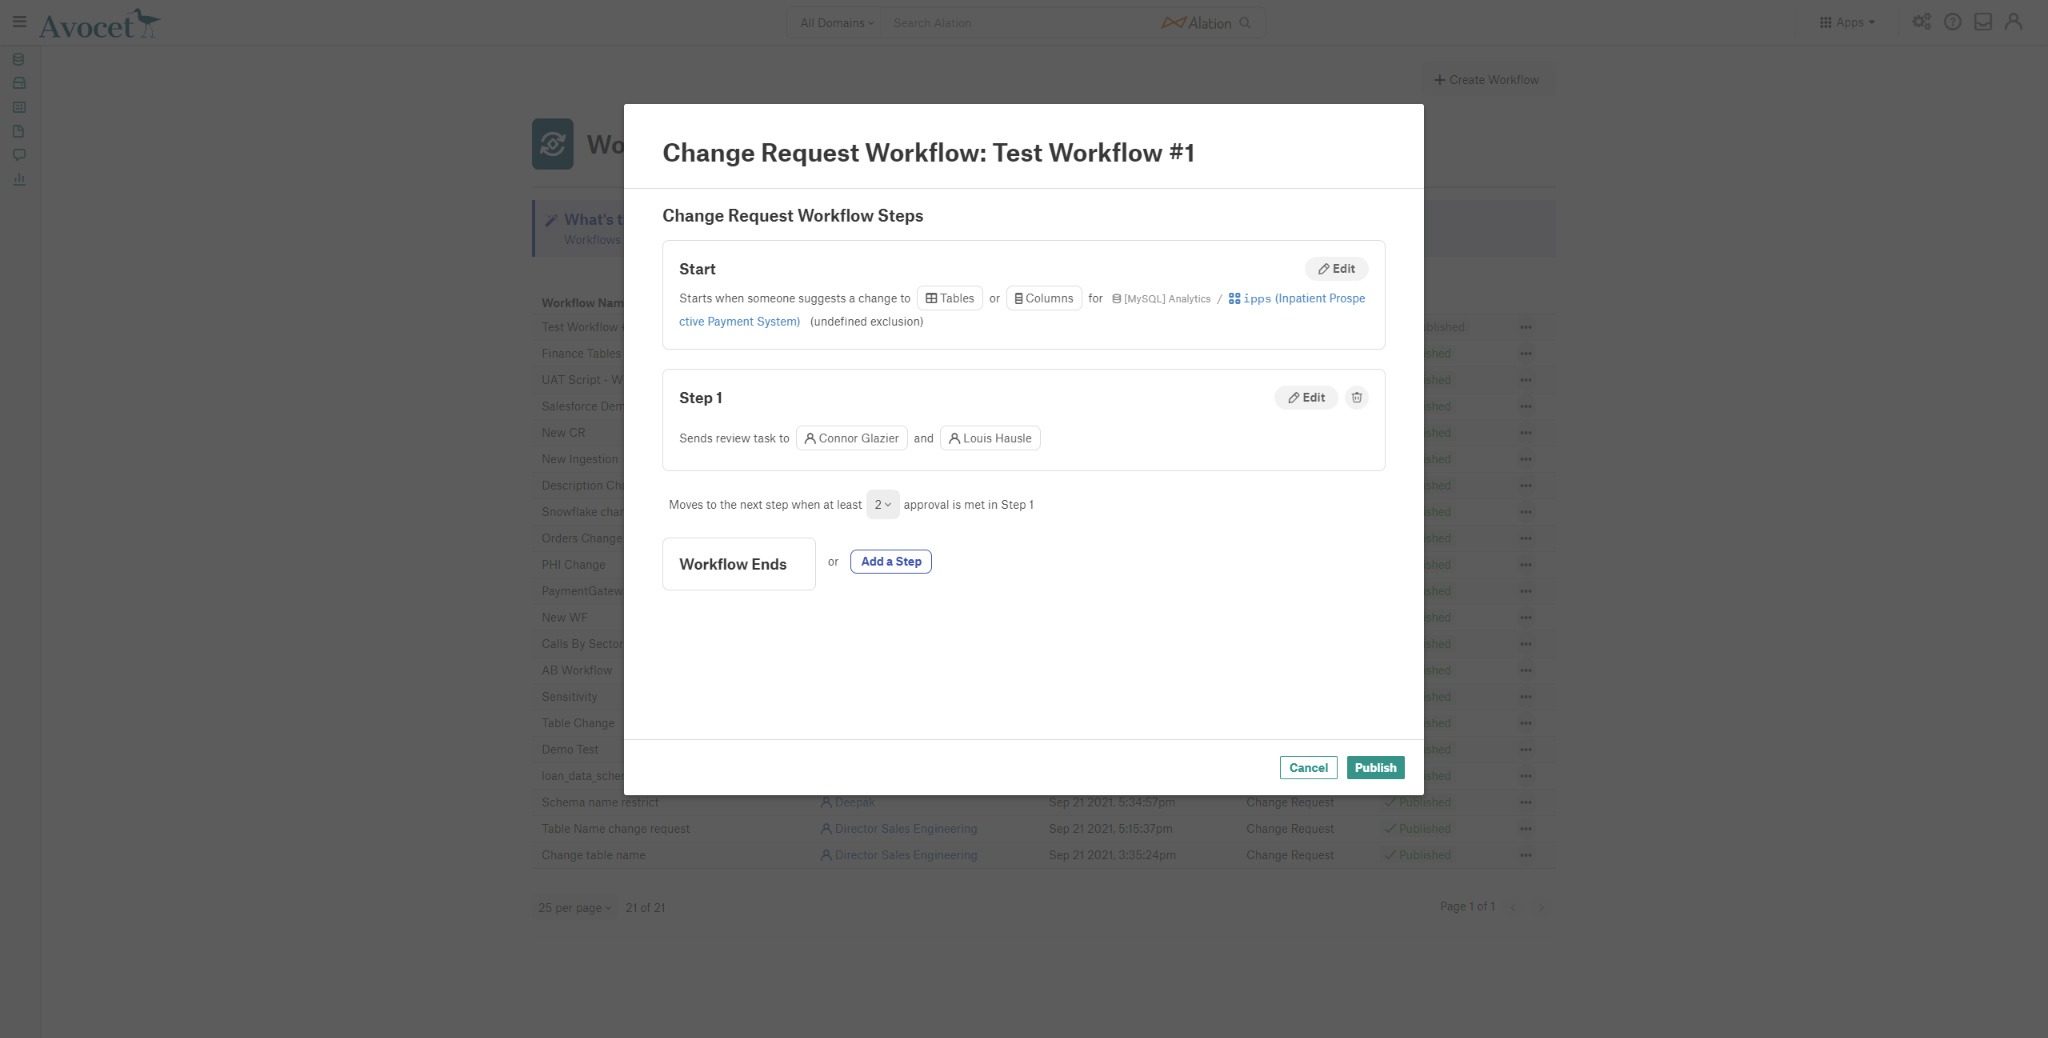
After adding the reviewers for Step 1, click Done. A dialog appears showing the start conditions and the Step 1 review:
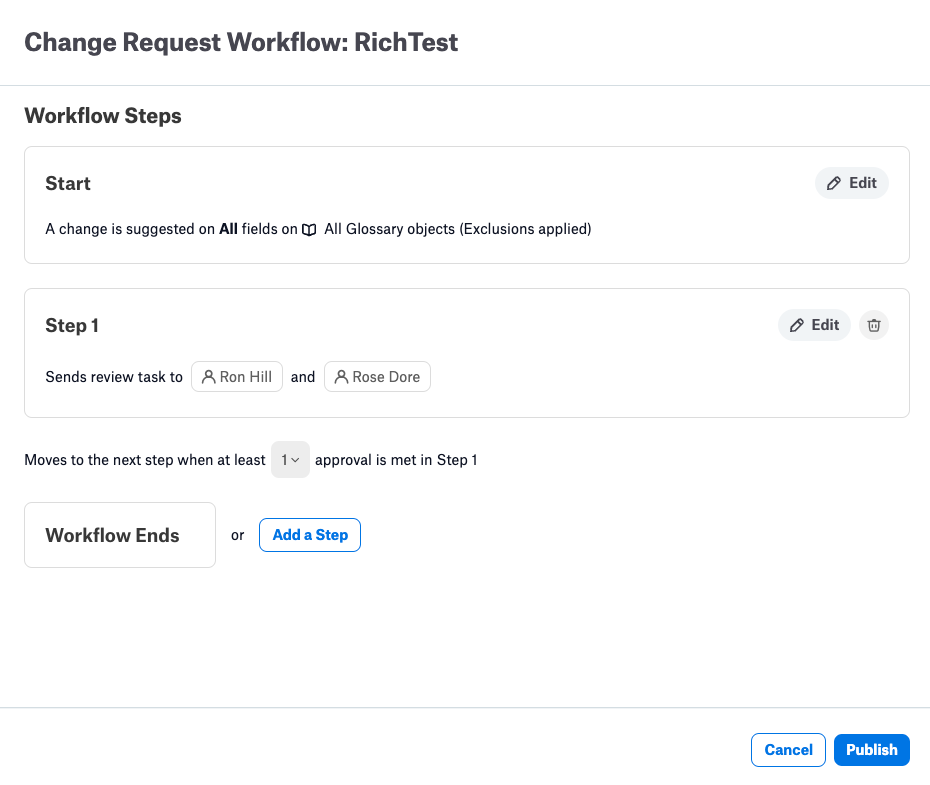
Additional review steps can also be added at this point if desired by clicking the Add a Step button.
When the workflow has all desired steps, click the Publish button to make the workflow available to all users.
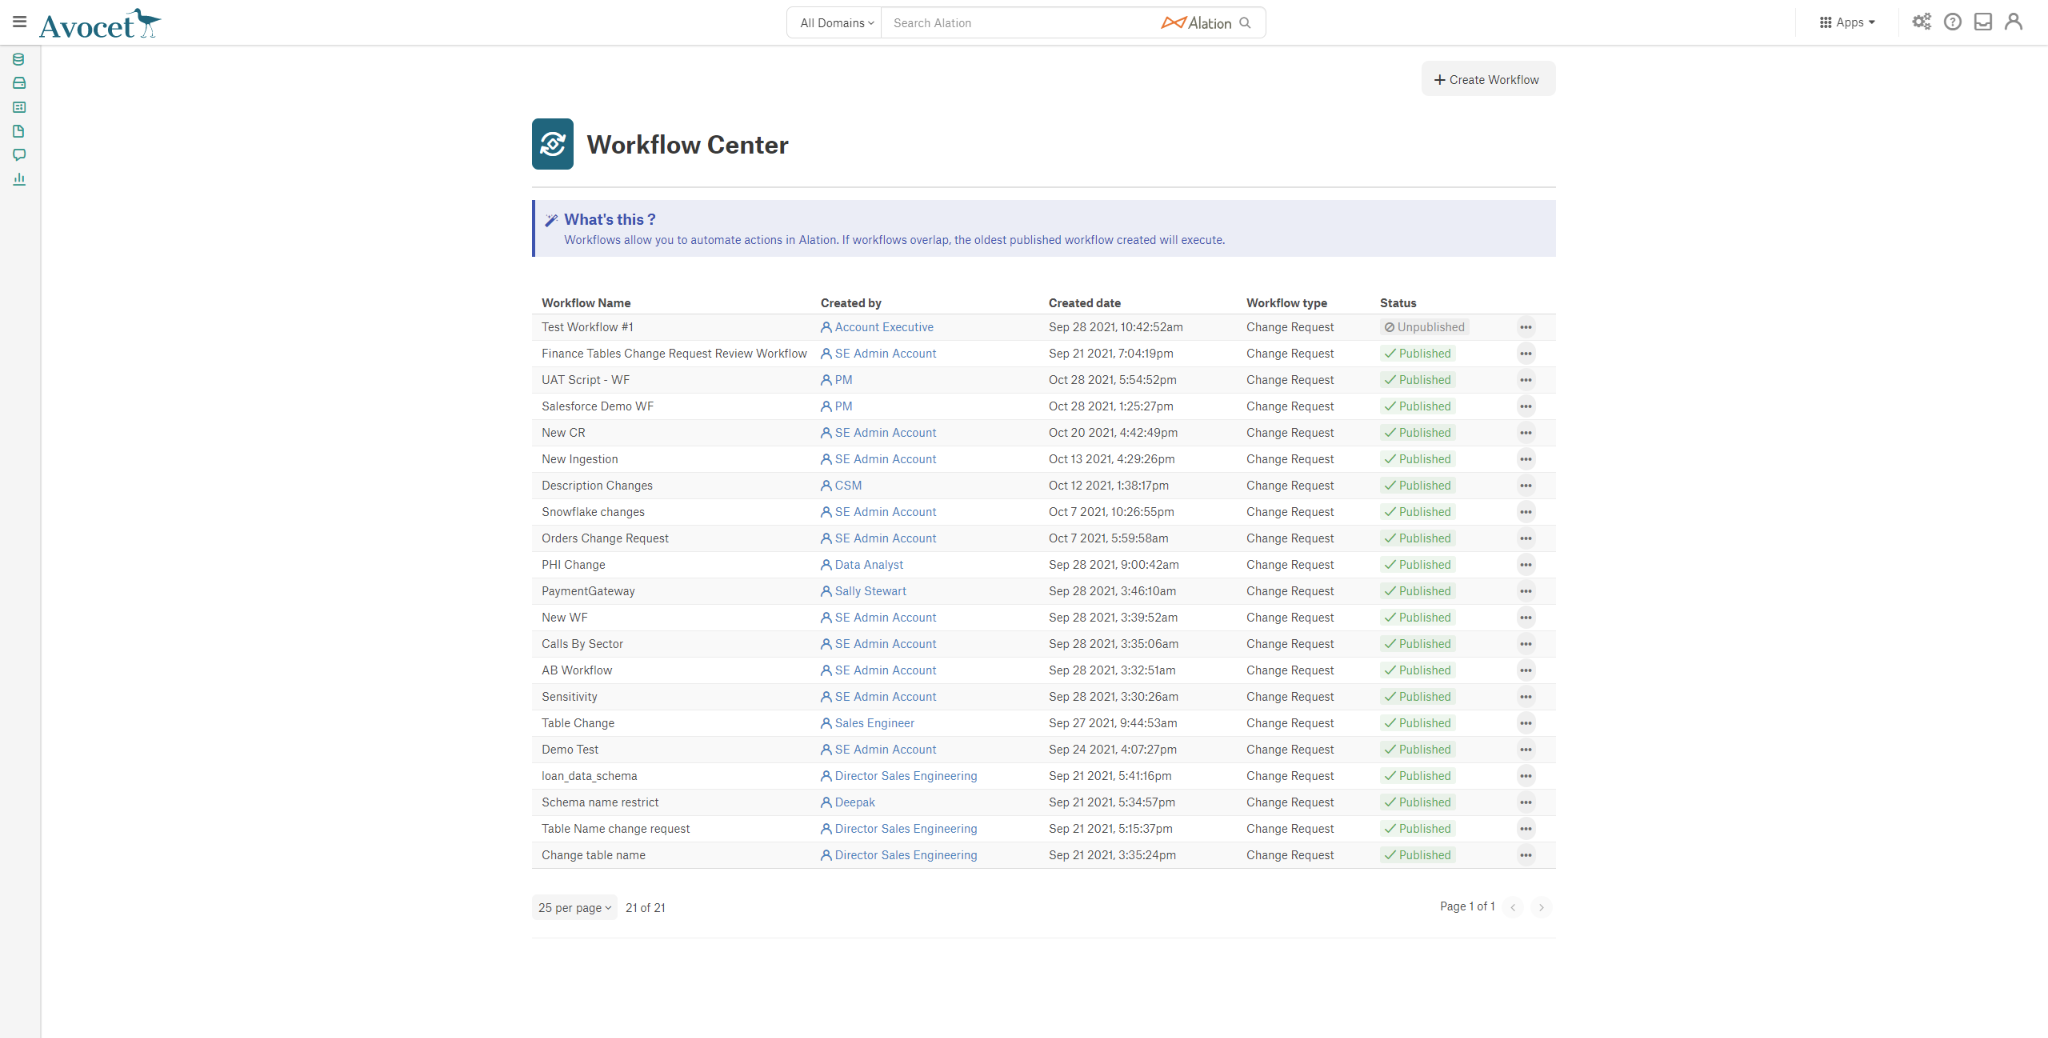
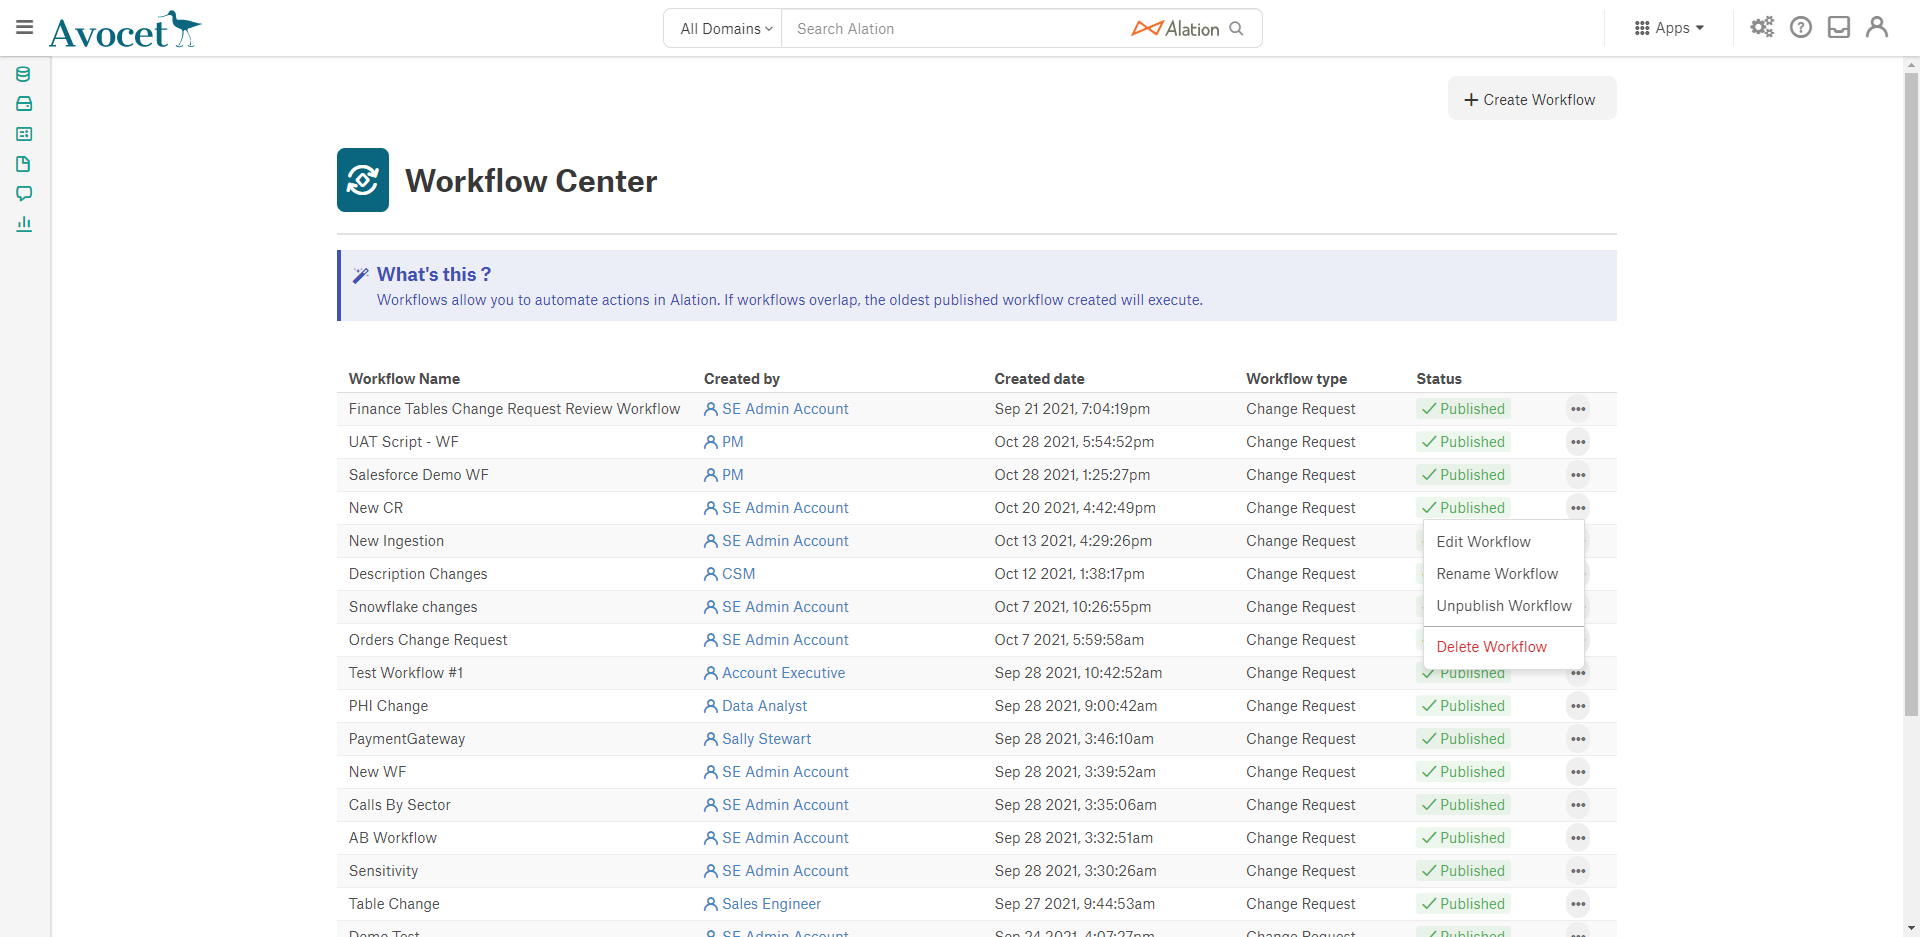
Publishing Workflows
Publishing is the final step in creating a workflow and will make the selected workflow available to all users for use and to suggest changes as necessary. Admins may choose to unpublish a workflow for a variety of reasons, such as making further edits or while planning best practices with other users and admins. When ready to restore previously created workflows that you would like to publish:
From the Apps menu, click Govern.
Click WORKFLOWS to access the Workflow Center.
Click the three dots (…) on the row of the workflow you want to publish.
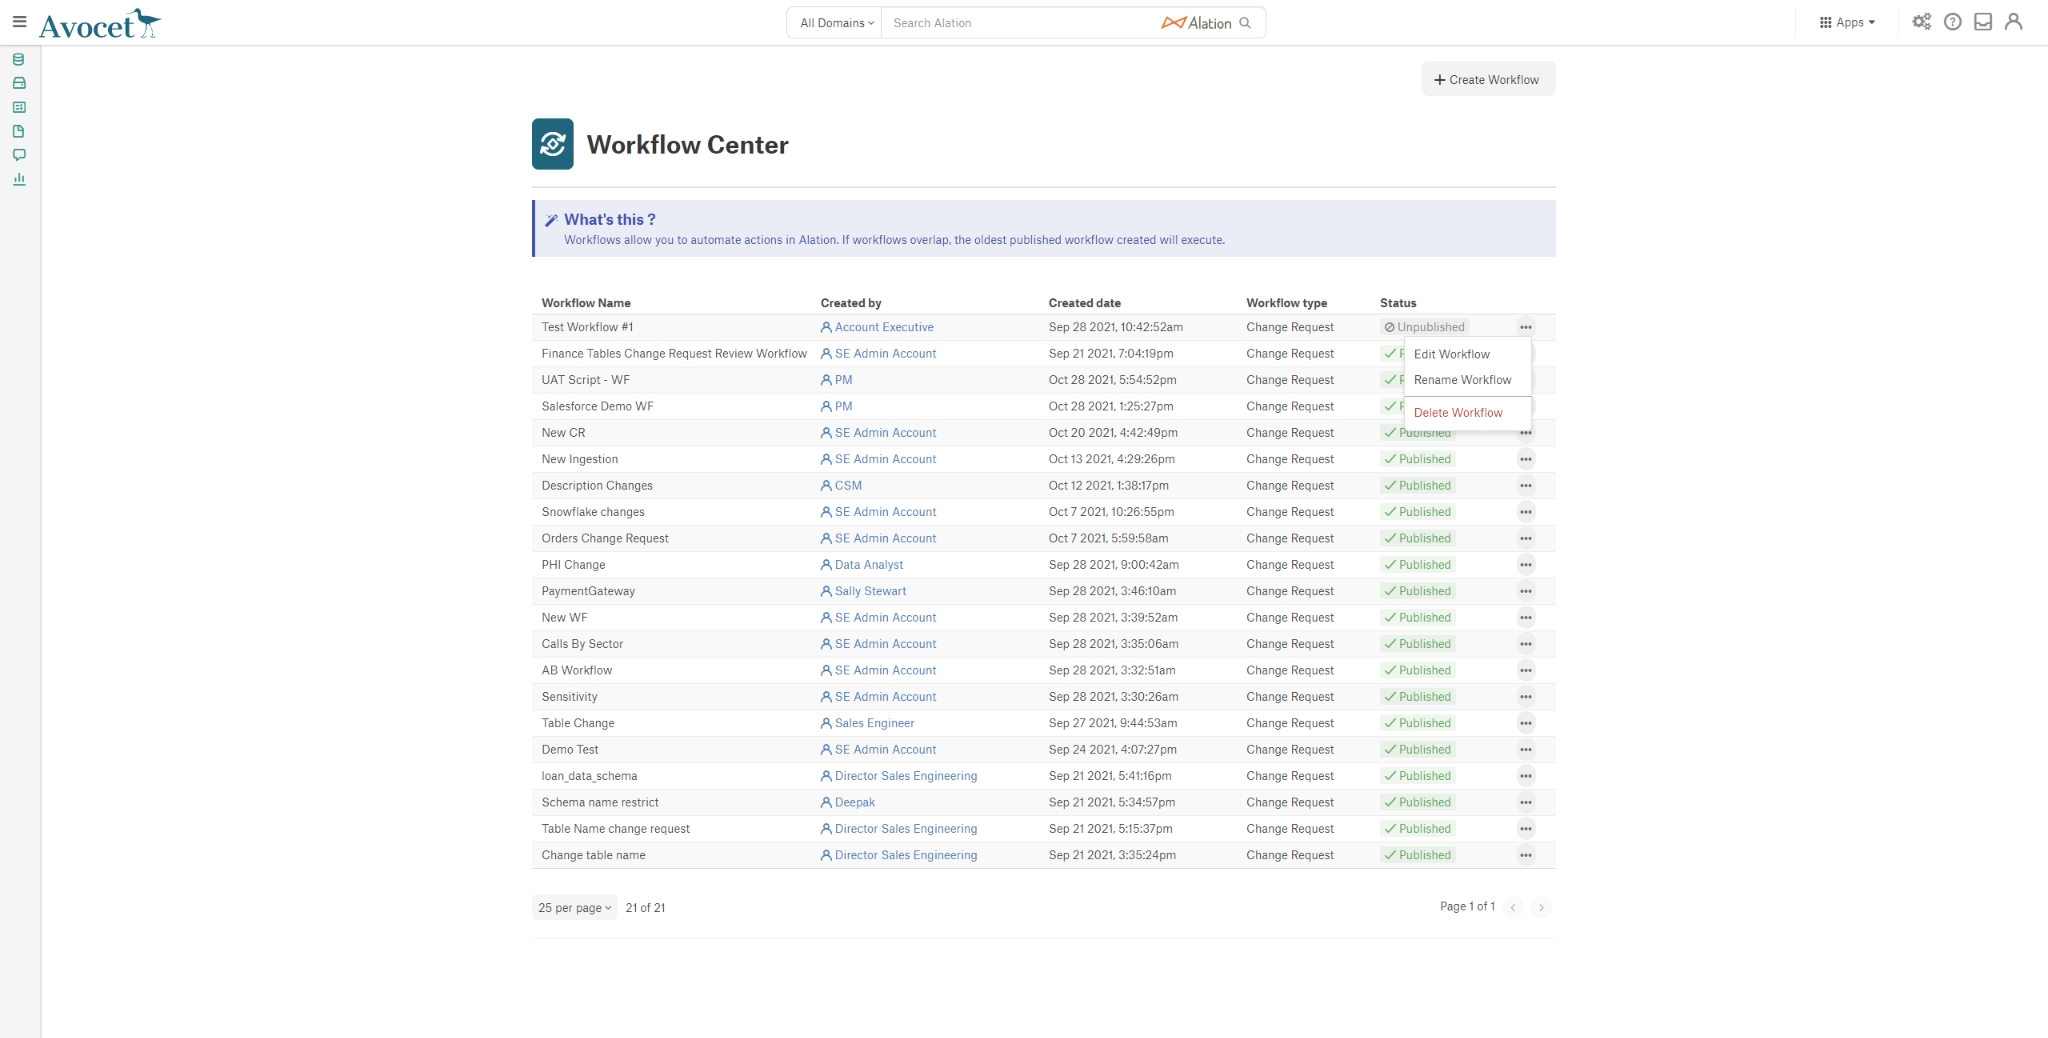
Click Edit Workflow. A dialog appears where you can edit the selected workflow, if necessary.
To proceed with publishing the workflow, click the Publish button. To discard your edits, click the Cancel button.
Click the Publish button to make the workflow available to all users.
Unpublishing Workflows
A workflow can be unpublished and will make the selected workflow unavailable to all users for use and to suggest changes as necessary. Admins may choose to unpublish a workflow for a variety of reasons, such as making further edits or while planning best practices with other users and admins. All active change requests will be suspended when the workflow is in an unpublished state. For previously created workflows that you would like to unpublish:
From the Apps menu, click Govern.
Click WORKFLOWS to access the Workflow Center.
Click the three dots (…) on the row of the workflow you want to unpublish.

Click Unpublish Workflow. A message appears to confirm your wish to unpublish the selected workflow.

To proceed with unpublishing the workflow, click the Unpublish button. To retain the workflow as-is, click the Cancel button. Once the Unpublish button is selected, the workflow is no longer available to users and cannot receive suggested changes.
Deleting Workflows
Deleting of workflows can also be accomplished from the Workflow Center. Please note that when deleting a workflow, that although the resulting actions from the workflow are retained (a suggested change to a field that was accepted and implemented for example), the workflow history is also removed. History of change suggestion, approval, rejection, and deletion are also removed from view upon associated workflow deletion.
To delete workflows:
From the Apps menu, click Govern.
Click WORKFLOWS to access the Workflow Center.
Click the three dots (…) on the row of the workflow you want to delete.
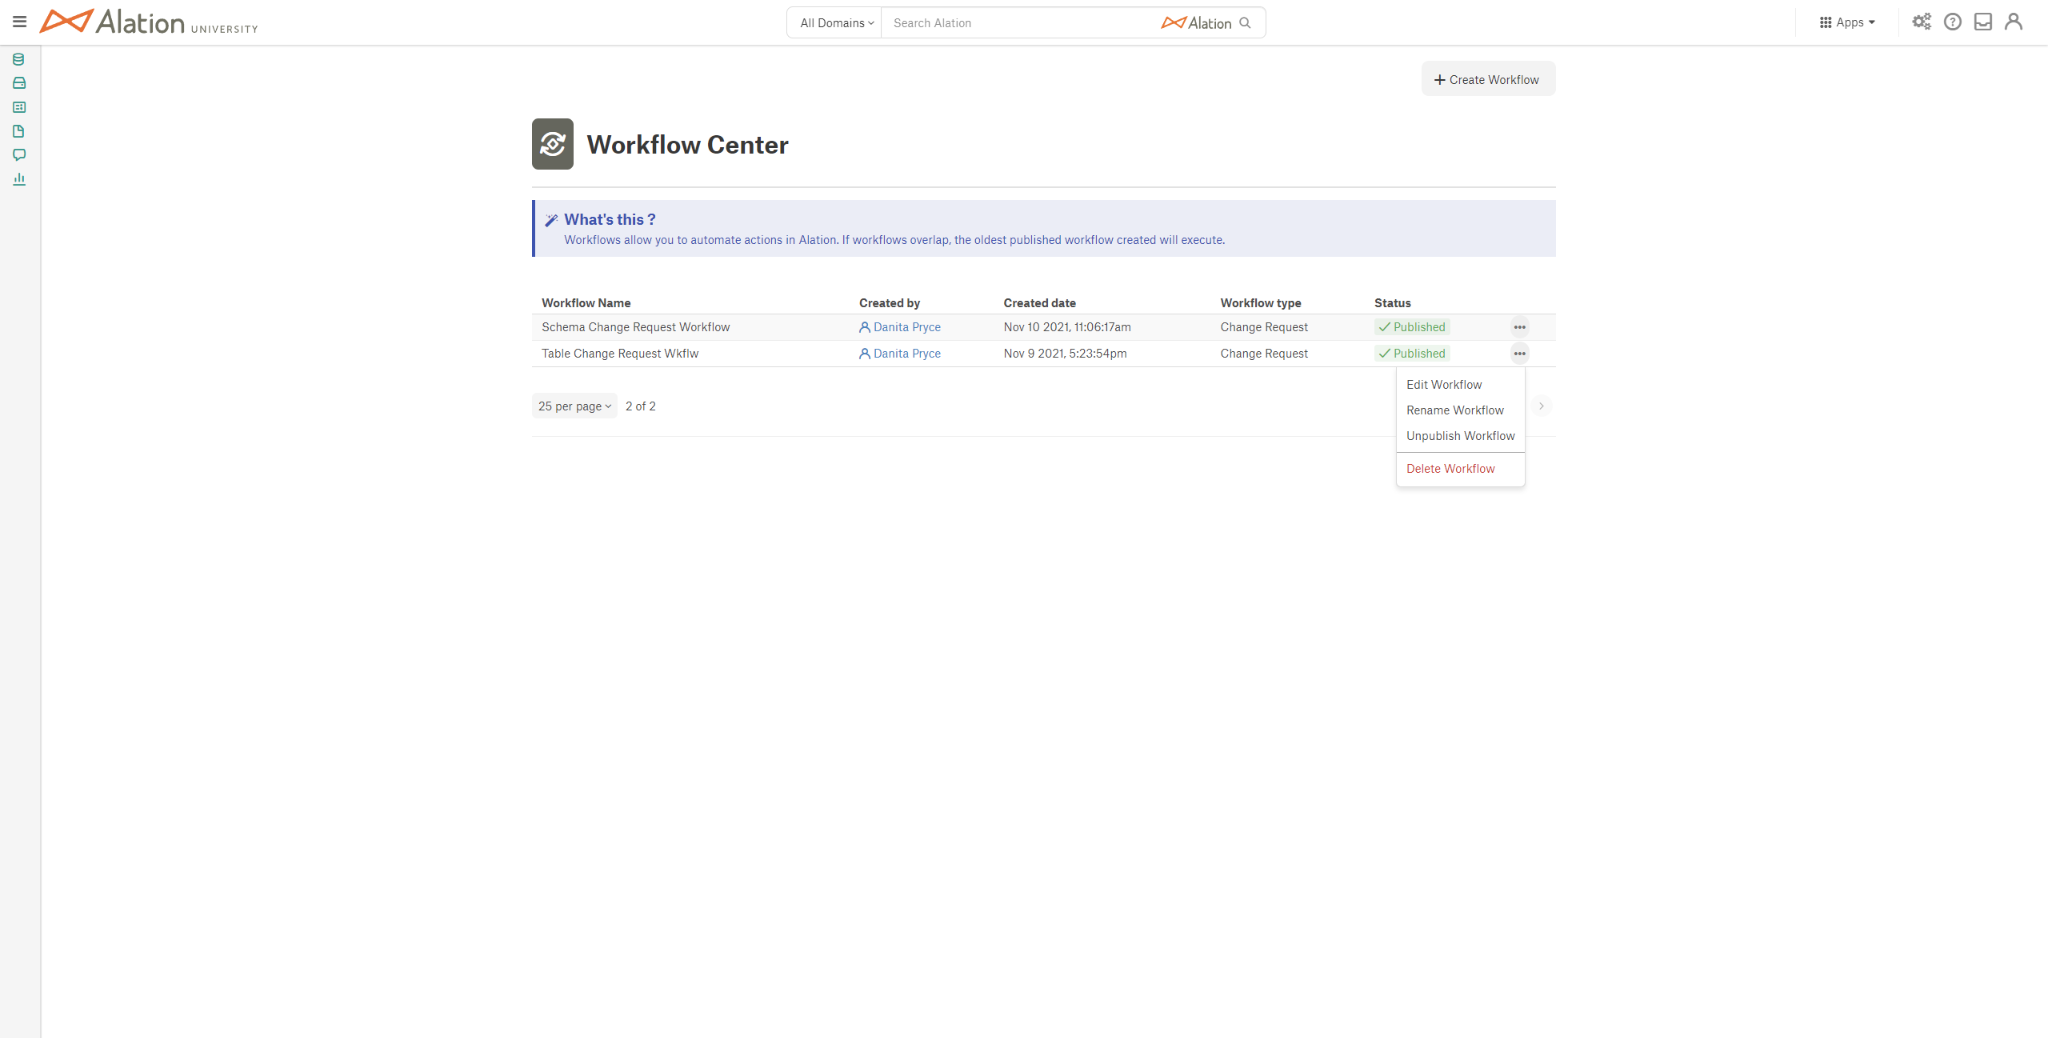
Click Delete Workflow. A warning message appears informing you that this is a permanent deletion.
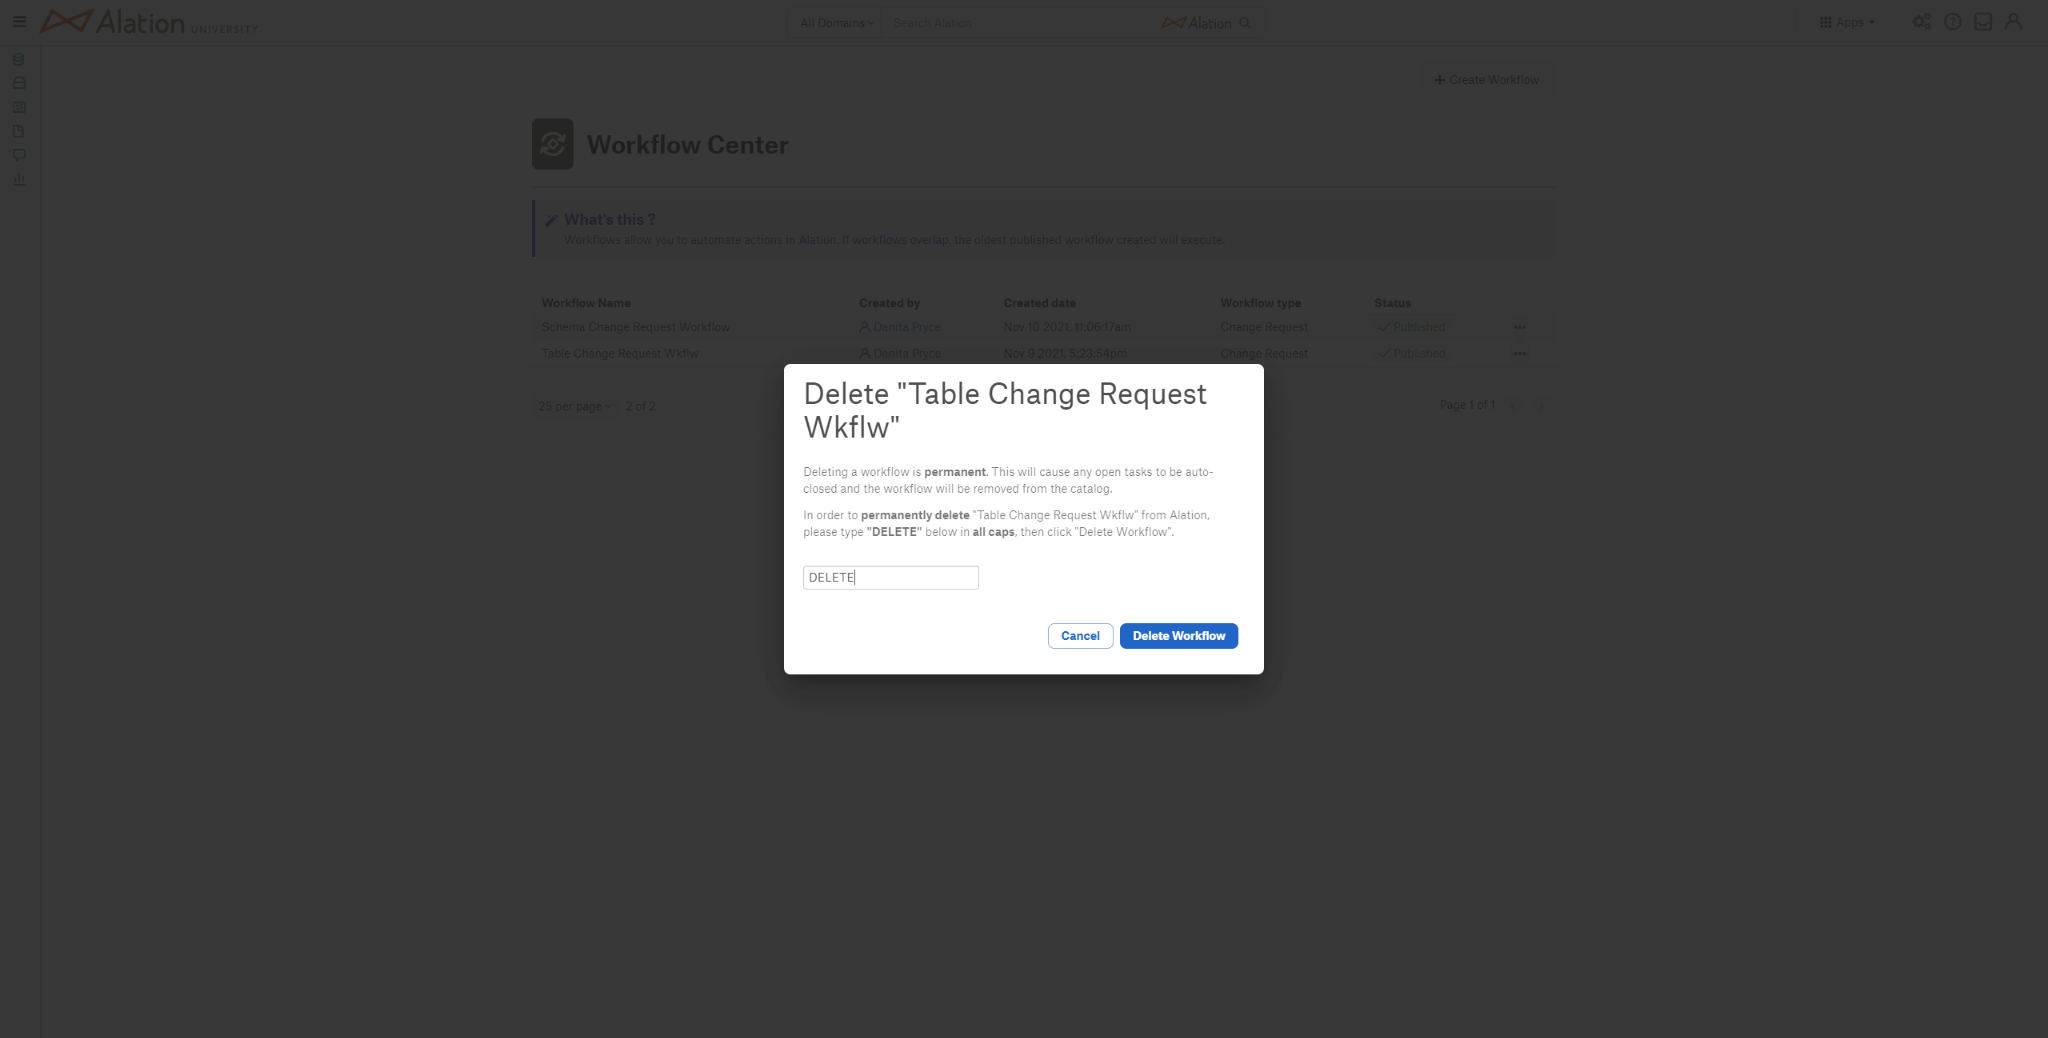
To proceed with deleting, type “DELETE” in all caps in the text field.
Click the Delete Workflow button.
Renaming Workflows
To rename workflows:
From the Apps menu, click Govern.
Click WORKFLOWS to access the Workflow Center.
Click the three dots (…) on the row of the workflow you want to rename.
Click Rename Workflow. A dialog appears where you can rename the selected workflow.
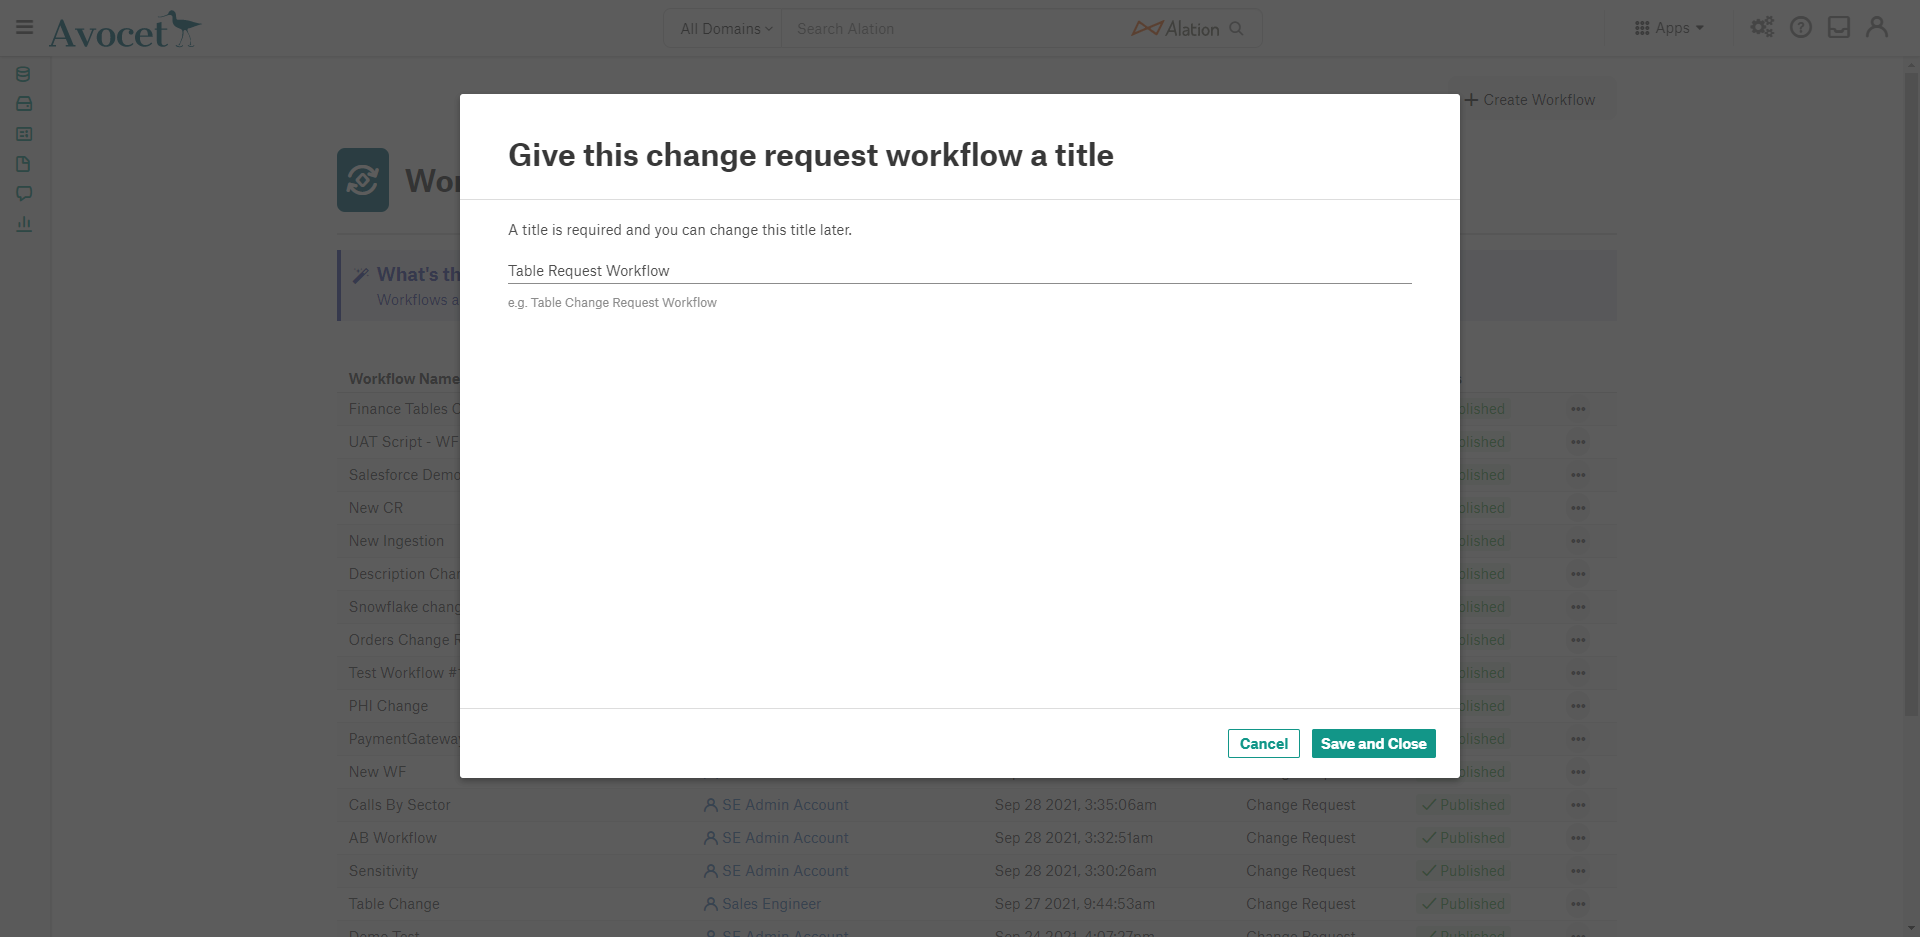
To proceed with your renamed workflow, click the Save and Close button. To discard your edits, click the Cancel button.
Editing Workflows
To edit workflows:
From the Apps menu, click Govern.
Click WORKFLOWS to access the Workflow Center.
Click the three dots (…) on the row of the workflow you want to edit.
Click Edit Workflow. A dialog appears where you can edit the selected workflow.
To proceed with your edited workflow, click the Publish button. To discard your edits, click the Cancel button.
Viewing Workflow Data in Alation Analytics
From Alation version 2023.1.5, you can view workflow data in Alation Analytics. Three tables with workflow data are available in the public schema:
workflows summarizes all existing workflows
workflow_requests summarizes the progress of triggered workflows
workflow_request_actions summarizes the actions taken during a triggered workflow
The latter two tables provide a history of workflows as they are triggered and worked through.