Uninstall and Reinstall the Agent Software
Alation Cloud Service Applies to Alation Cloud Service instances of Alation
Uninstall the Agent
To uninstall an Agent from your network, run the following commands on the Agent’s host machine.
Red Hat-Based
Run these two commands in turn.
sudo yum remove alation-container-service
sudo yum remove alation-hydra
Debian-Based
Run these two commands in turn.
sudo apt-get remove alation-hydra
sudo apt-get remove alation-container-service
Or run these two commands in turn.
sudo dpkg --remove alation-hydra
sudo dpkg --remove alation-container-service
After you uninstall an Agent, the corresponding Agent entry on the Agents Dashboard in Alation will show as disconnected. To delete the Agent entry from the Agents Dashboard, see Deleting the Agent from Alation. To reinstall an Agent on your network and connect it to an existing Agent entry in Alation, see below.
Reinstall an Agent and Reconnect to Alation
In some cases, you may have an Agent listed on the Agents Dashboard in Alation, but the Agent software that you had installed inside your network is no longer there. For example, the Agent’s host machine may have gone down, or the Agent software may have been uninstalled or deleted.
If this happens, you can install a new copy of the Agent on your network and reconnect it to the Agent entry in Alation. Once the connection has been restored, any connectors you had previously installed on your old Agent will automatically be reinstalled on the new Agent.
Step 1: Prepare for the Installation
Before you can install the Agent, you must:
Provision a Linux host to install the Agent on. This can be a physical or virtual machine. Do not run other software on this machine—only the Agent should be installed. See Agent System Requirements for details.
Get access to Alation’s Customer Portal. If you don’t have access or aren’t sure how to access it, contact your account manager.
Have the Server Admin role in Alation.
Step 2: Navigate to the Agent Dashboard
First ensure you have completed the prerequisites in the prior step. You must have the Server Admin role in Alation to complete the remaining steps.
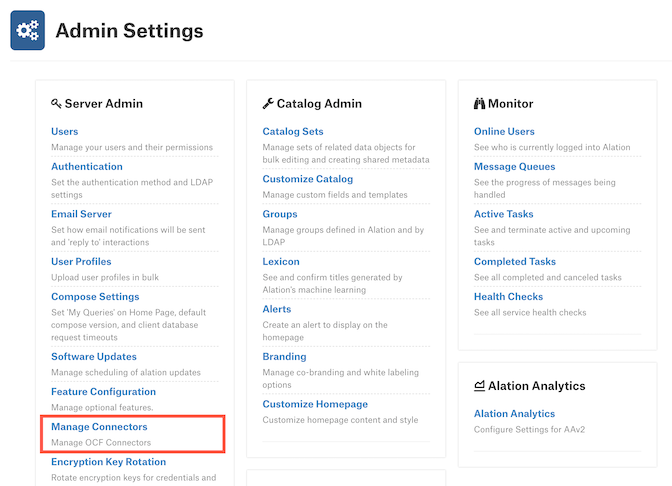
In Alation, click on the Settings gear icon in the top right corner. This opens the Admin Settings page.

Under the Server Admin section, click Manage Connectors.
Click the Agents tab. The Agents Dashboard appears.
Click the Add New Agent button.
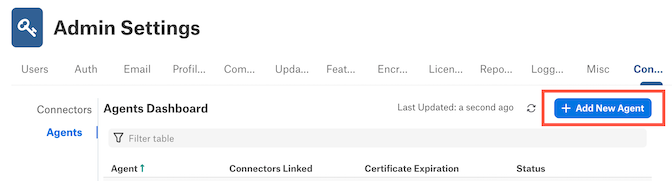
The Add New Agent dialog will appear.
Note
You will only need to use the first step in the Add New Agent process. This provides you the information needed to install the Agent. Do not click the Next button.
Step 3: Download and Run Installation Script
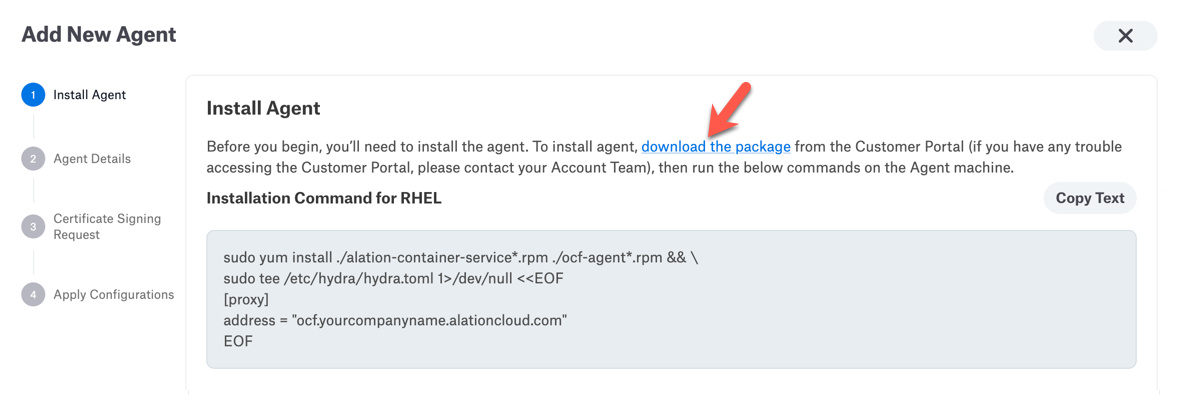
In the Add New Agent dialog, click the link to the Alation Customer Portal.
In the Alation Customer Portal, select the latest available version for the desired operating system:
RHEL for Red Hat-based systems
DEBIAN for Debian-based systems
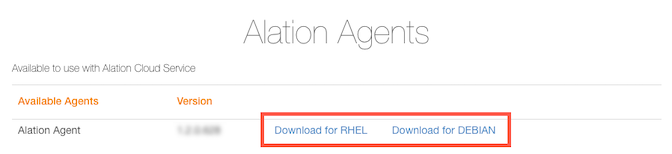
The Agent will download to your computer as a tar.gz file named ocf-agent-<agent-version>-<operating-system>.tar.gz.
If needed, transfer the downloaded file to the Agent’s host machine. For example, if you downloaded the Agent file to a Unix-based machine, you could transfer the file using the
scpcommand in Terminal:scp /local/path/to/ocf-agent-<agent-version>-<operating-system>.tar.gz <ssh-user>@<server-address>:/remote/path/to/ocf-agent
Important
If you already have an ocf-agent directory on the Agent machine, remove or rename it so its old files won’t interfere with the current process.
On the Agent’s host machine, extract the .tar.gz file. Example:
tar -xf ocf-agent-<agent-version>-<operating-system>.tar.gz
The Agent installation files are extracted into an ocf-agent directory.
Change into the ocf-agent directory.
cd ocf-agent
In Alation, copy the relevant installation command from the Install Agent screen.
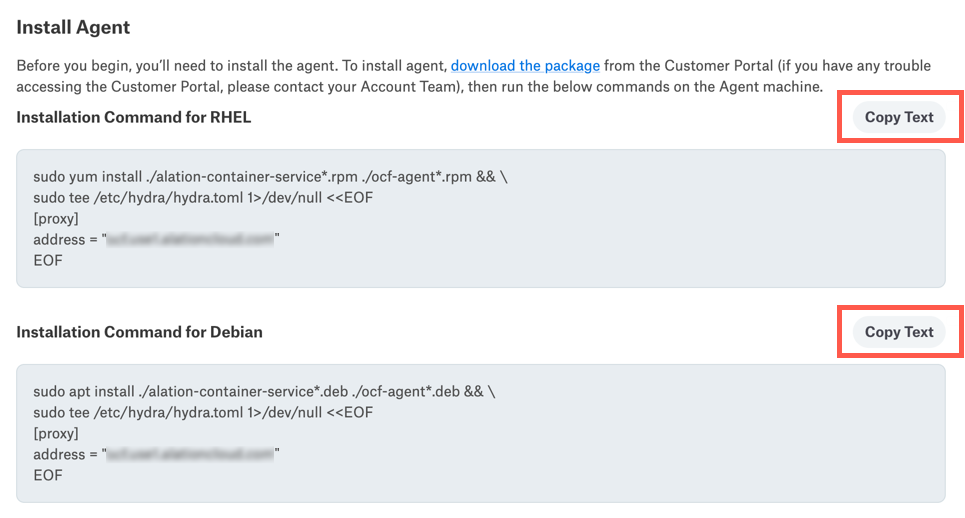
In the terminal on the Agent’s host machine, make sure you are in the ocf-agent directory, then paste and run the installation command. This will install and configure the Agent.
(Optional) If your network routes outgoing traffic through an HTTP CONNECT proxy, see the Advanced Configuration section below.
In Alation, click the X button to exit the Add New Agent dialog.
Note
Do not click the Next button. The remaining steps in the Add New Agent process are not needed in this scenario.
Advanced Configuration
If your network routes outgoing traffic through an HTTP CONNECT proxy, you need to:
Add the Alation Cloud Service connectivity endpoint to your proxy server’s allow list.
Add the proxy’s address to the Agent configuration file.
Proxy Allow List
You will need to add the Alation Cloud Service connectivity endpoint to your proxy server’s allow list so the Agent can reach your Alation Cloud Service instance.
The Alation Cloud Service endpoint is shown on the
addressline of the Agent installation command. This is the same address that should be in your Agent configuration file at /etc/hydra/hydra.toml.
Add Proxy Address to Agent Config
This is done on the Agent’s host machine. The steps depend on whether your proxy requires authentication.
No Authentication
For proxies that don’t require authentication, edit /etc/hydra/hydra.toml to add the following line:
web_proxy = "<proxy-address>:<proxy-port>"
Basic Authentication
Starting with Agent version 1.2.1.1168, you can route the Agent through proxies that require basic authentication. Edit /etc/hydra/hydra.toml to add the following line:
web_proxy = "<username>:<password>@<proxy-address>:<proxy-port>"
Replace the parts in angle brackets with the appropriate information for your proxy. Don’t include the angle brackets. Do include the quotes. The proxy address can be a domain name or an IP address. If no port is provided, the Agent defaults to port 3128.
Here’s an example with basic authentication:
web_proxy = "jane:securepassword@company.proxy.com:3128"
Step 4. Renew the Agent’s Certificates
If you’re reinstalling the Agent on the same machine as your old Agent, you may be able to reuse the old Agent’s certificates. To check if your old Agent’s certificates are still valid, see View the Certificates’ Expiration Date. If they are not valid, or if you’re installing the Agent on a new machine, use the steps below to renew the certificates.
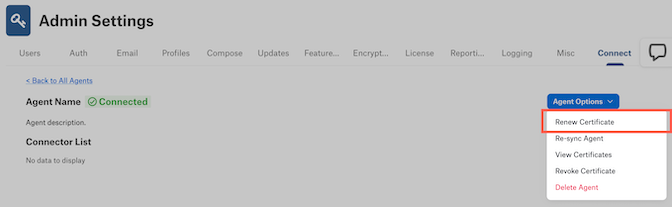
On the Agents Dashboard in Alation, click the name of the Agent you are reconnecting to.
Click the Agent Options button, then select Renew Certificate.
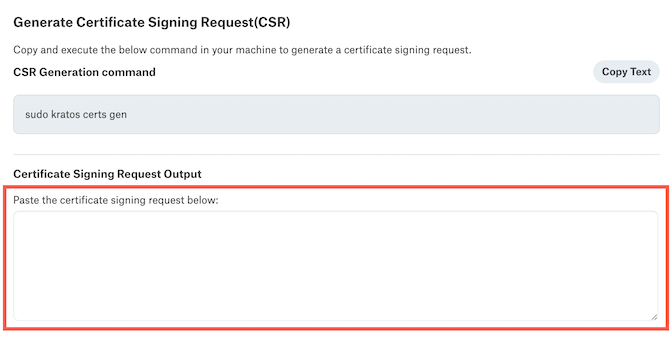
On the Generate Certificate Signing Request (CSR) screen, copy the provided command and run it on the Agent’s host machine.
sudo kratos certs gen
Since this Agent has already been connected to your Alation Cloud instance in the past, you will get a warning that a key has already been created.
Warning! A key for this agent appears to have already been generated
at "/etc/hydra/agent/security/proxy_key.pem". Generating a new key pair
will destroy the existing one.
Continue? [Y|n]
Enter Y to continue.
The command will generate a certificate signing request. Example output:
-----BEGIN CERTIFICATE REQUEST-----
<your certificate signing request>
-----END CERTIFICATE REQUEST-----
Copy the certificate signing request from the Agent machine, including the dashes.
In Alation, paste the certificate signing request into the provided box under Certificate Signing Request Output. Then click the Next button.
Alation will generate two signed certificates—one for the Agent and one root certificate. Copy the provided certificate installation command.
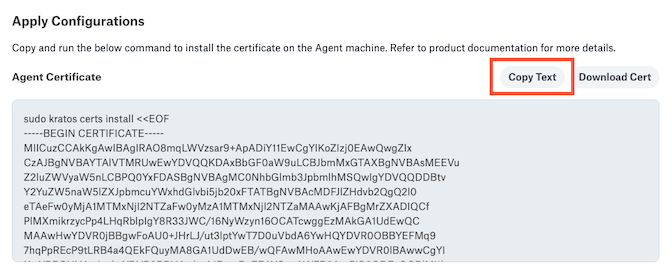
On the Agent’s host machine, paste the copied certificate command and run it. This installs the certificate.
Restart the Agent by copying the provided command and running it on the Agent’s host machine.
sudo systemctl restart hydra
When the Agent has finished restarting, click the Finish button in Alation. Check that your Agent has a status of Connected in the Agent Dashboard. If it doesn’t, check the Troubleshooting page.
Warning
The certificates will automatically expire after one year.
Step 5. Resync the Agent
Your new Agent installation should now be connected to your Alation Cloud instance. Now you can resync the Agent, which will reinstall any connectors that you had previously installed on your Agent.
On the Agent page, click the Agent Options button, then select Resync Agent.

A confirmation message will appear. Click the Confirm button to continue resyncing.
The resync process may take some time. When the resync is complete, a success message will appear. Click the Close button.

Step 6. Verify the Data Source Connection
Now that the Agent has been resynced, you can verify that the Agent’s data source is connected properly. To do this, you must be a Data Source Admin for this data source.
Go to Apps and select Sources.
Click the data source you want to verify.
Click on More, then Settings.
Click on the General Settings tab.
Under the Network Connection heading, click the Test button.