Using Stewardship Workbench
Alation Cloud Service Applies to Alation Cloud Service instances of Alation
Customer Managed Applies to customer-managed instances of Alation
Alation’s Stewardship Workbench is part of the Data Governance App. Stewards are able to make updates to the catalog in bulk, instead of navigating to multiple different object pages to make the same change, such as applying a data masking or row access policy.
Selected objects are validated for relevance and the changes will then be applied. For some policy types, only relevant objects will be updated. For example, data masking policies will only update column objects and row access policies will only update table objects in the selection. The user will receive an email notification when policies are successfully applied.
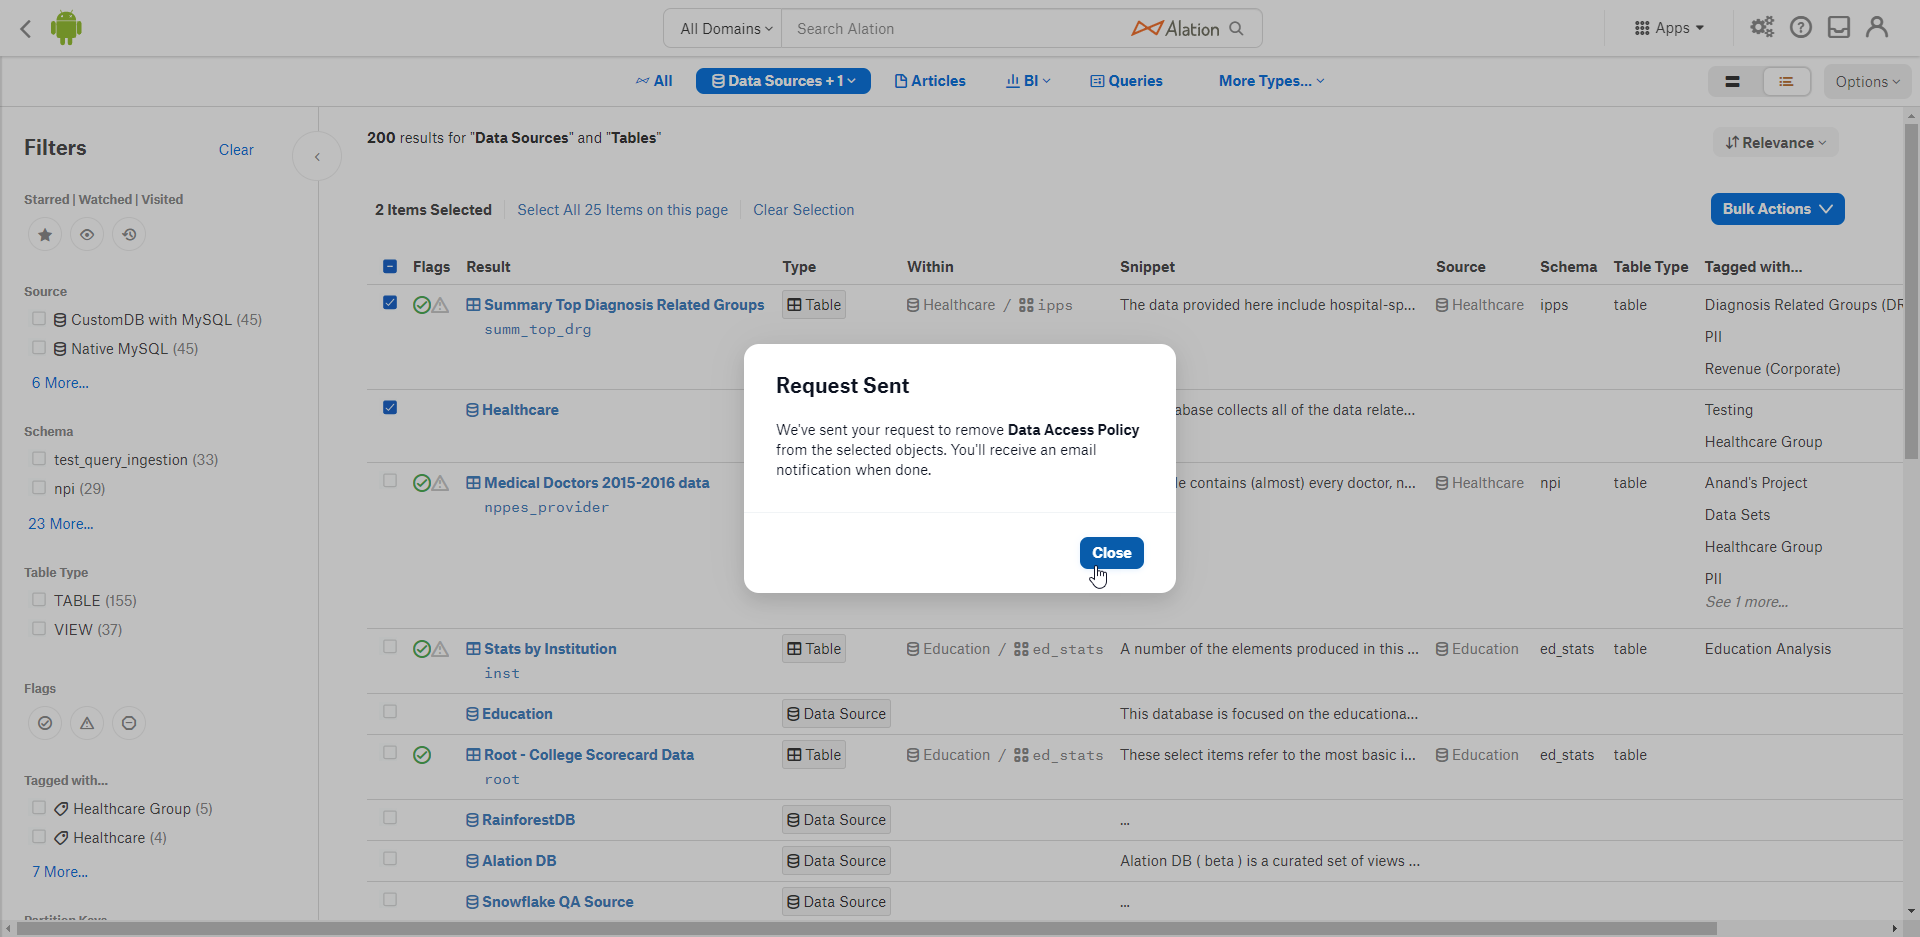
Upon committing changes such as Bulk Add Data Policy or Bulk Remove Data Policy, Alation communicates with Snowflake via bulk processing API to carry out the requested action. Alation sends the requested action to Snowflake to process for the desired objects and after completion of the action, the user will receive an email confirmation. This process is also notified to the user making the update in the final dialog “Request Sent” as displayed in the Bulk Add Data Policy or Bulk Remove Data Policy sections below.
How to Access Stewardship Workbench
After Stewardship Workbench has been enabled, select the Govern icon in the Apps menu.

Click the STEWARDSHIP WORKBENCH icon to view the Stewardship Workbench page.
Navigating Stewardship Workbench
After arriving to the Stewardship Workbench, you will find a search page displaying in table view.
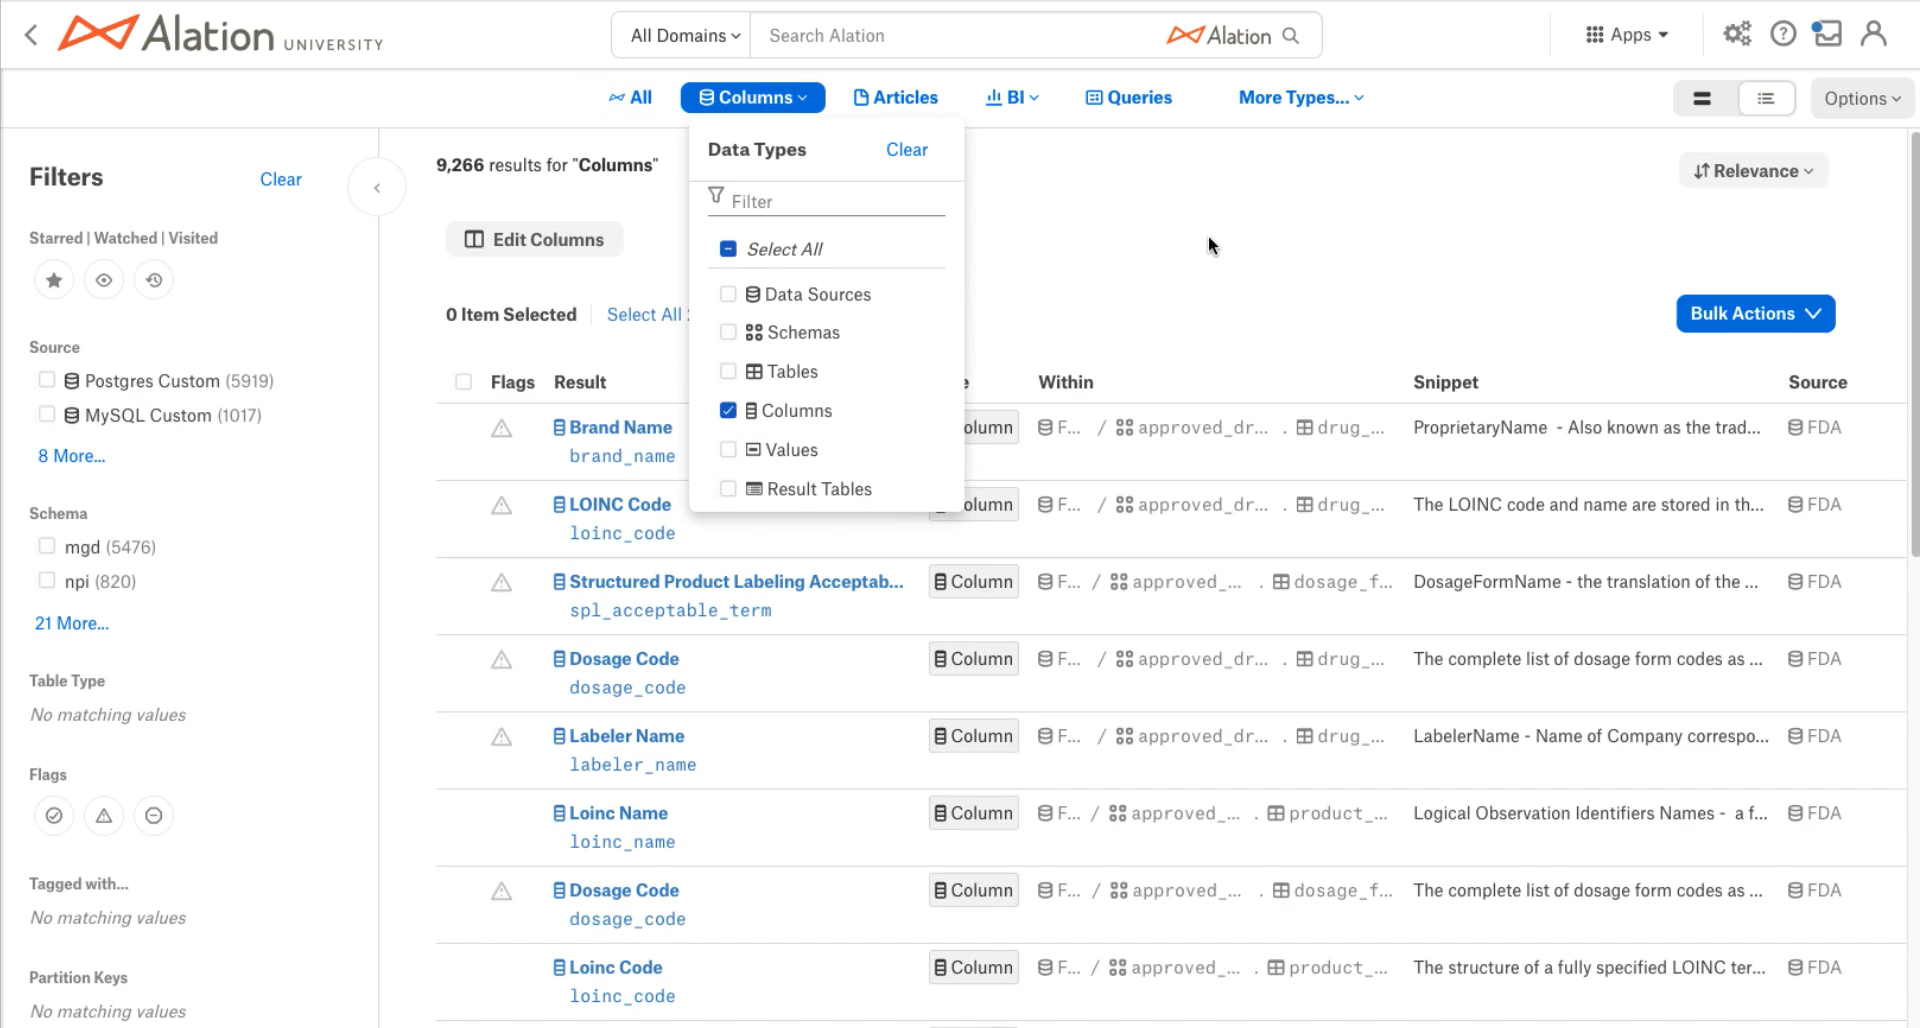
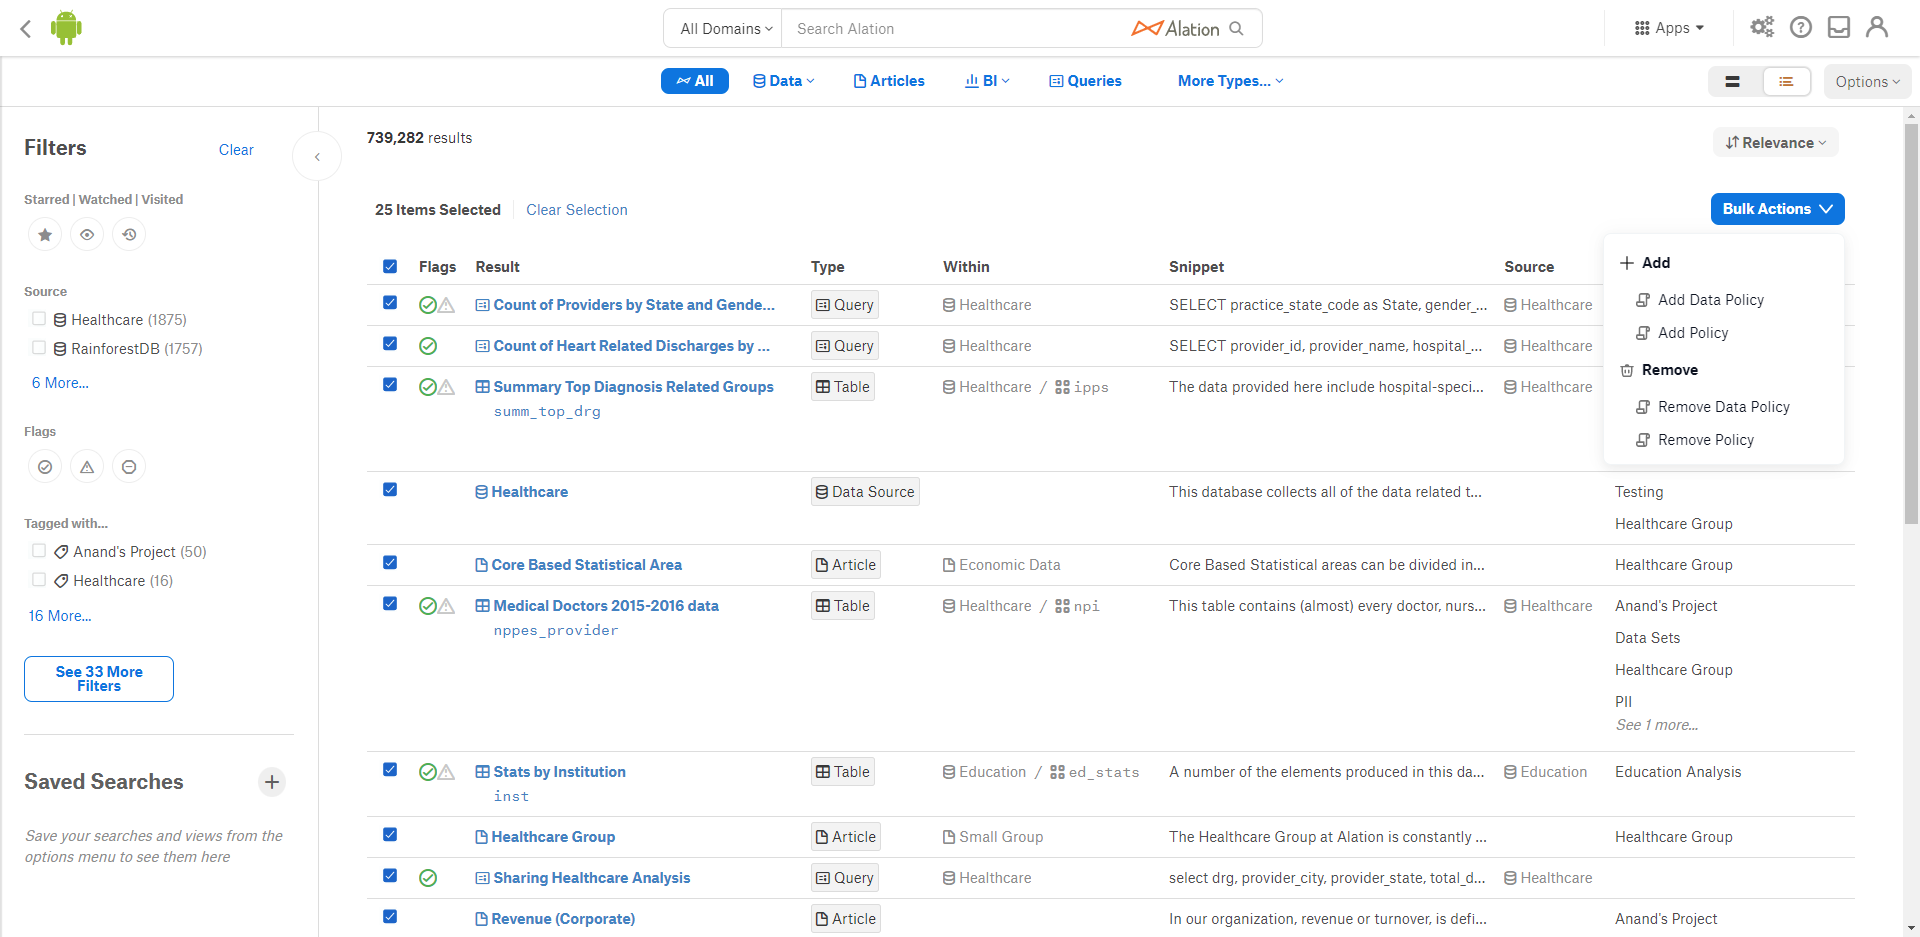
The first column of the results table contains checkboxes that allow you to select one or more data objects. You can filter the results to only show the data objects that you want to edit.
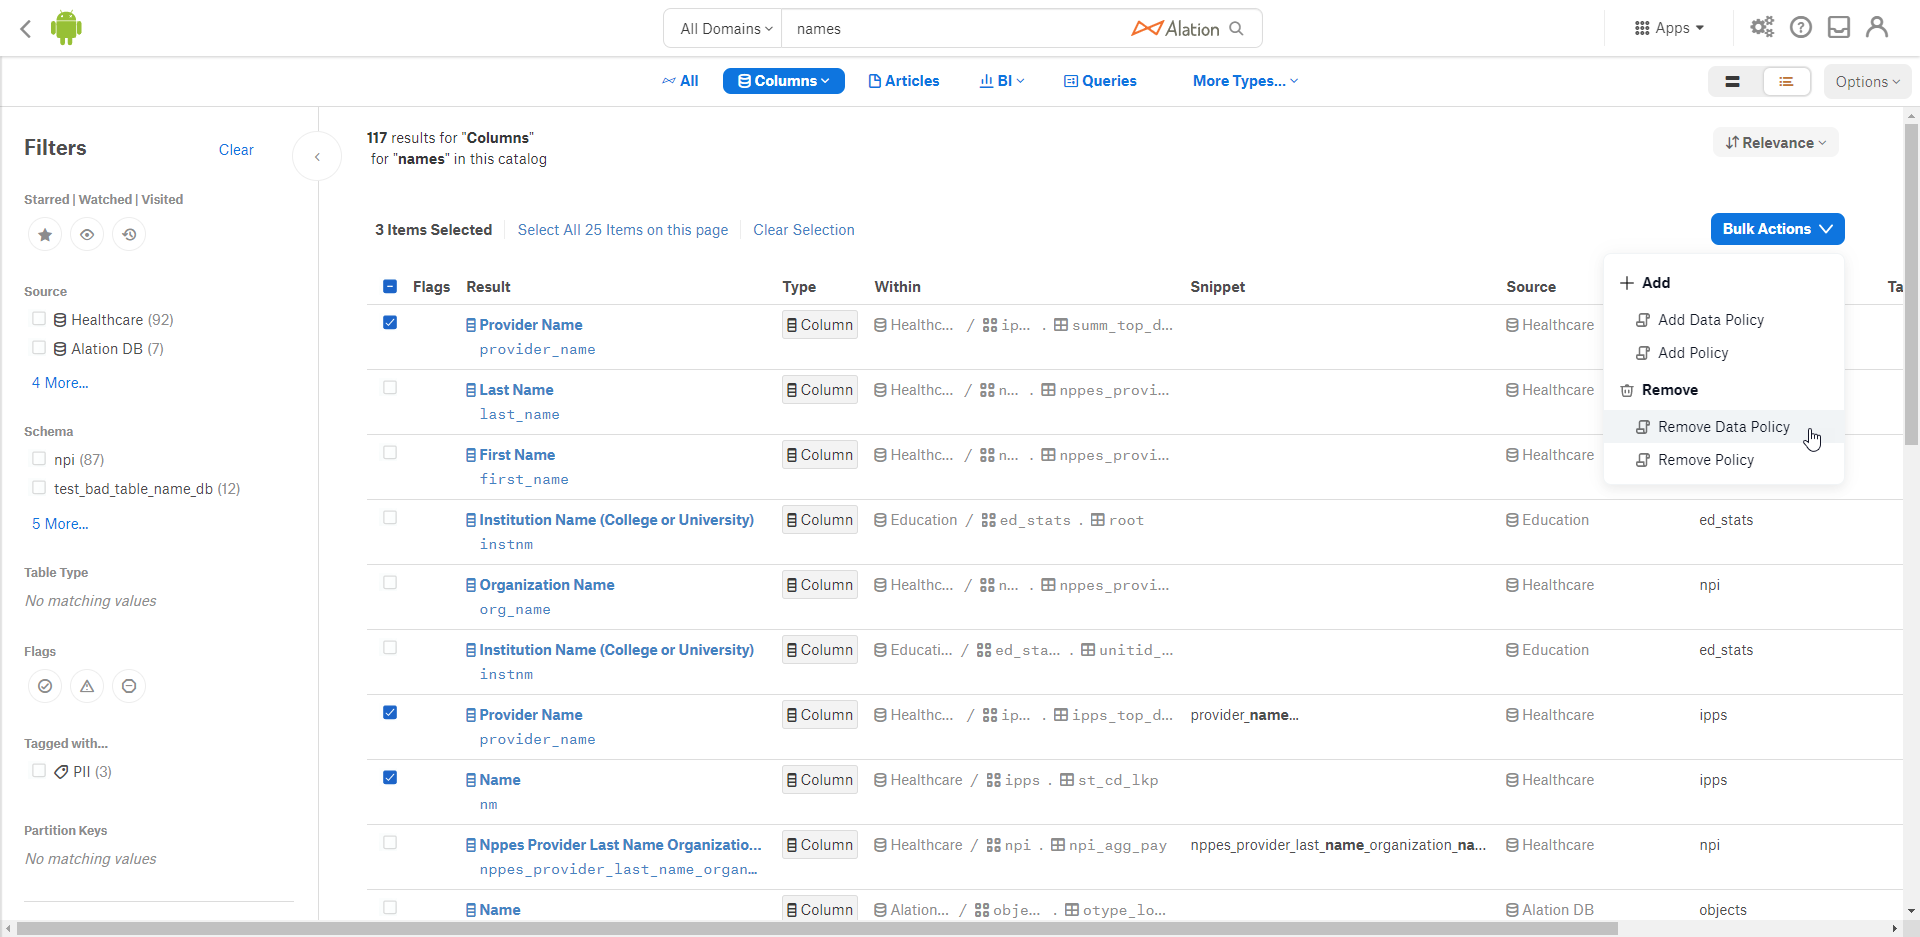
The Bulk Actions button contains a menu of all available bulk actions.
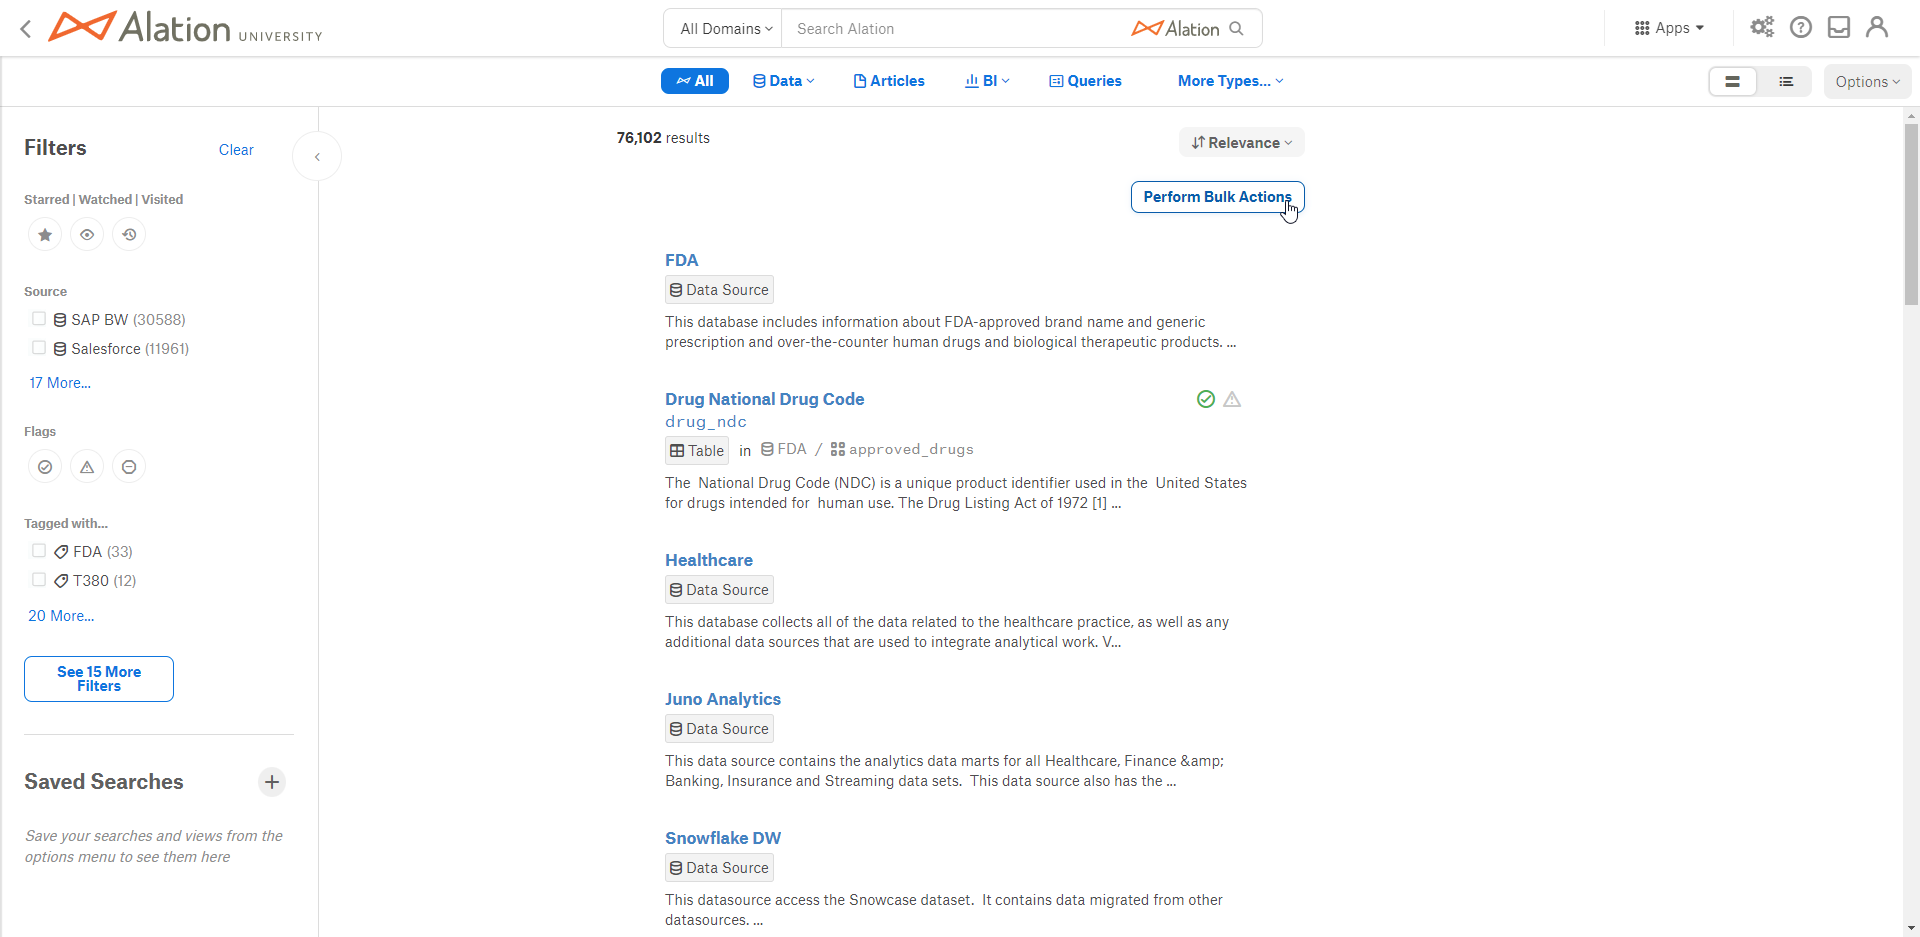
Bulk actions can also be accessed from the list view by clicking the Perform Bulk Actions button, which will take you to the table view.
Bulk Add Data Policy
After filtering the results to only show the data objects that you want to edit, select the checkboxes for the columns you want to apply the data policy to. If you would like to add the data policy to all columns, select the checkbox in the header row.
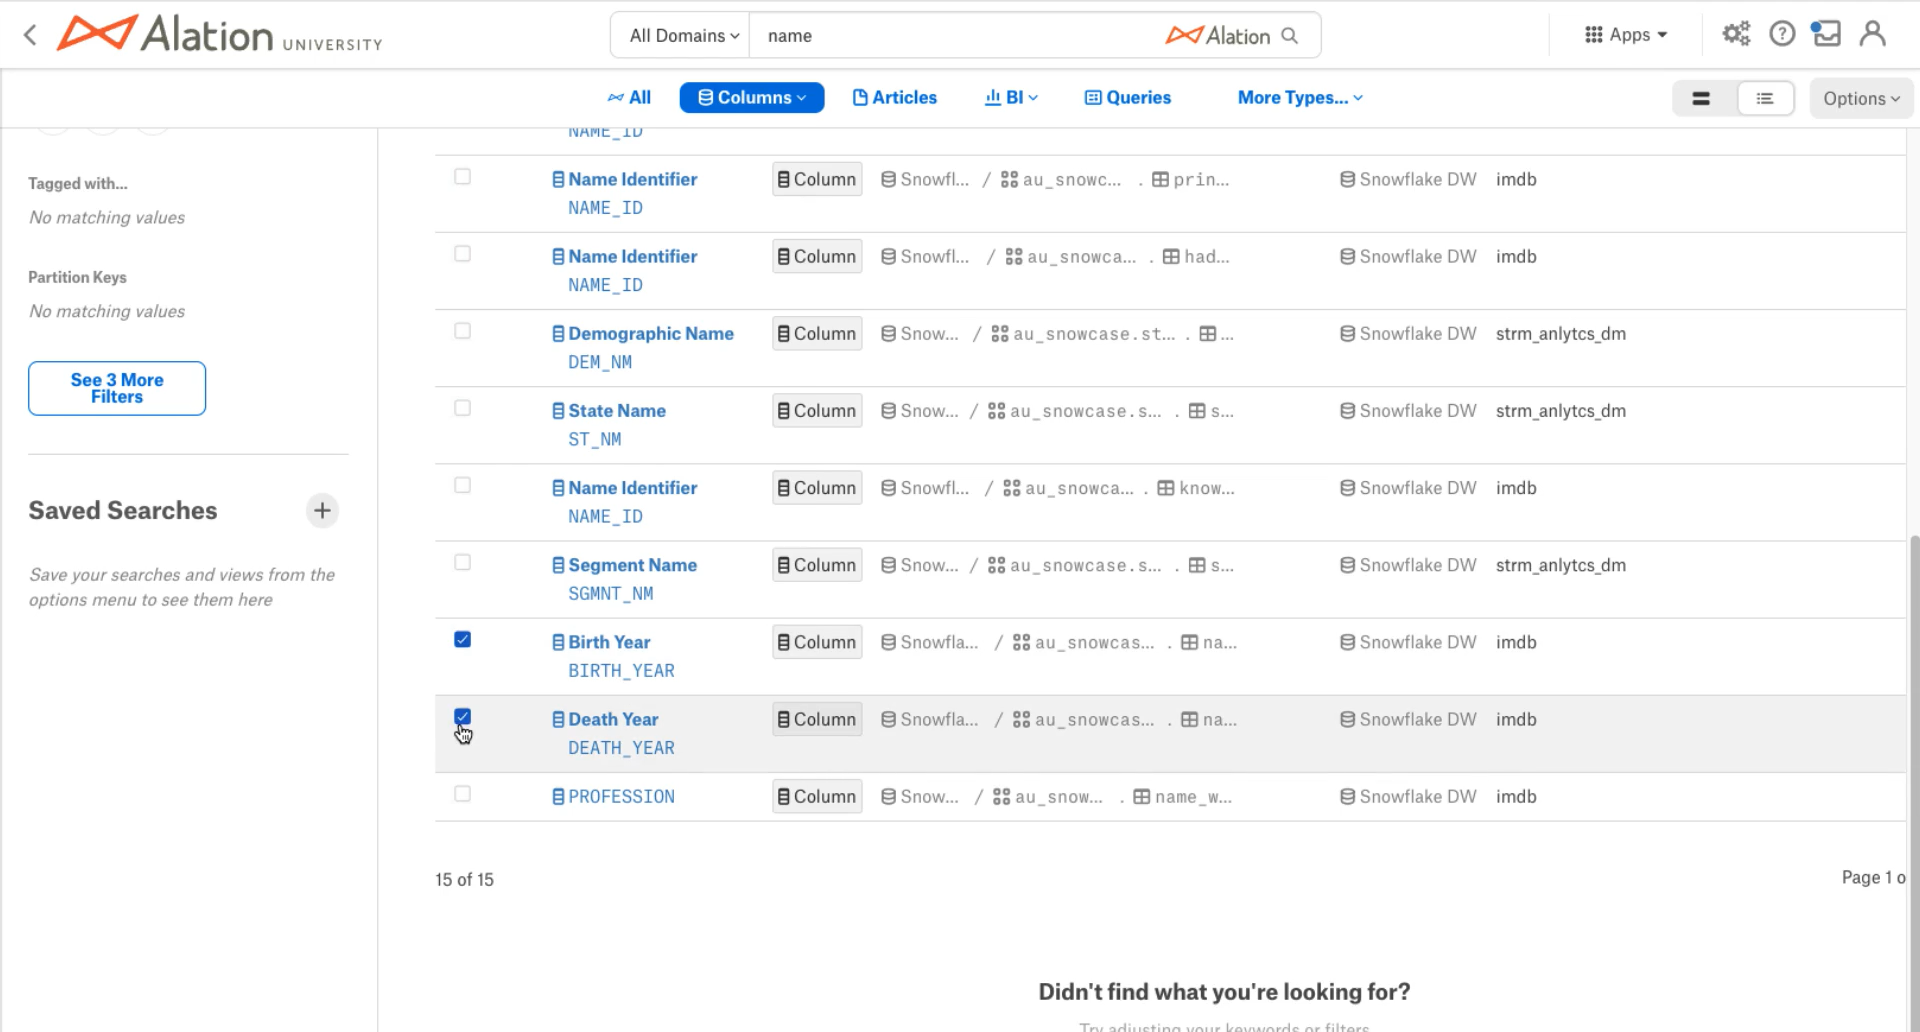
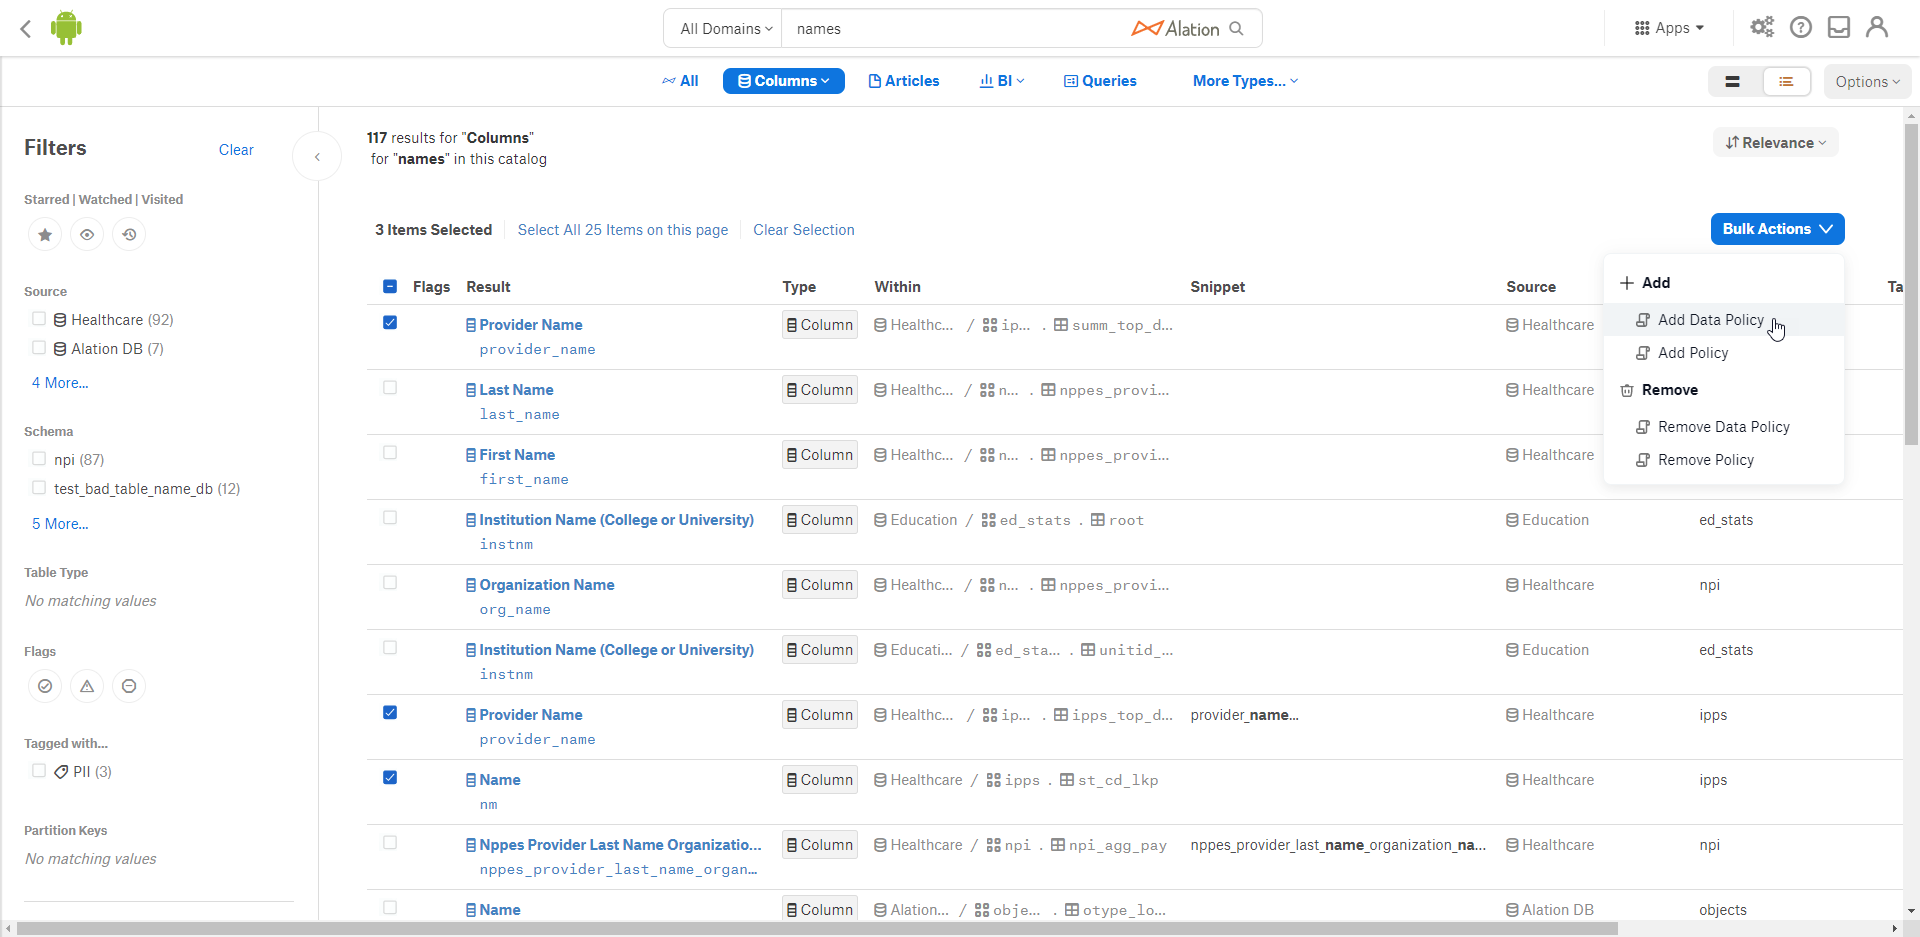
Click the Bulk Actions button and select Add Data Policy from the list of options.
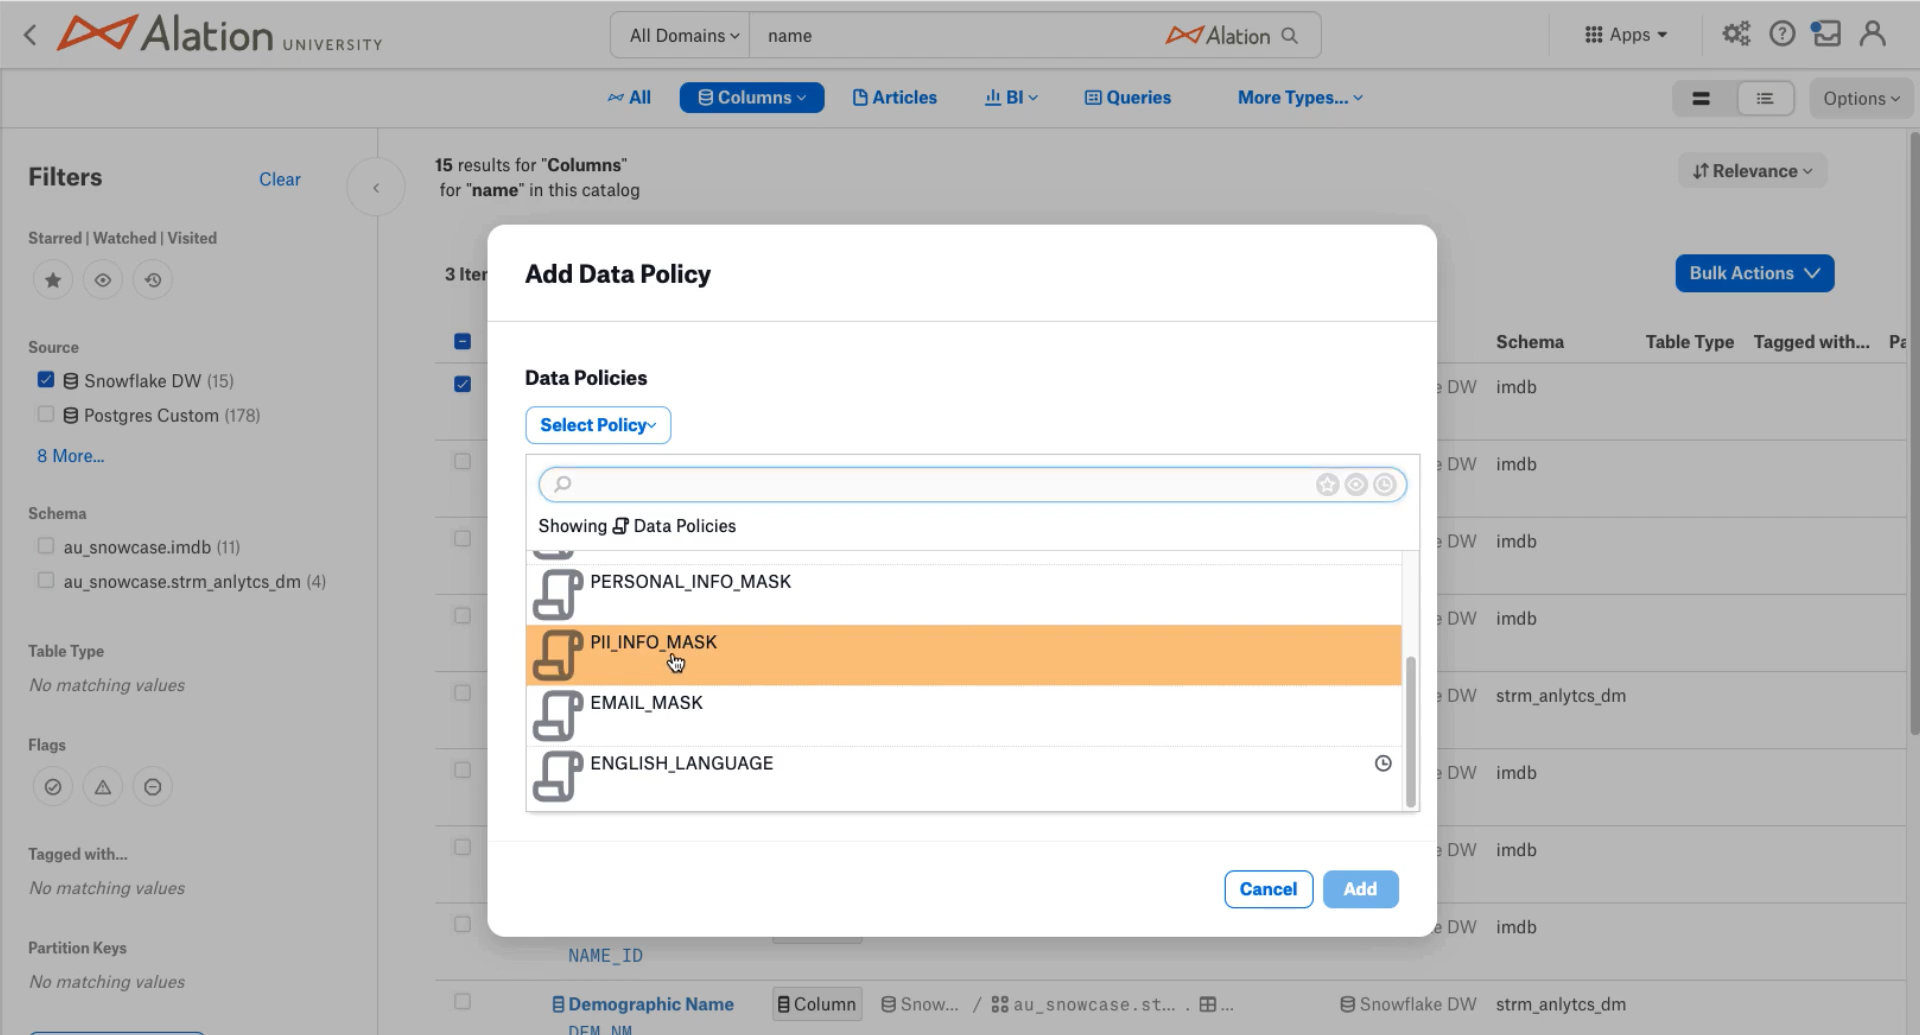
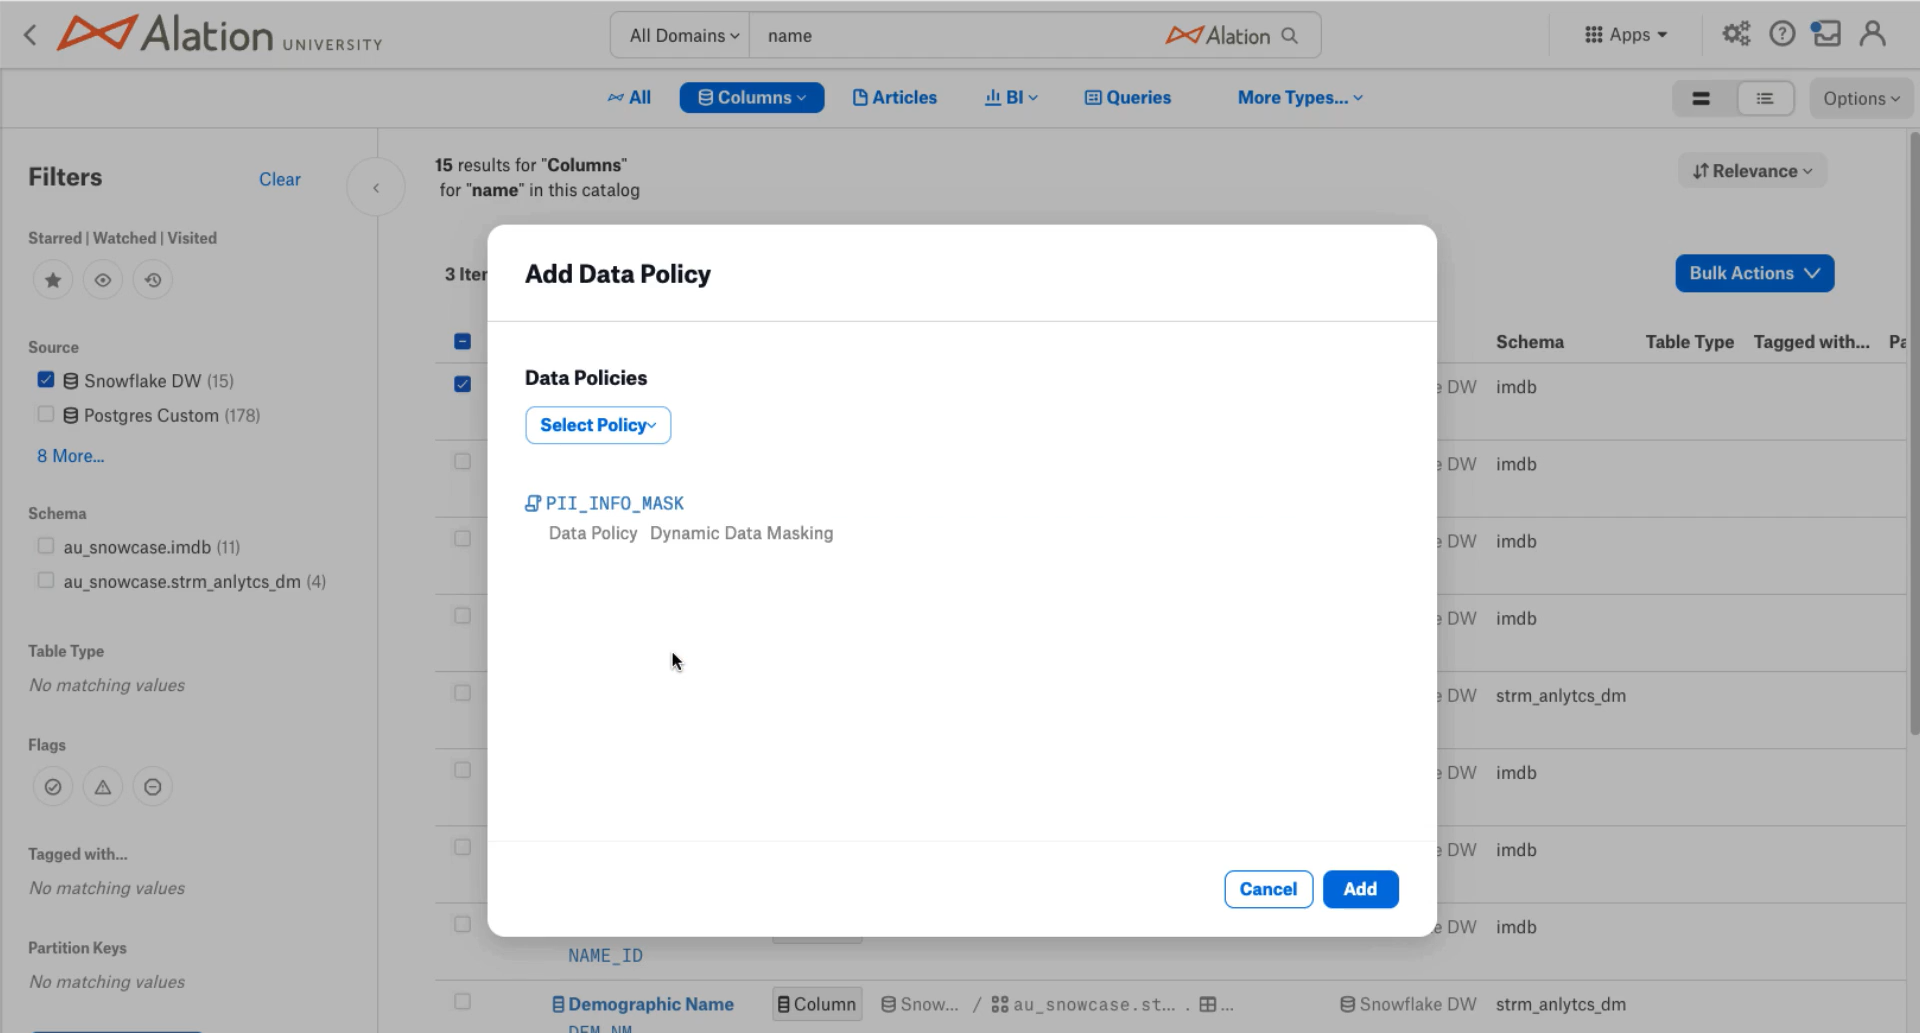
Click the Select Policy button.
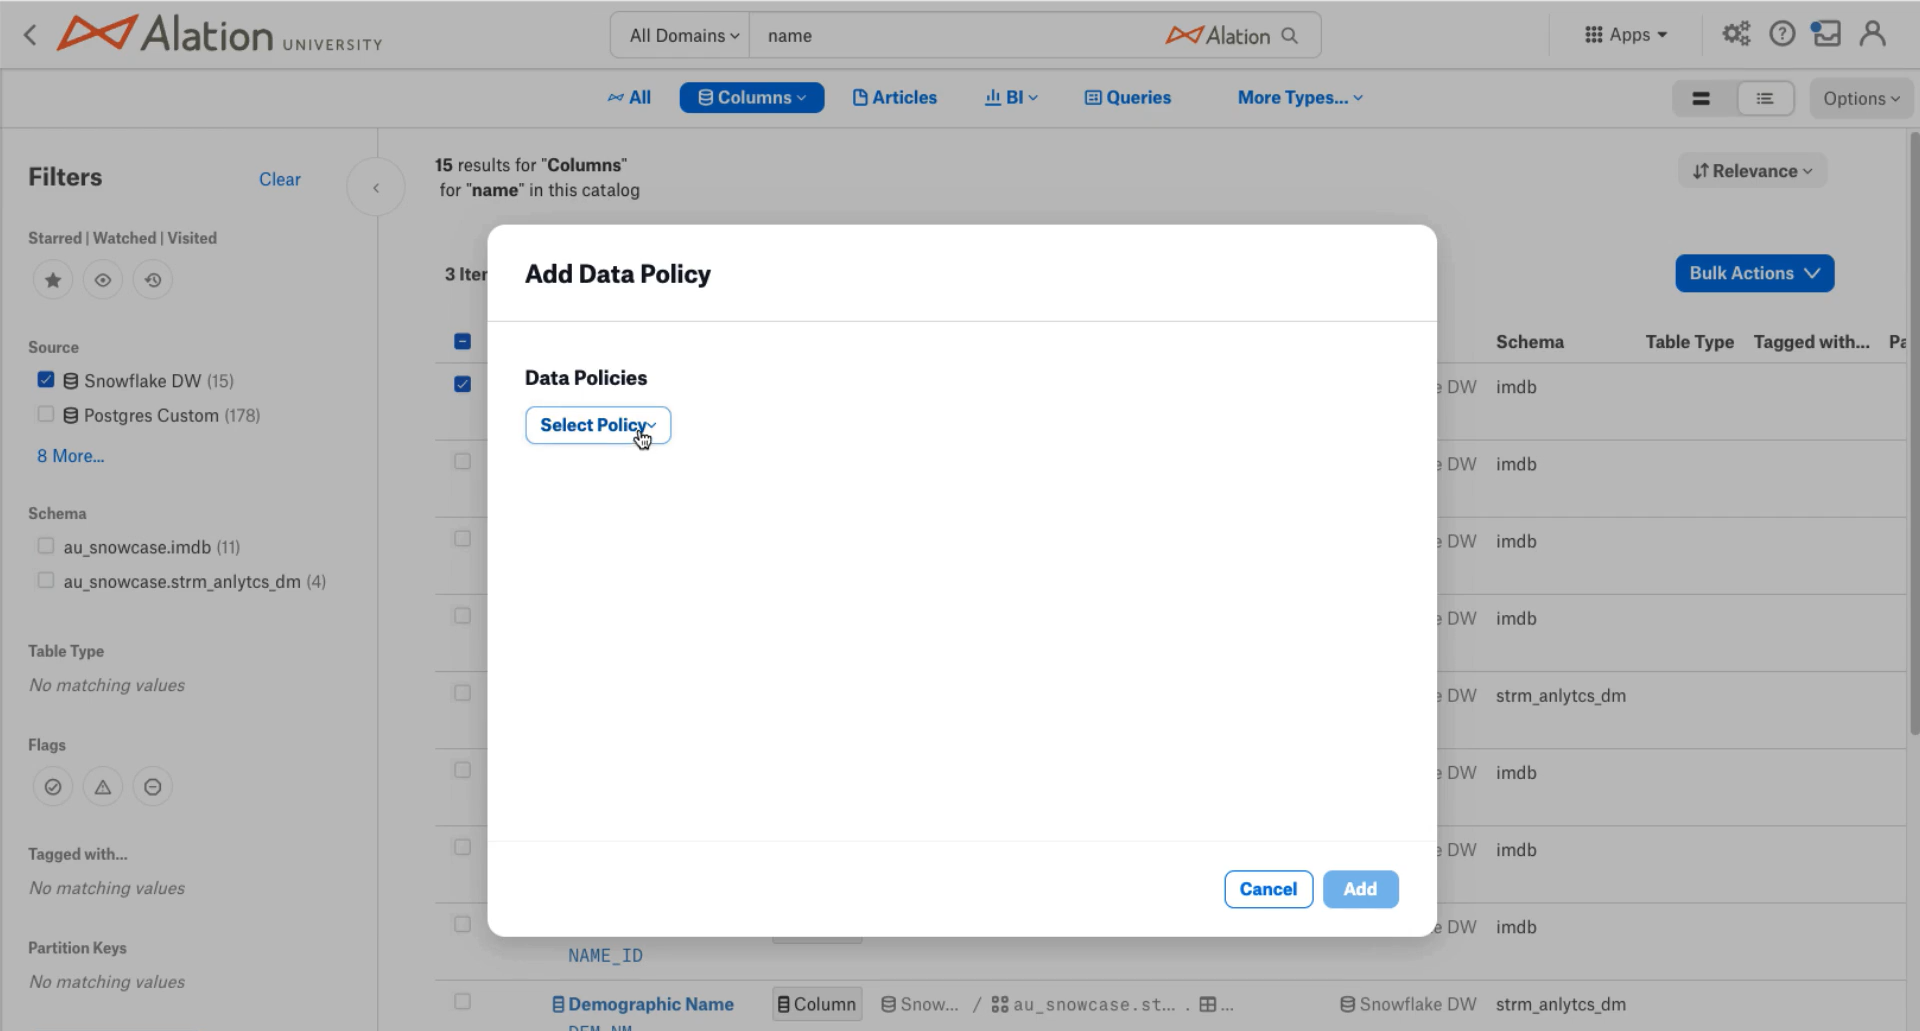
From the list, select a Dynamic Data Masking policy. If you are unsure which policy is for Dynamic Data Masking, you will need to go to the Policy Center and view the list of policies.
Click the Add button.
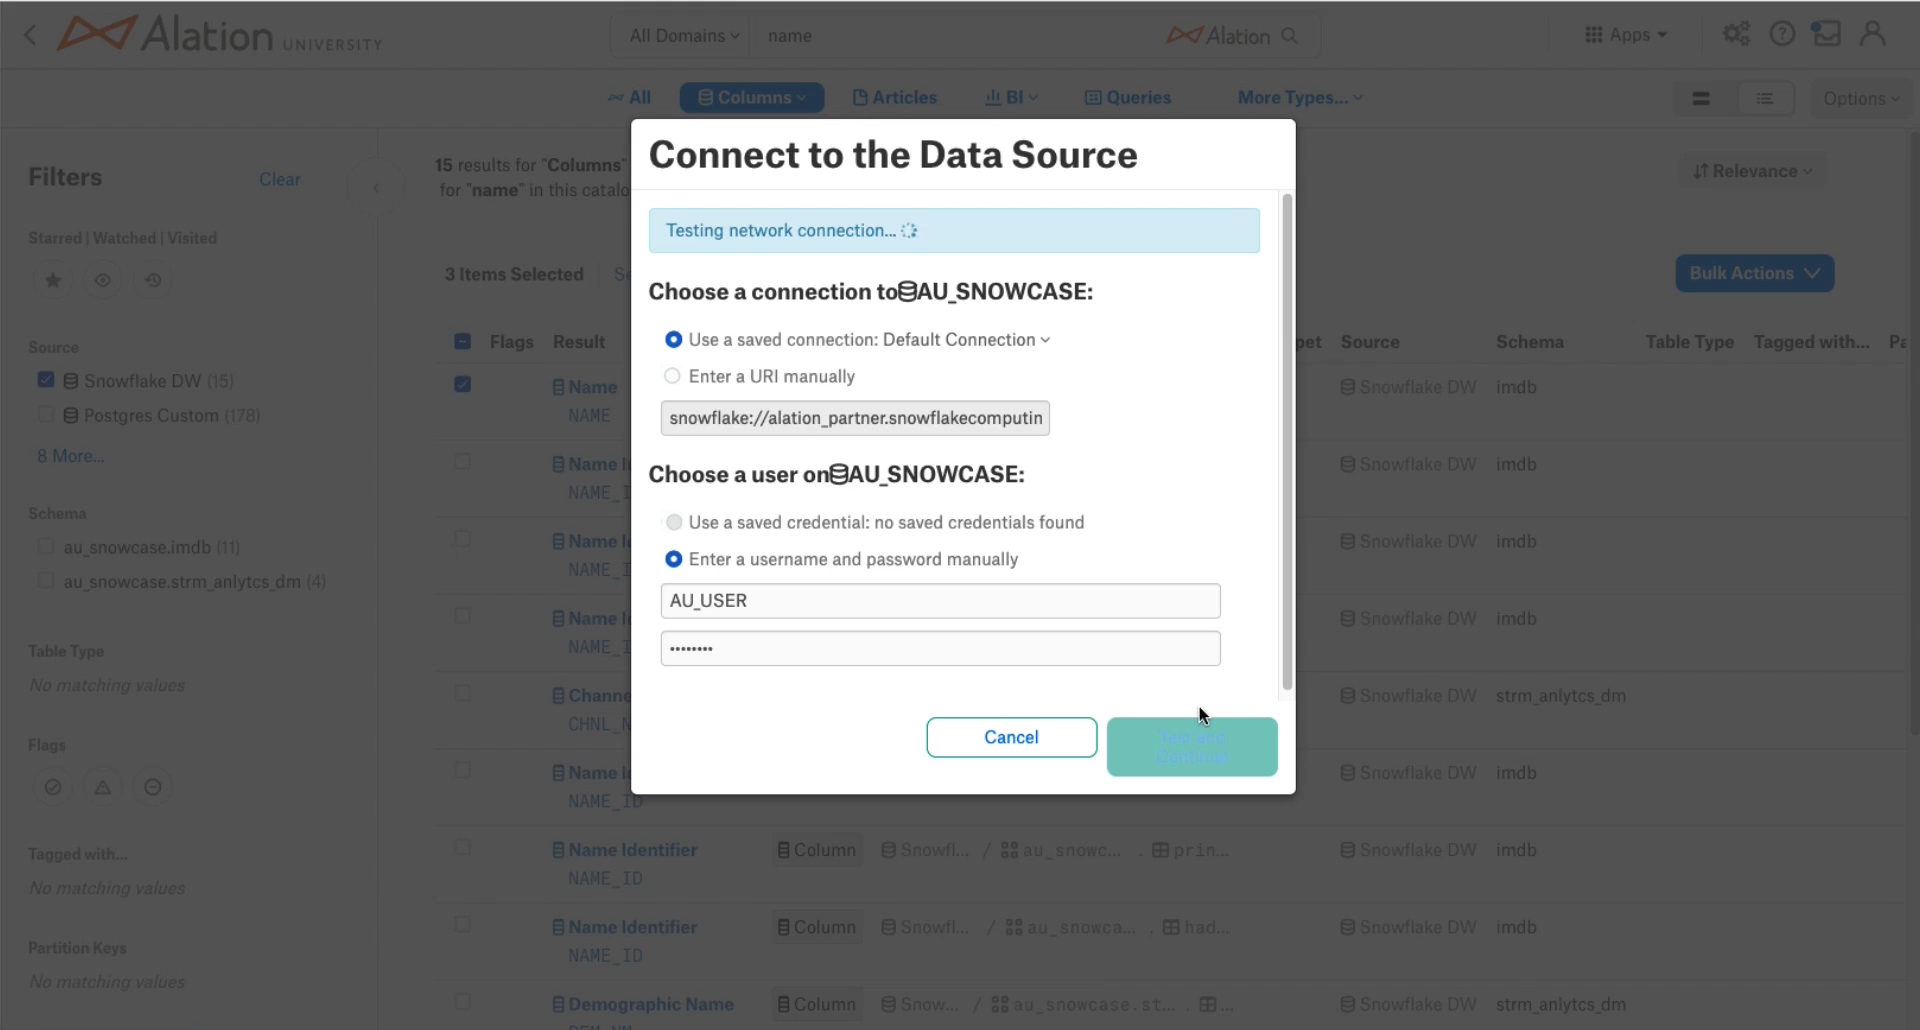
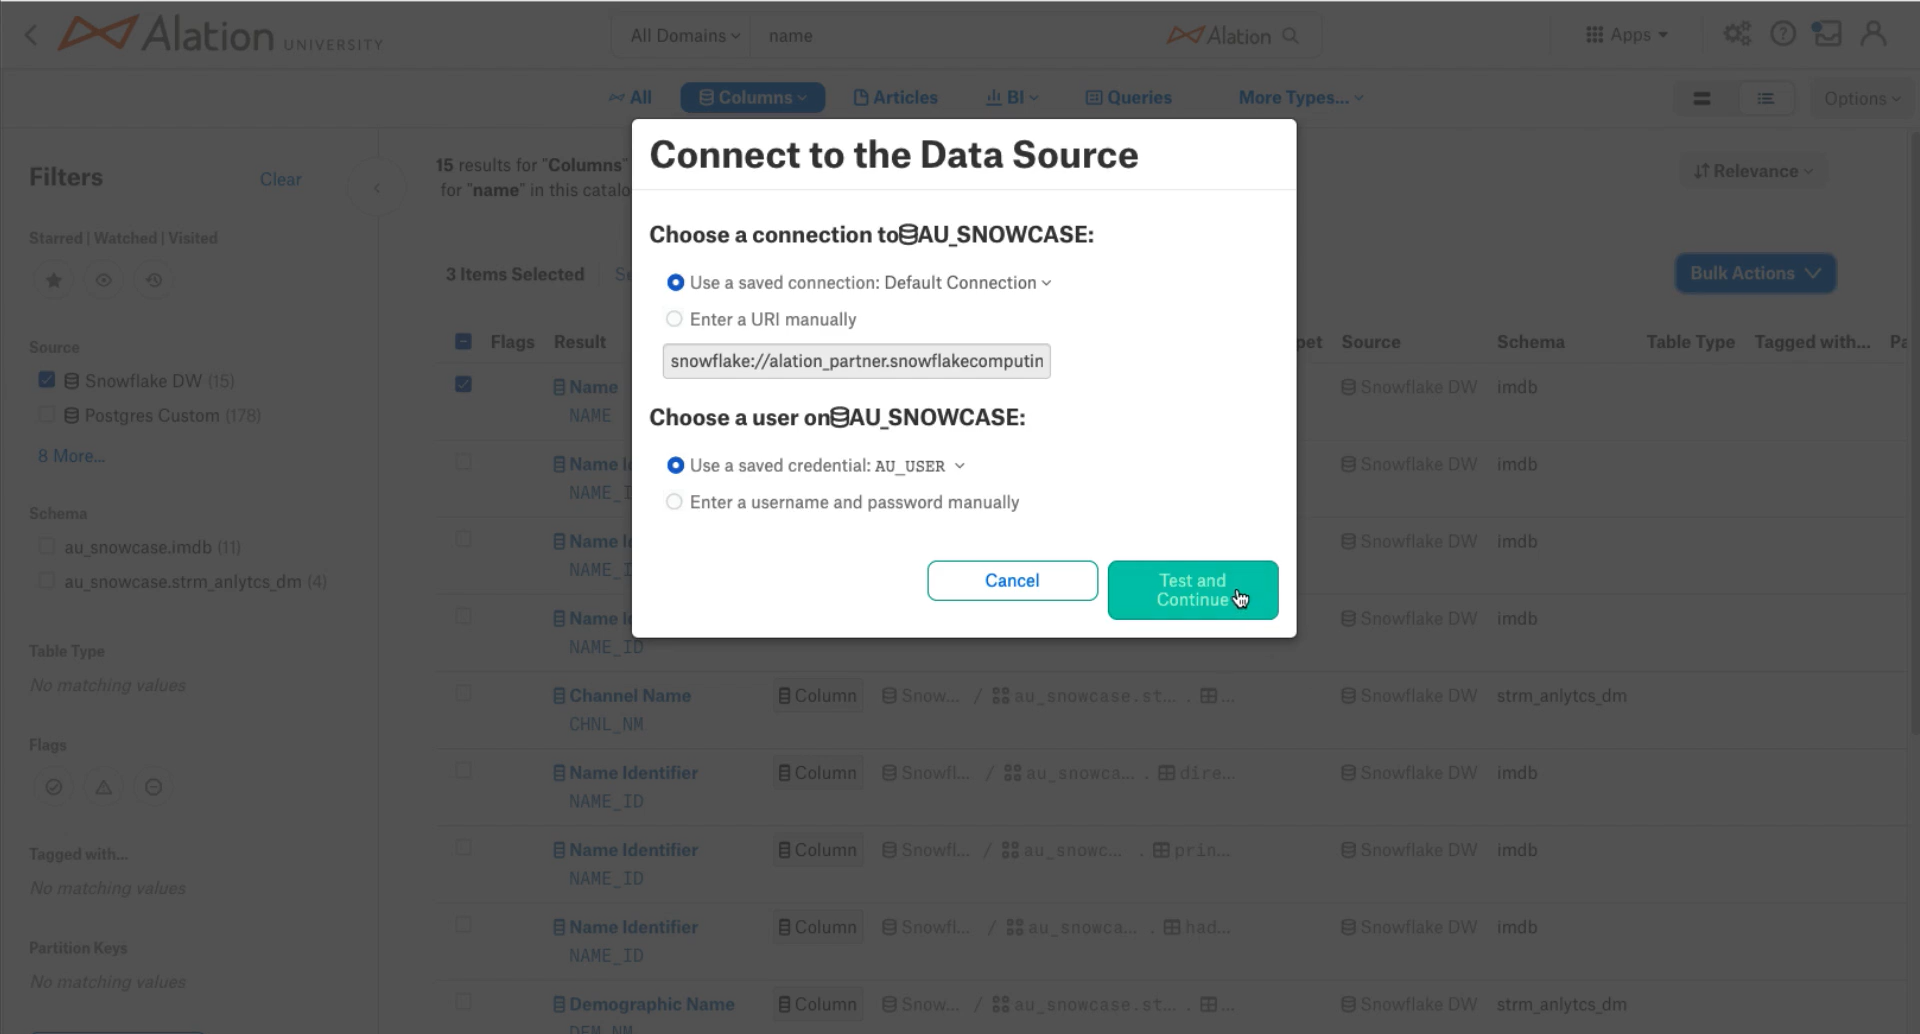
You will be prompted for credentials to the Snowflake data source. Once you have entered the appropriate credentials, you can click the Test and Continue button.
You will see a notification that the request to apply the data policy has been sent and that you will receive an email notification when it is complete.

Bulk Remove Data Policy
After filtering the results to only show the data objects that you want to edit, select the checkboxes for the columns you want to remove the data policy from. If you would like to remove the data policy from all columns, select the checkbox in the header row.
Click the Bulk Actions button and select Remove Data Policy from the list of options.
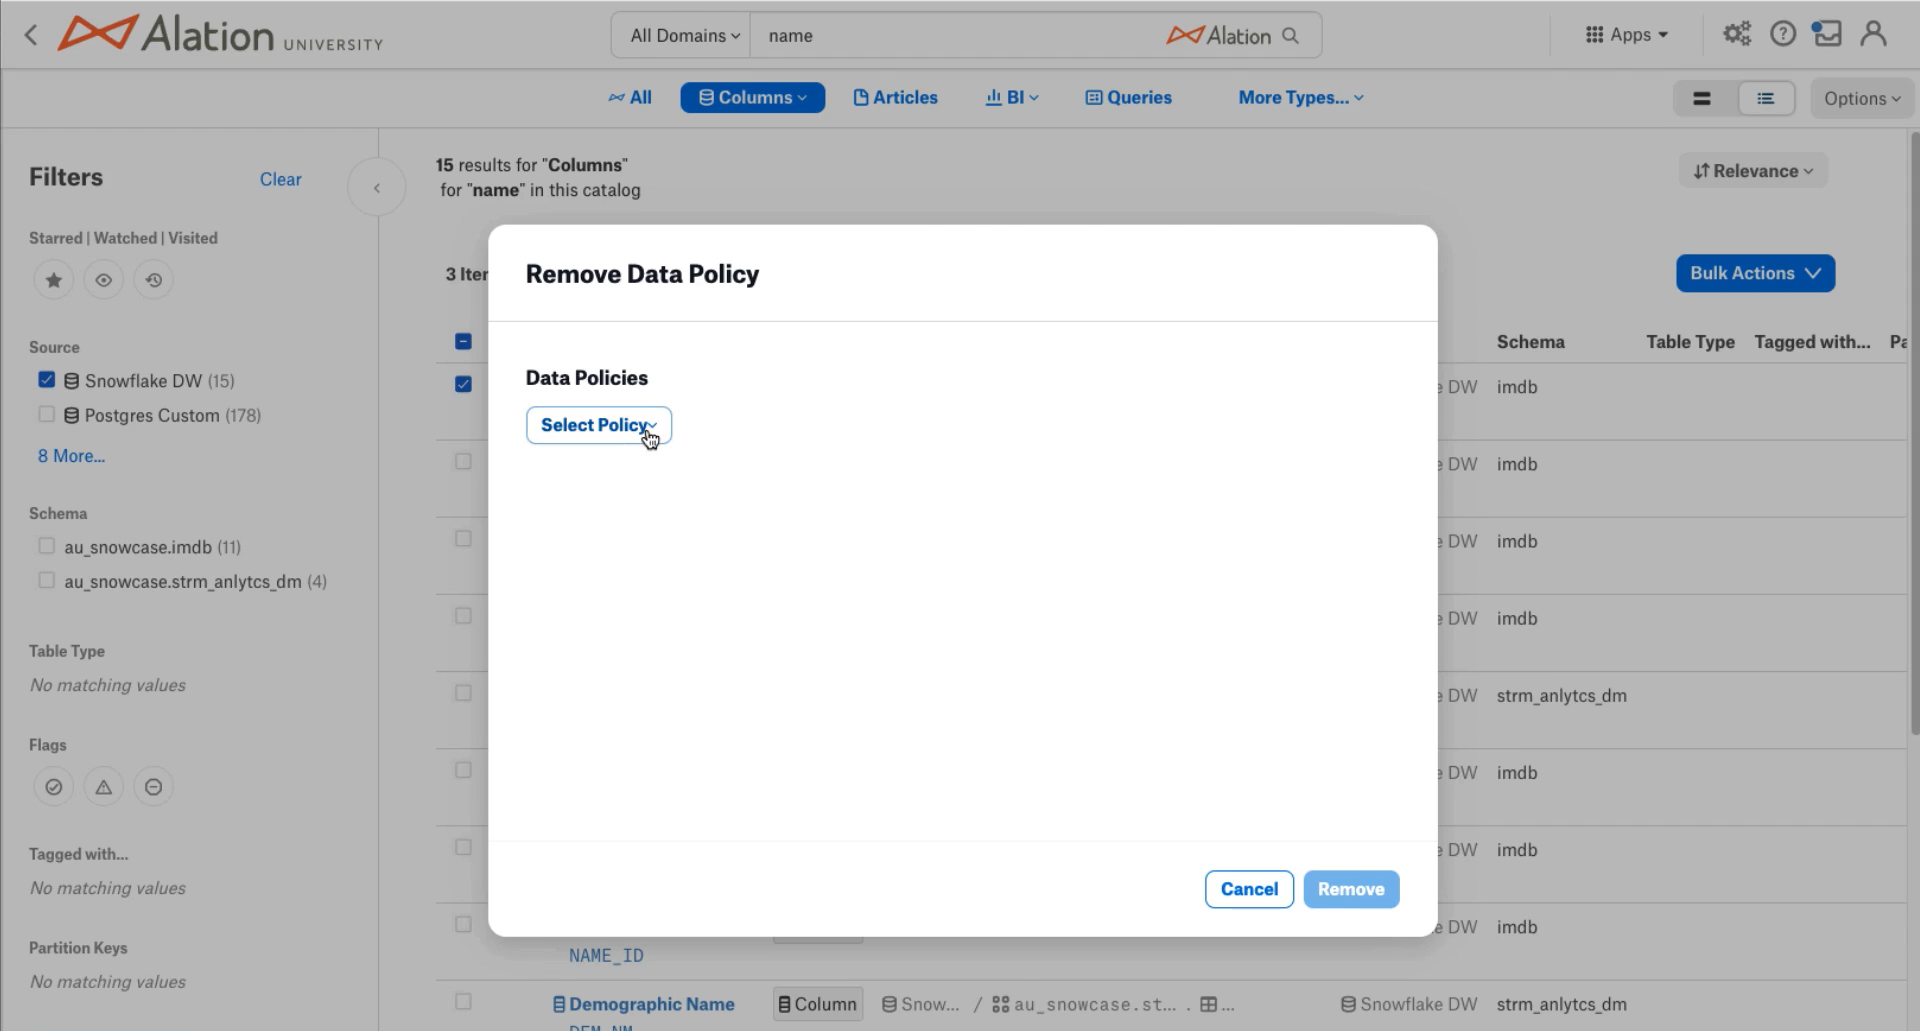
Click the Select Policy button.
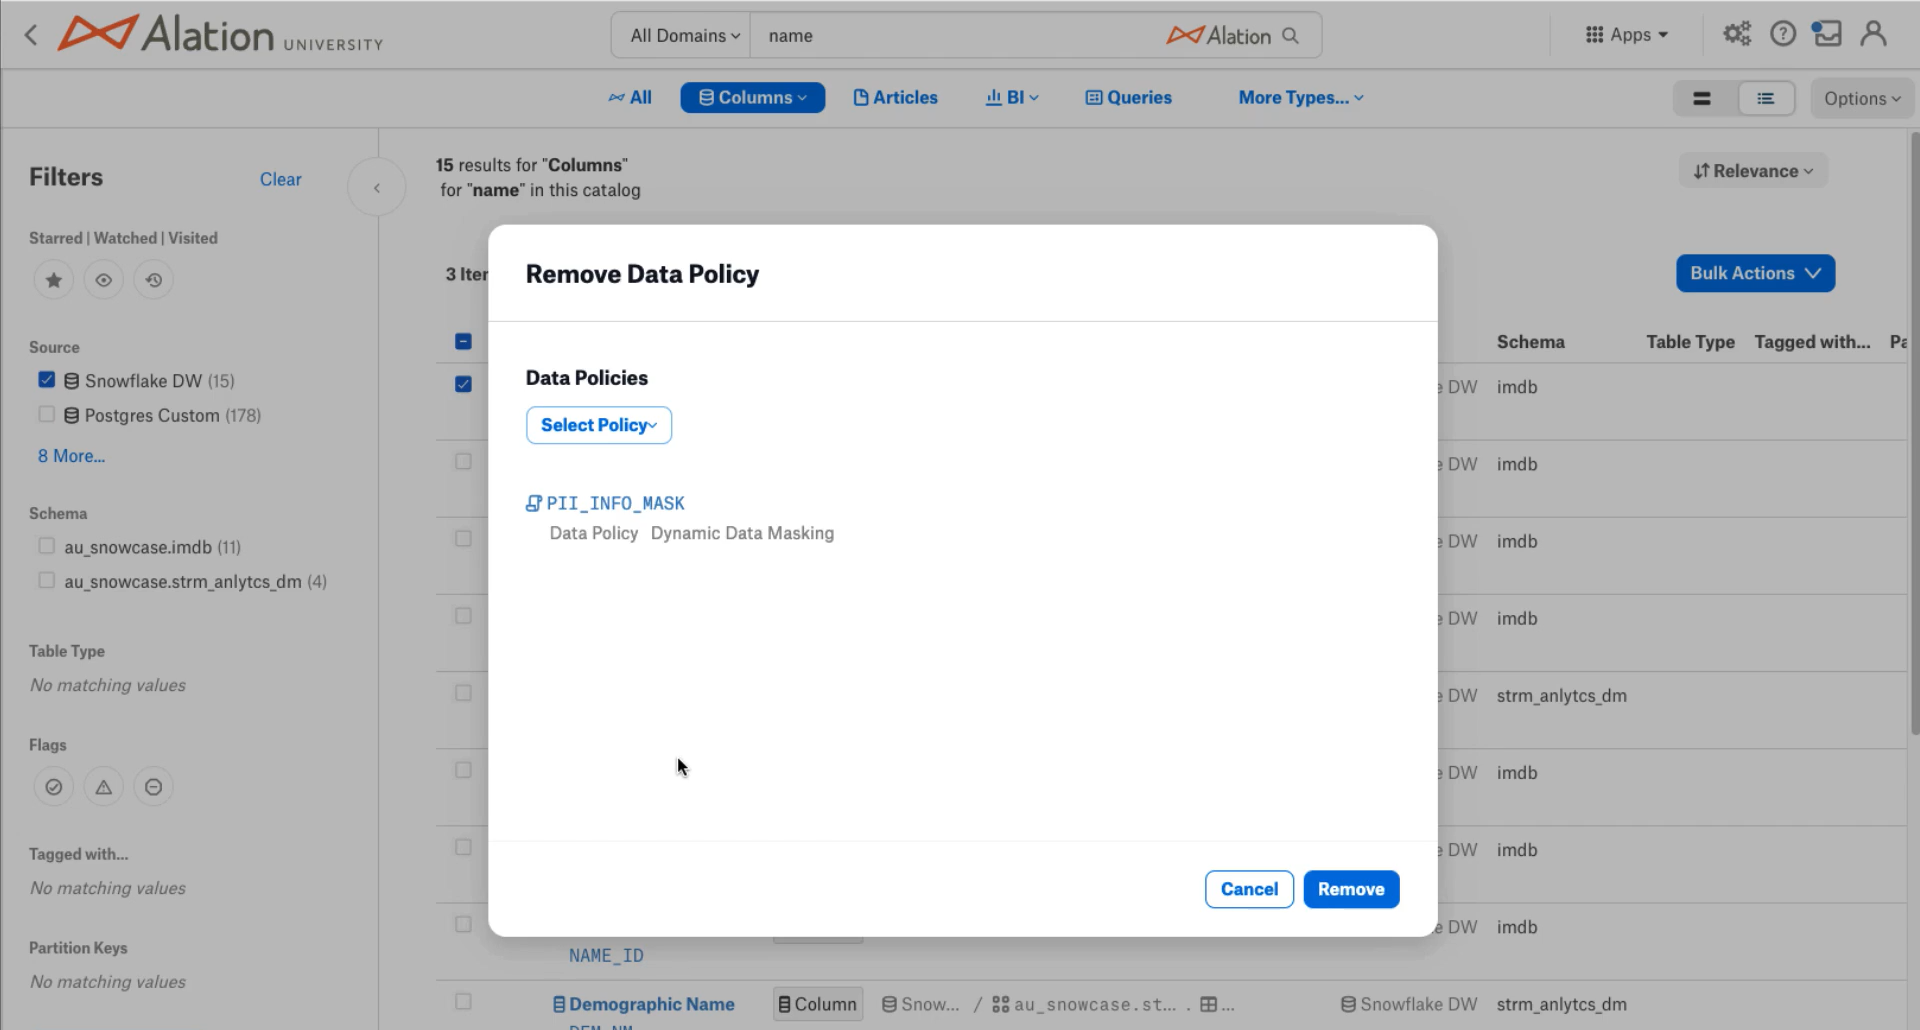
From the list, select the Dynamic Data Masking policy you want to remove.
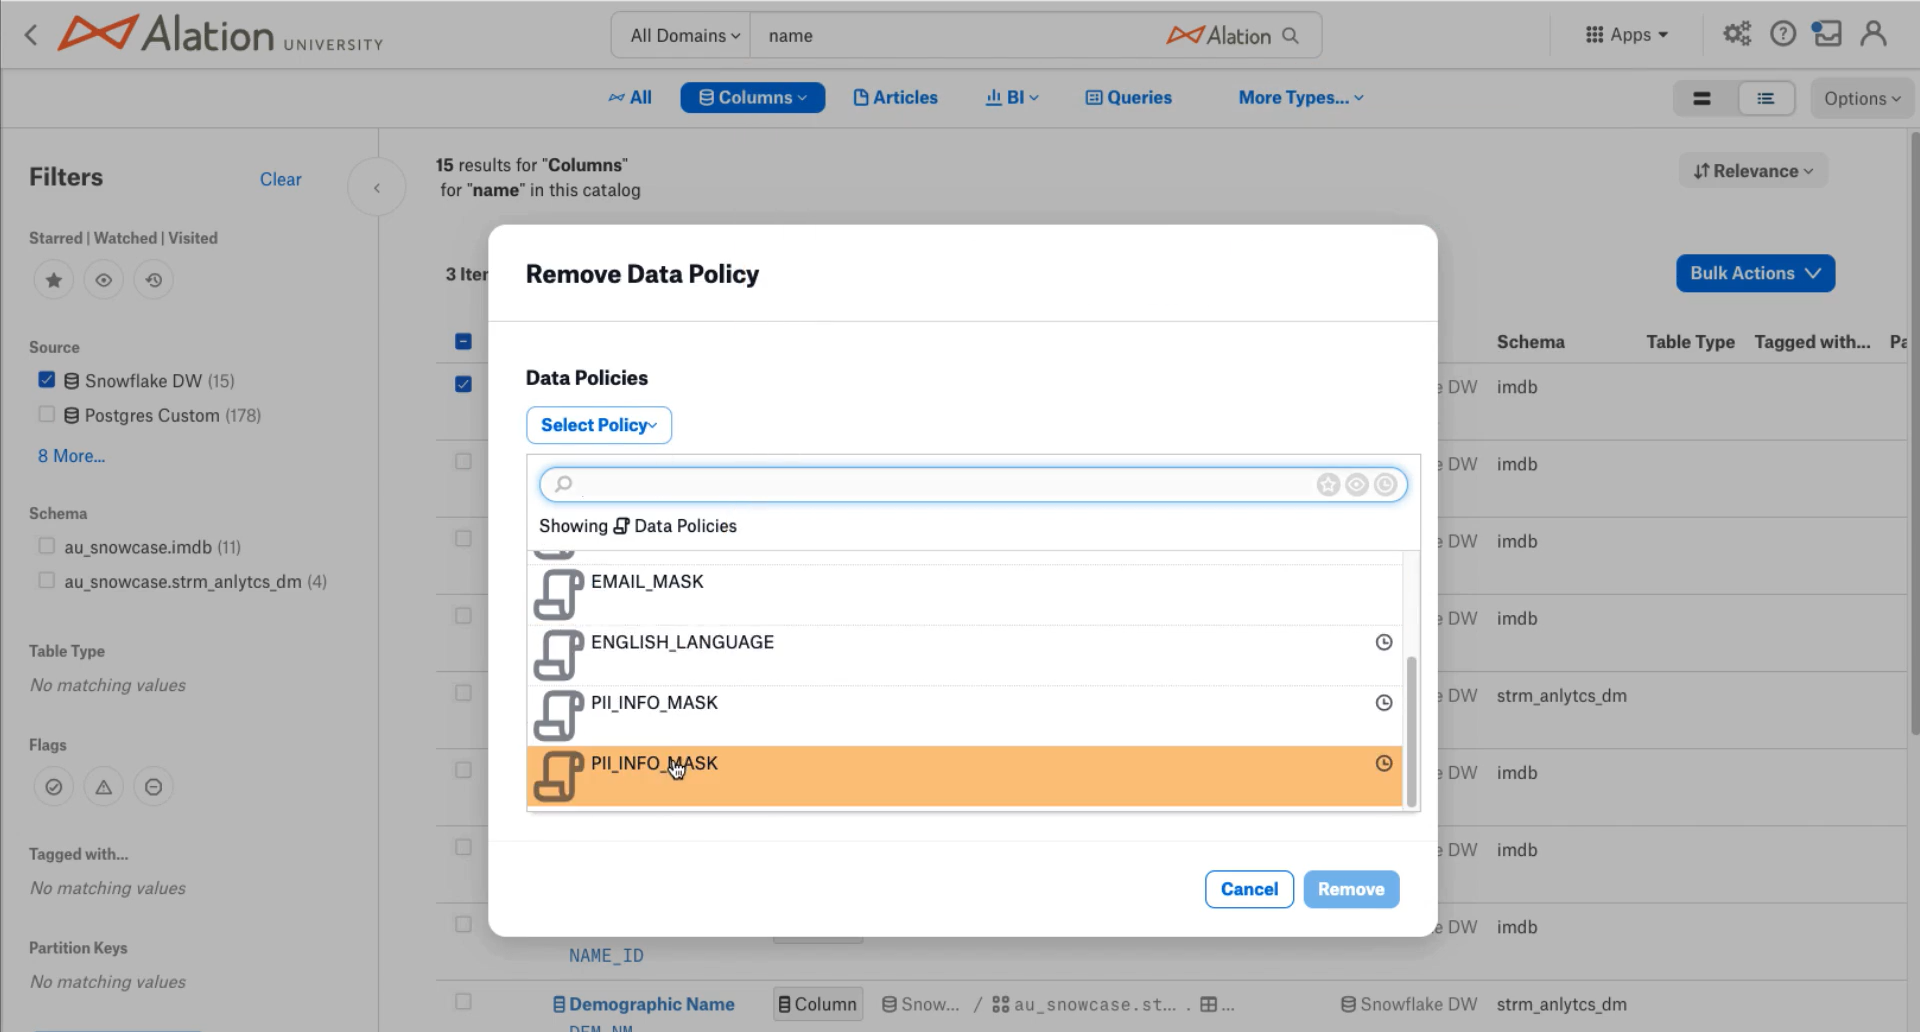
Click the Remove button.
You will be prompted for credentials to the Snowflake data source. Once you have entered the appropriate credentials, you can click the Test and Continue button.
You will see a notification that the request to remove the data policy has been sent and that you will receive an email notification when it is complete.

Bulk Add Policy
In 2022.1.3 and later, the ability to add policies in bulk was incorporated into Stewardship Workbench.
Note
An Object Set custom field must be created and added to the Policy catalog template page in order to perform bulk addition of policy to objects.
After filtering the results to only show the objects that you want to edit, select the checkboxes for the objects you want to apply the policy to. If you would like to add the policy to all objects, select the checkbox in the header row.
Note
If objects are selected to add a policy to for which a policy cannot be applied, an error message will display.
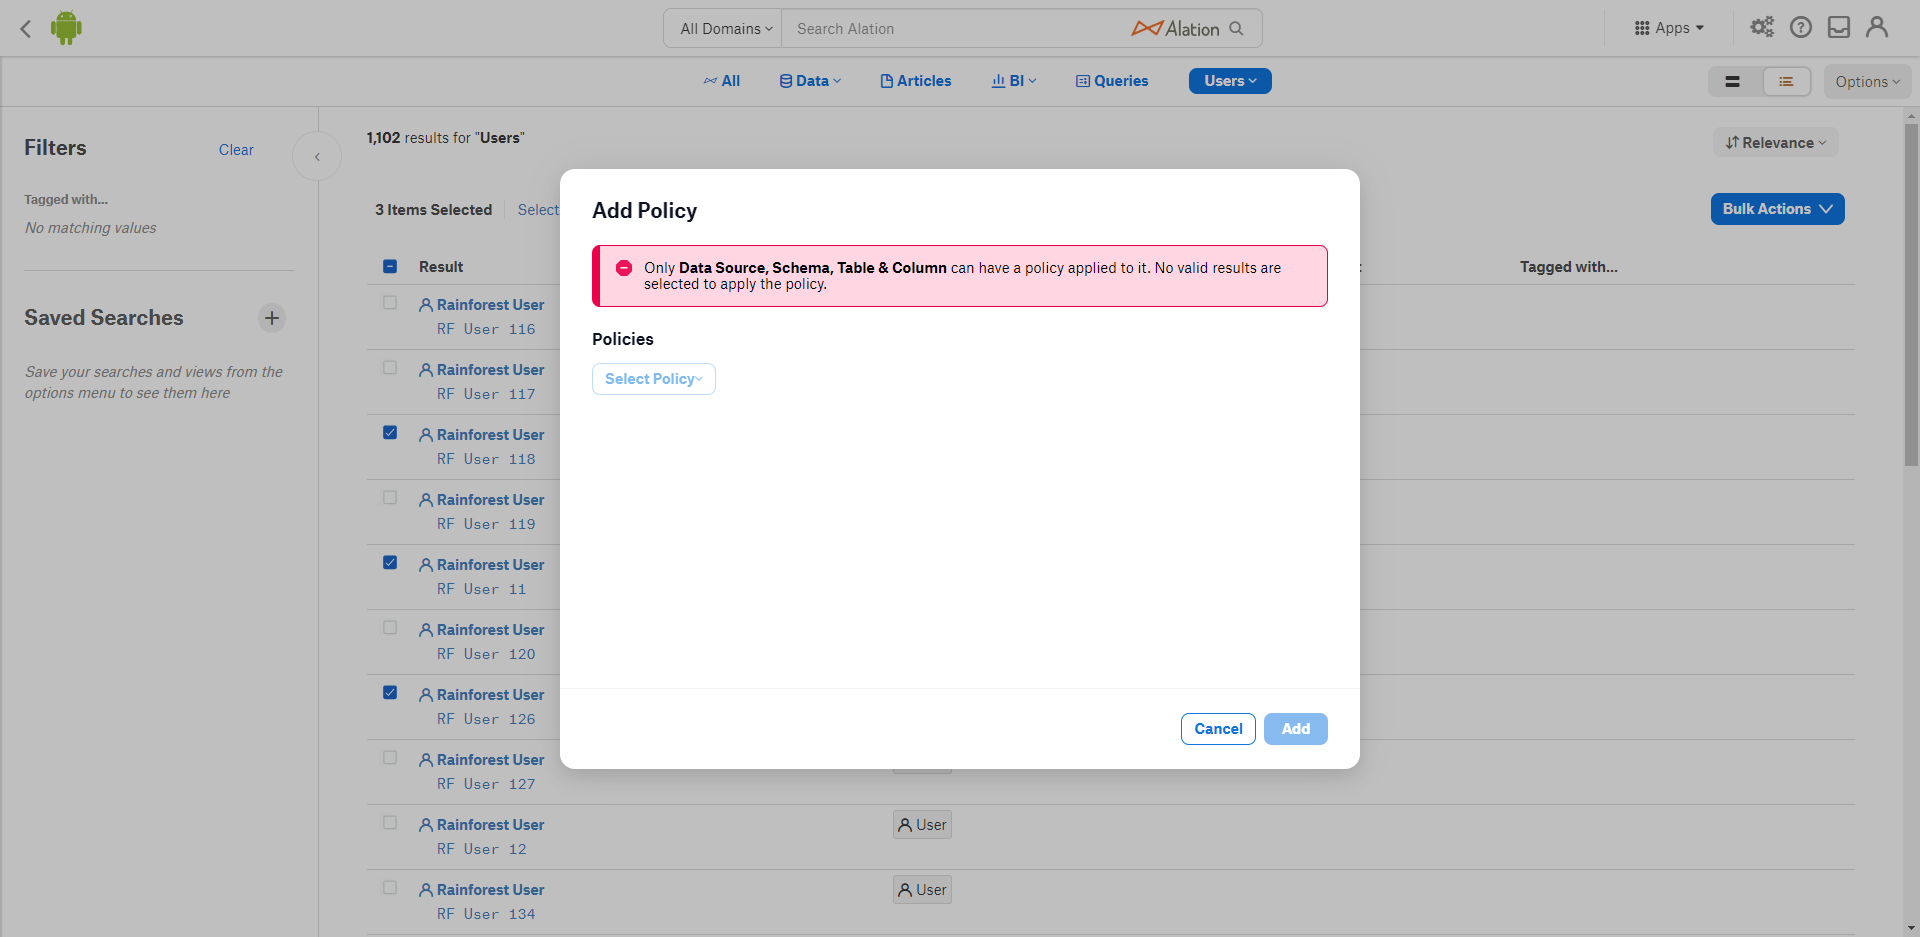
Click the Bulk Actions button and select Add Policy from the list of options.
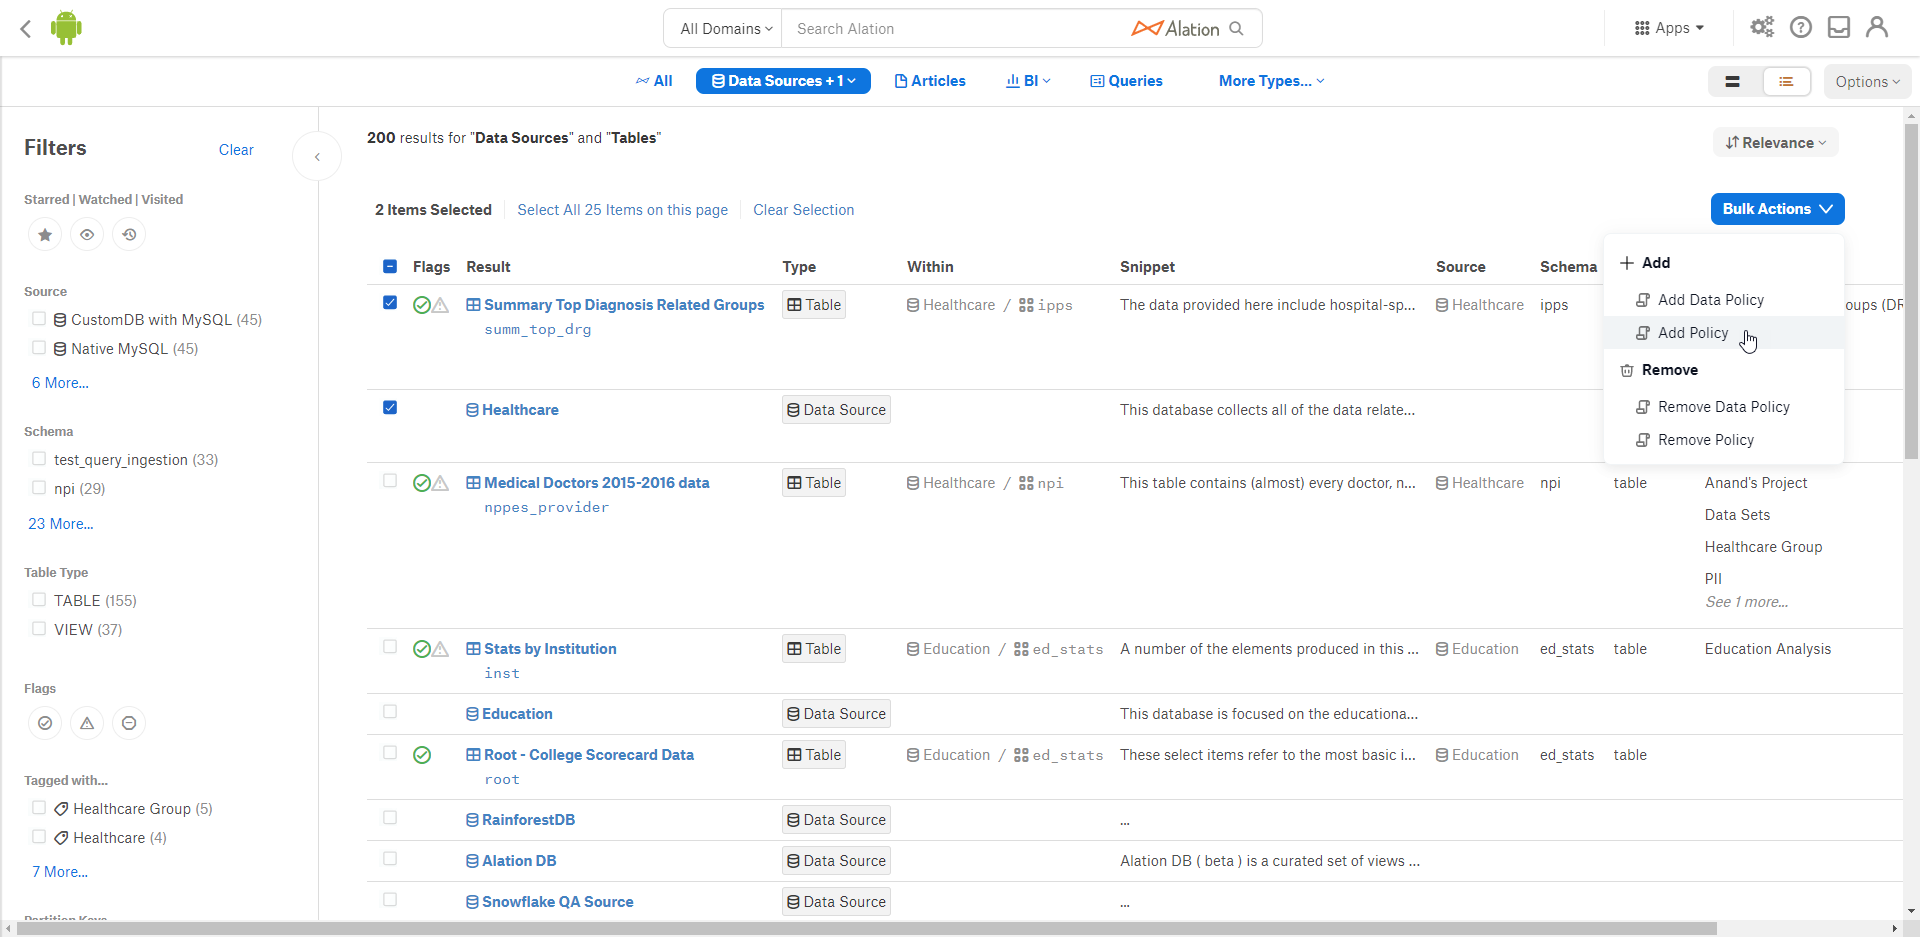
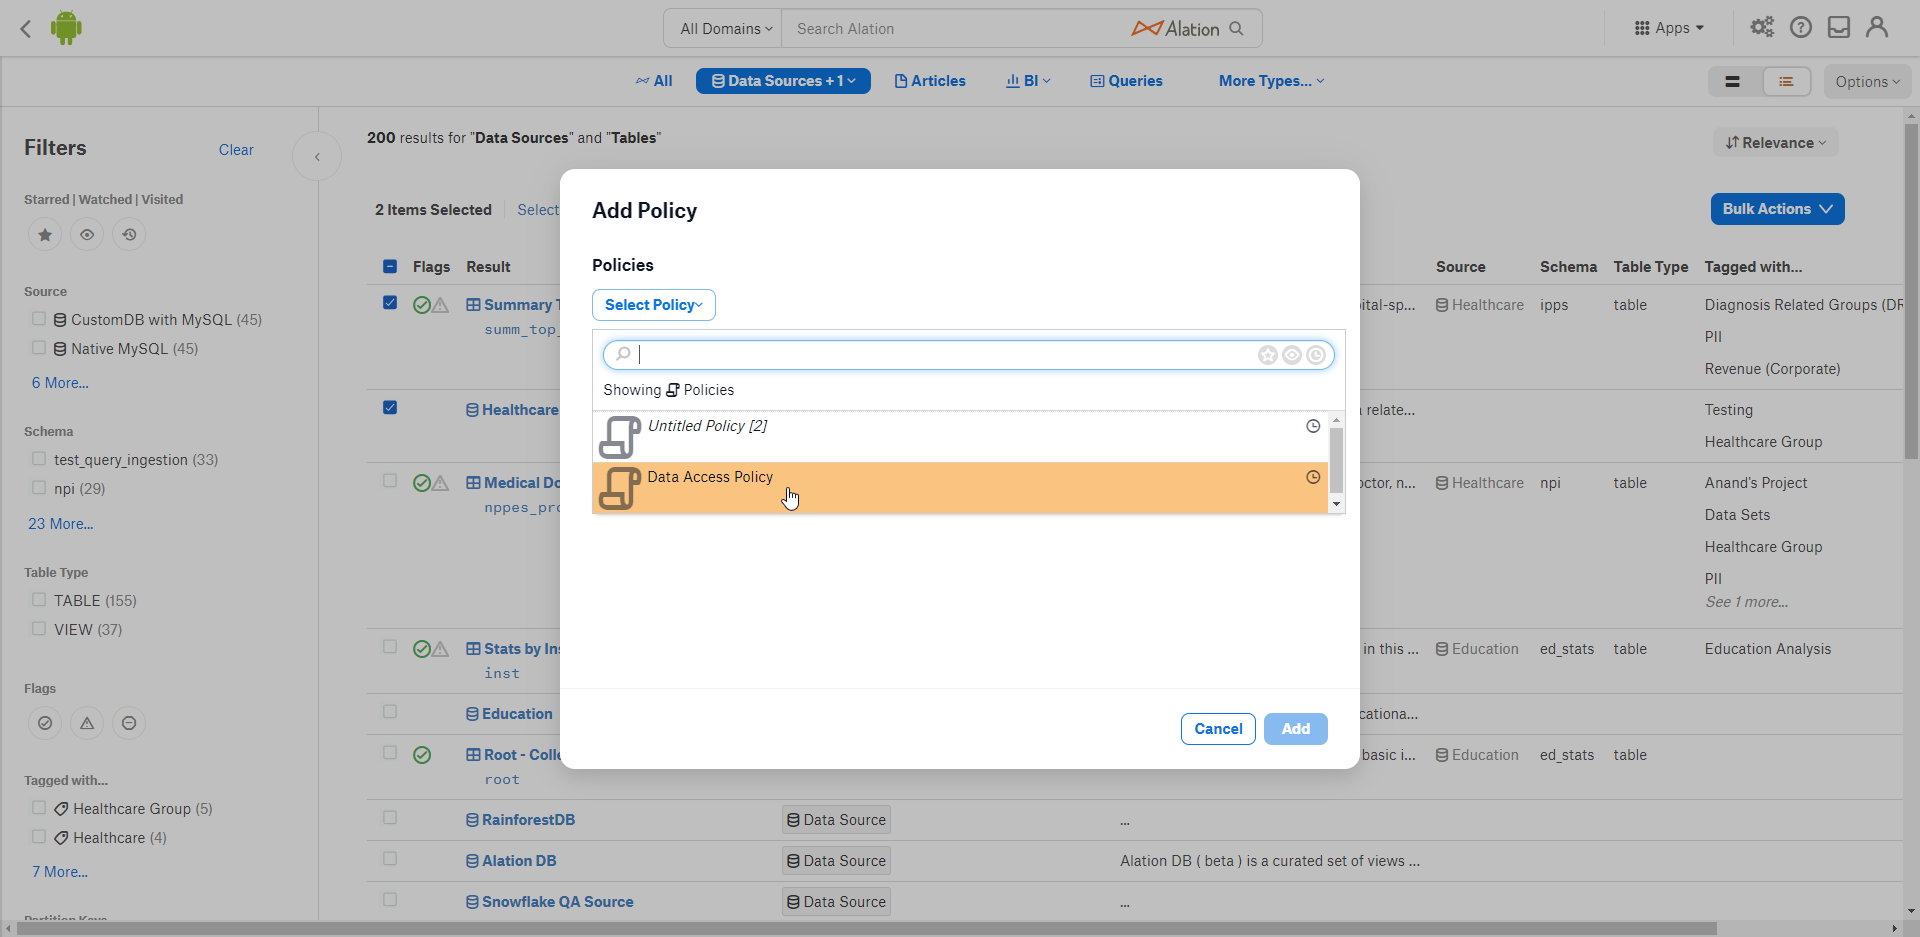
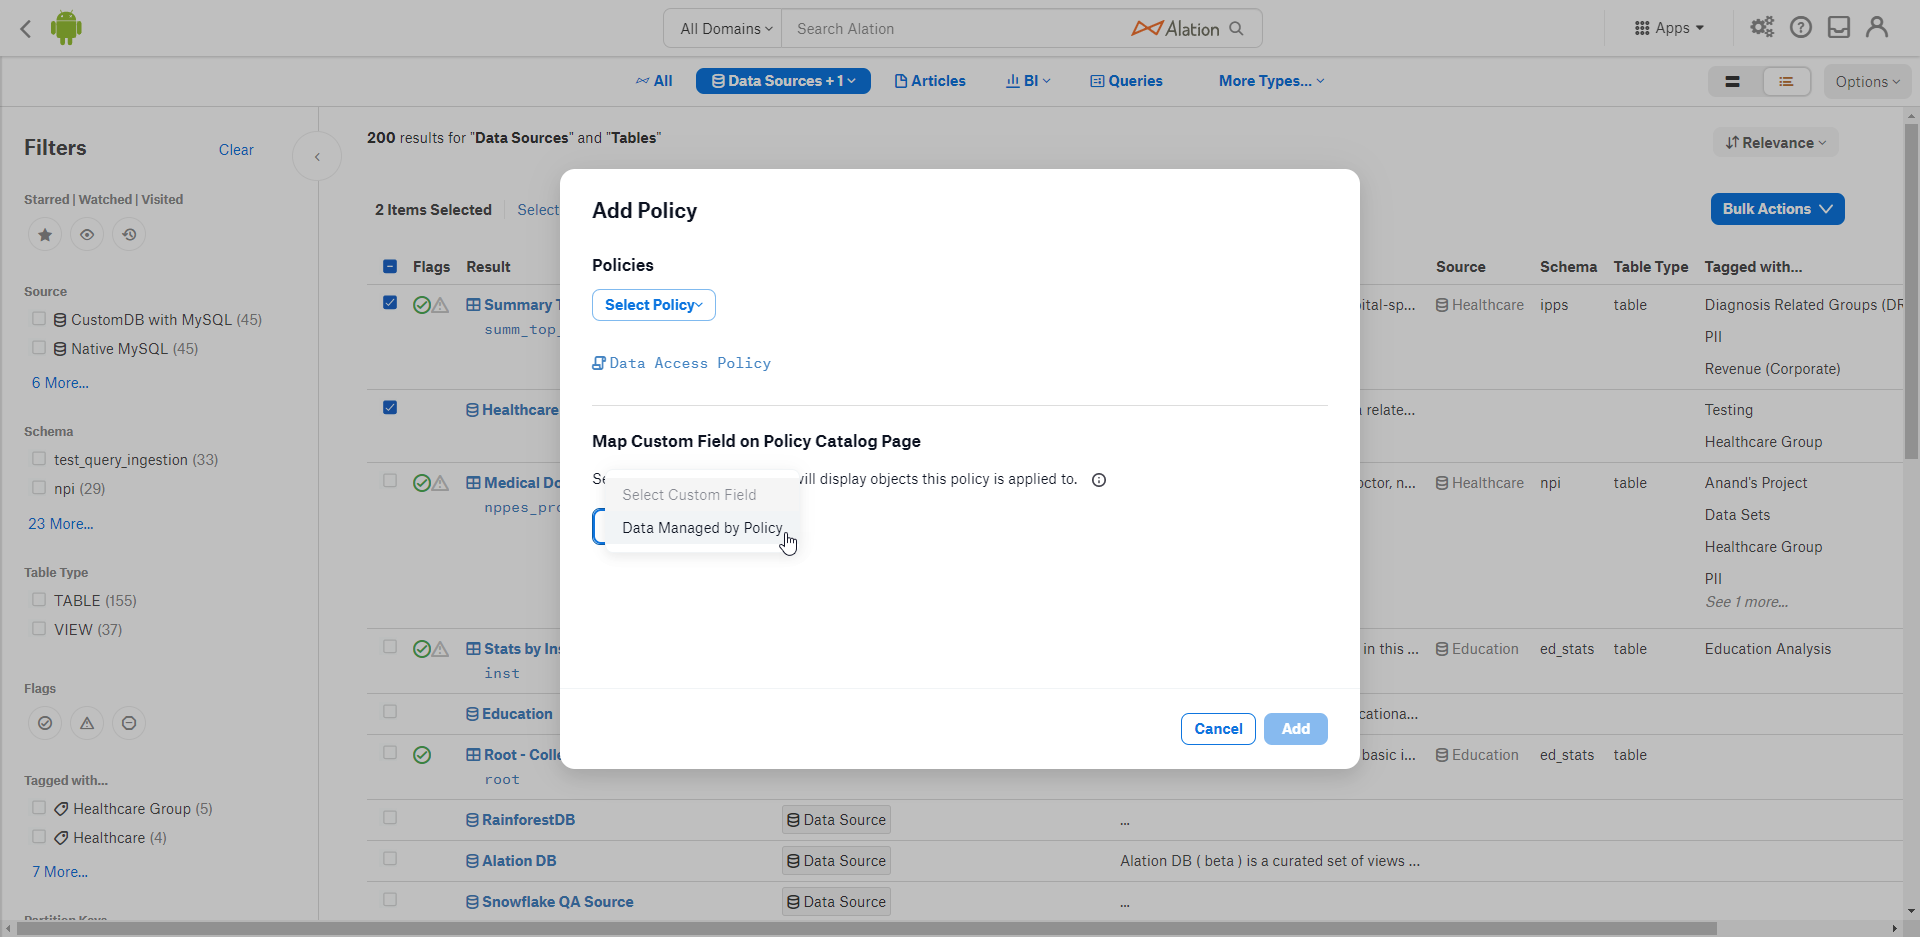
Click the Select Policy button.
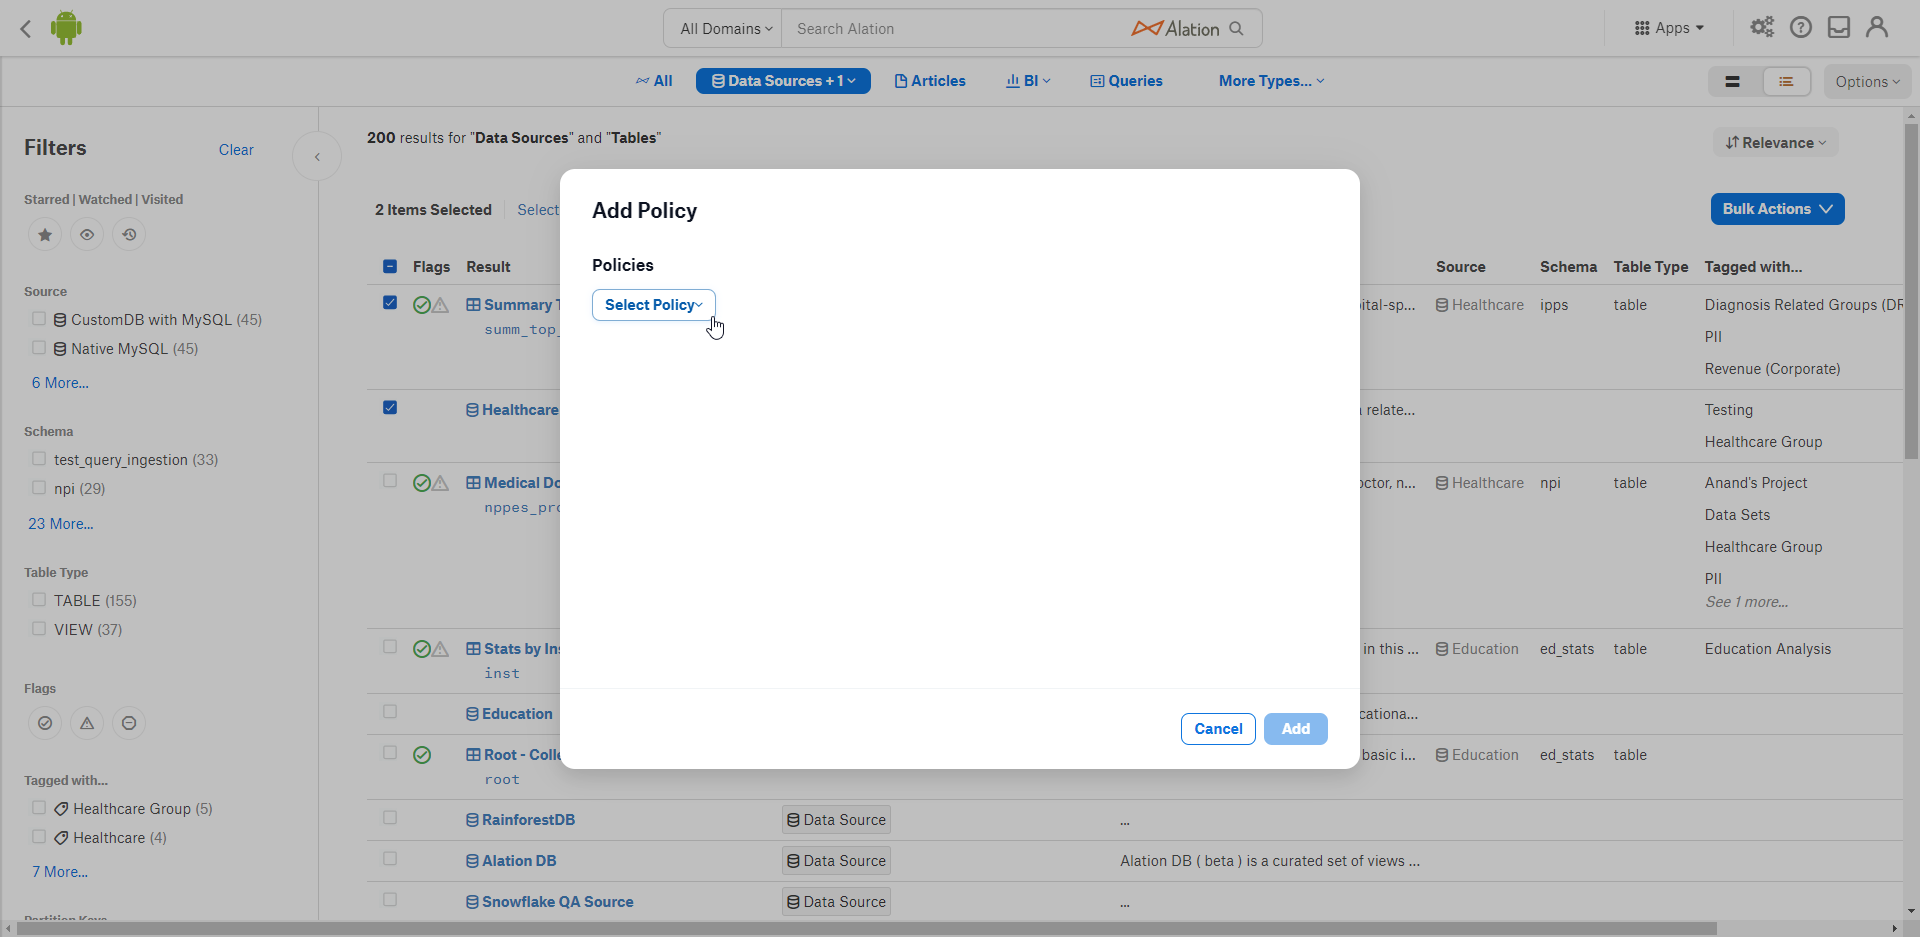
From the list, select a policy. If you are unsure which policy should be applied or would like to modify the policy, you will need to go to the Policy Center to view and edit the list of policies.
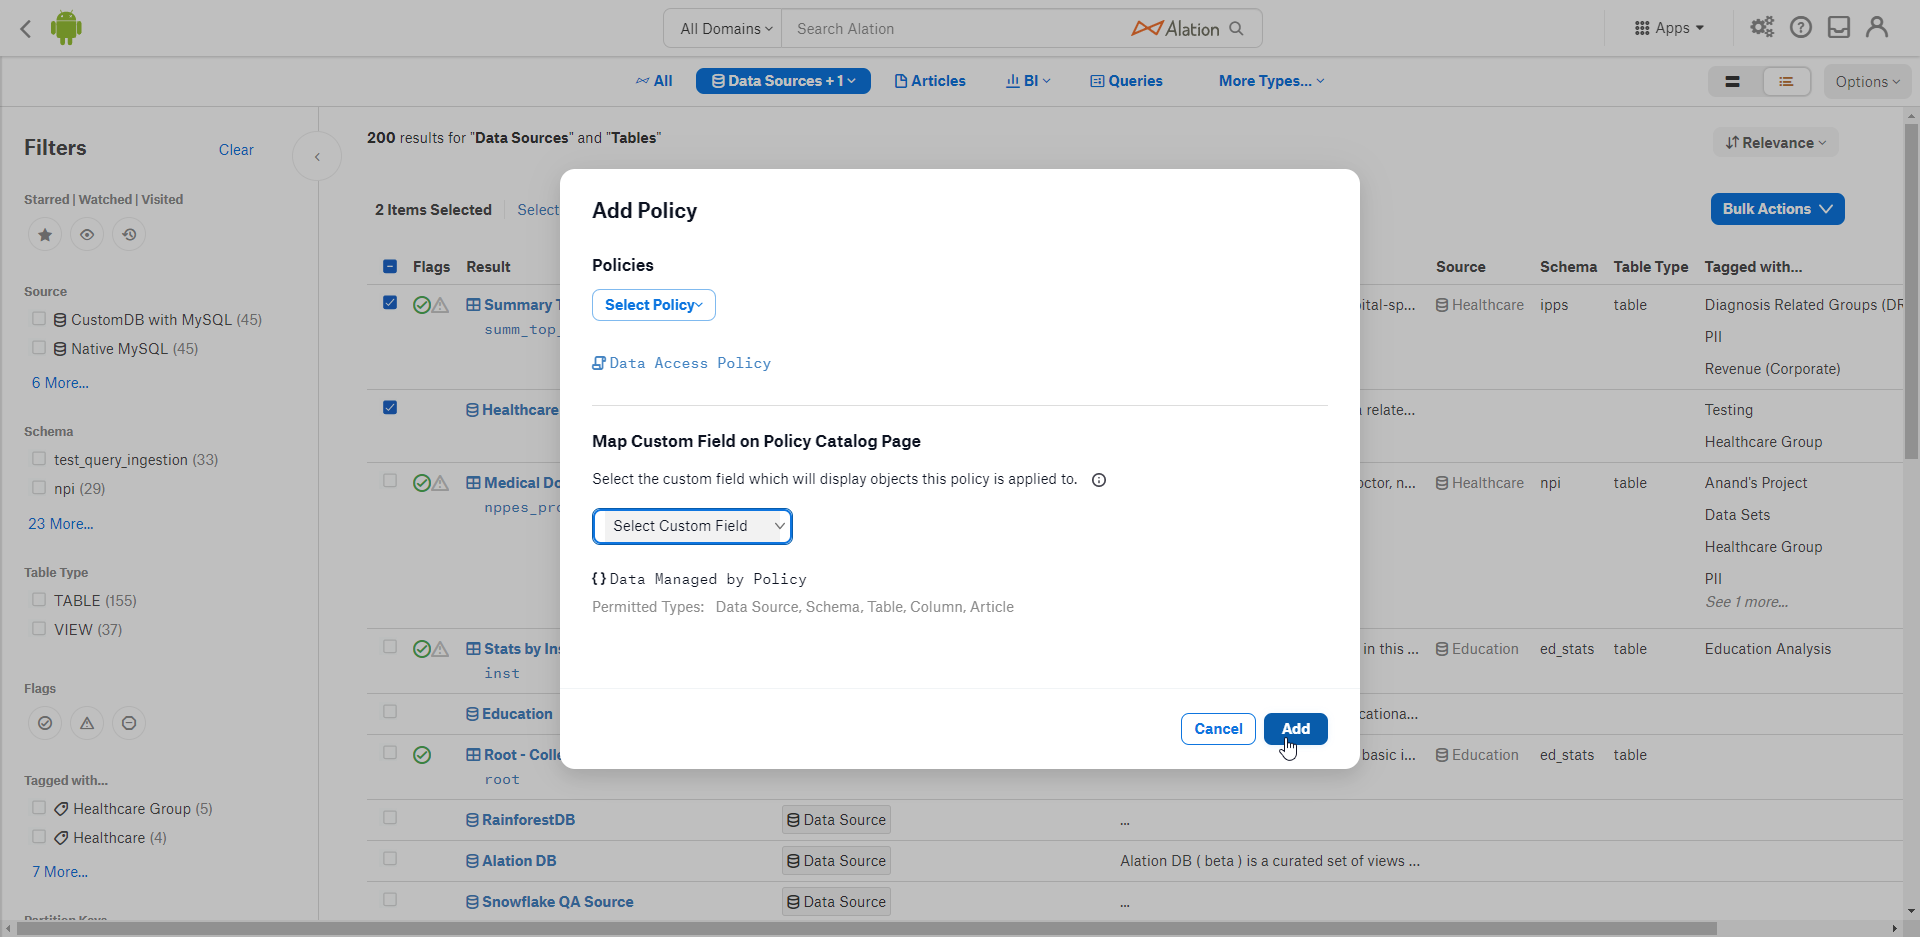
From the Select Custom Field list, select the custom field which will display objects this policy is applied to.
Click the Add button.
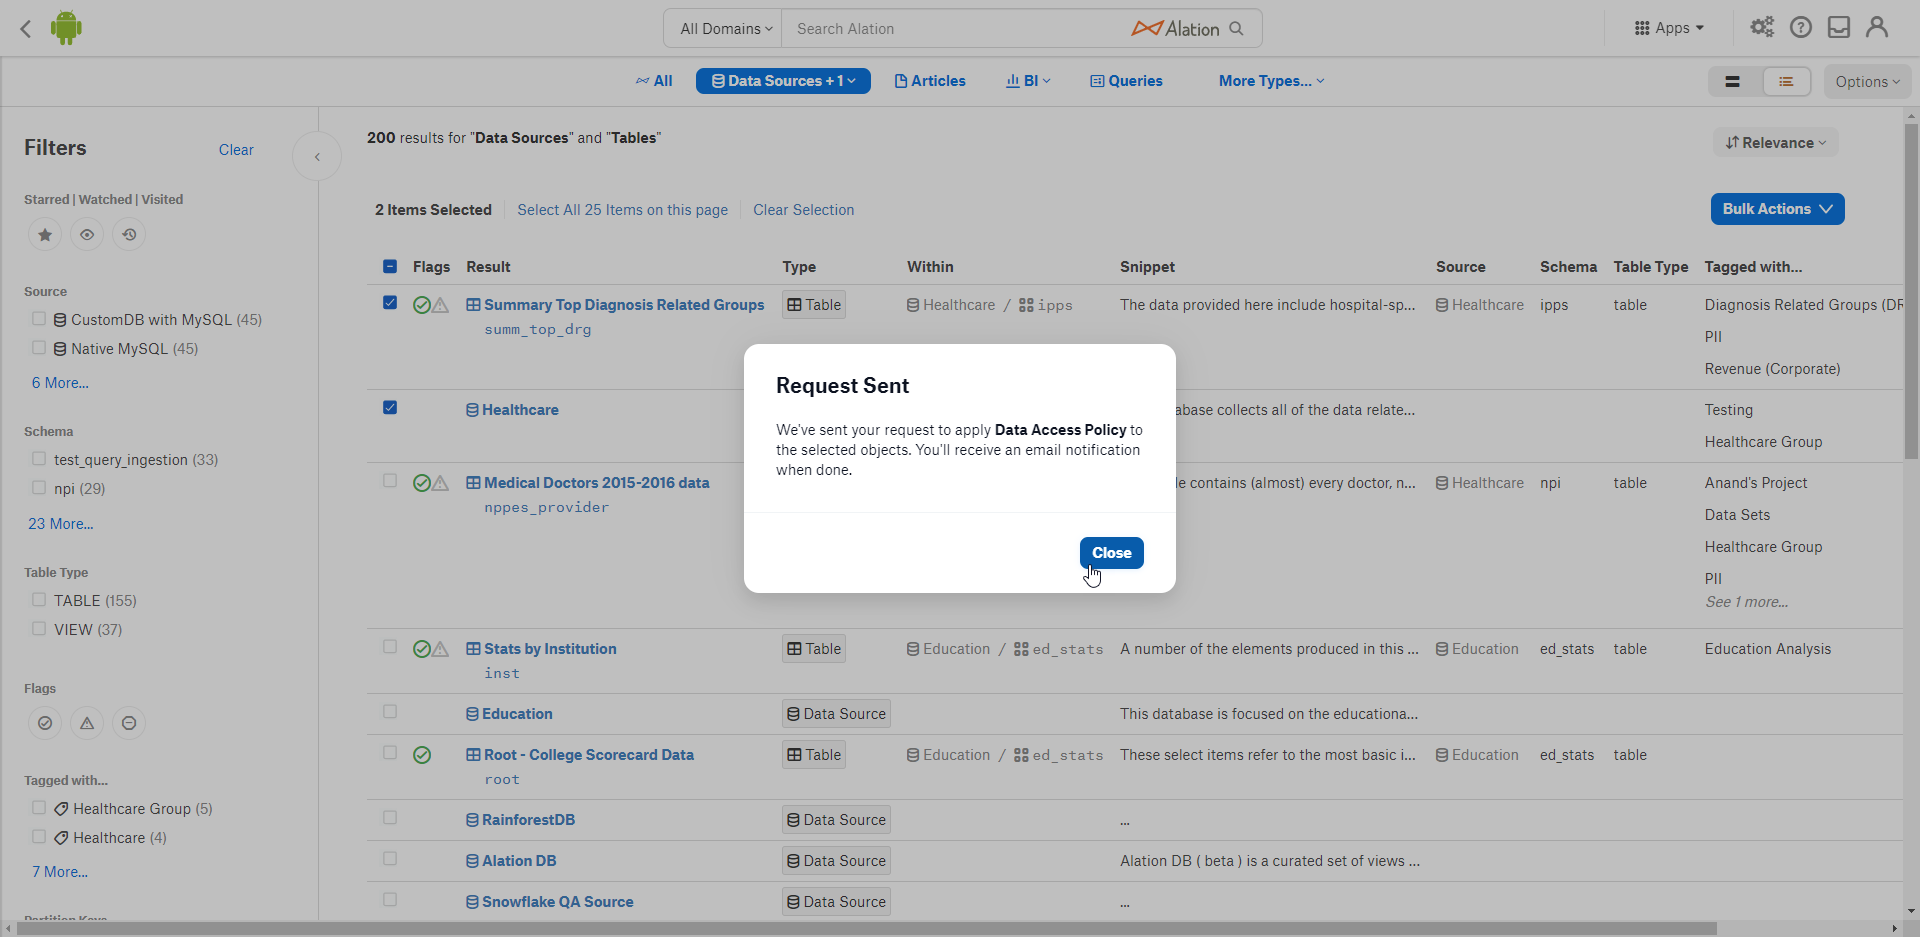
You will see a notification that the request to apply the policy has been sent and that you will receive an email notification when it is complete.
Bulk Remove Policy
In 2022.1.3 and later, the ability to remove policies in bulk was incorporated into Stewardship Workbench.
After filtering the results to only show the objects that you want to edit, select the checkboxes for the objects you want to remove the policy from. If you would like to remove the policy from all objects, select the checkbox in the header row.
Note
If objects are selected to remove a policy from for which a policy cannot be removed, an error message will display.
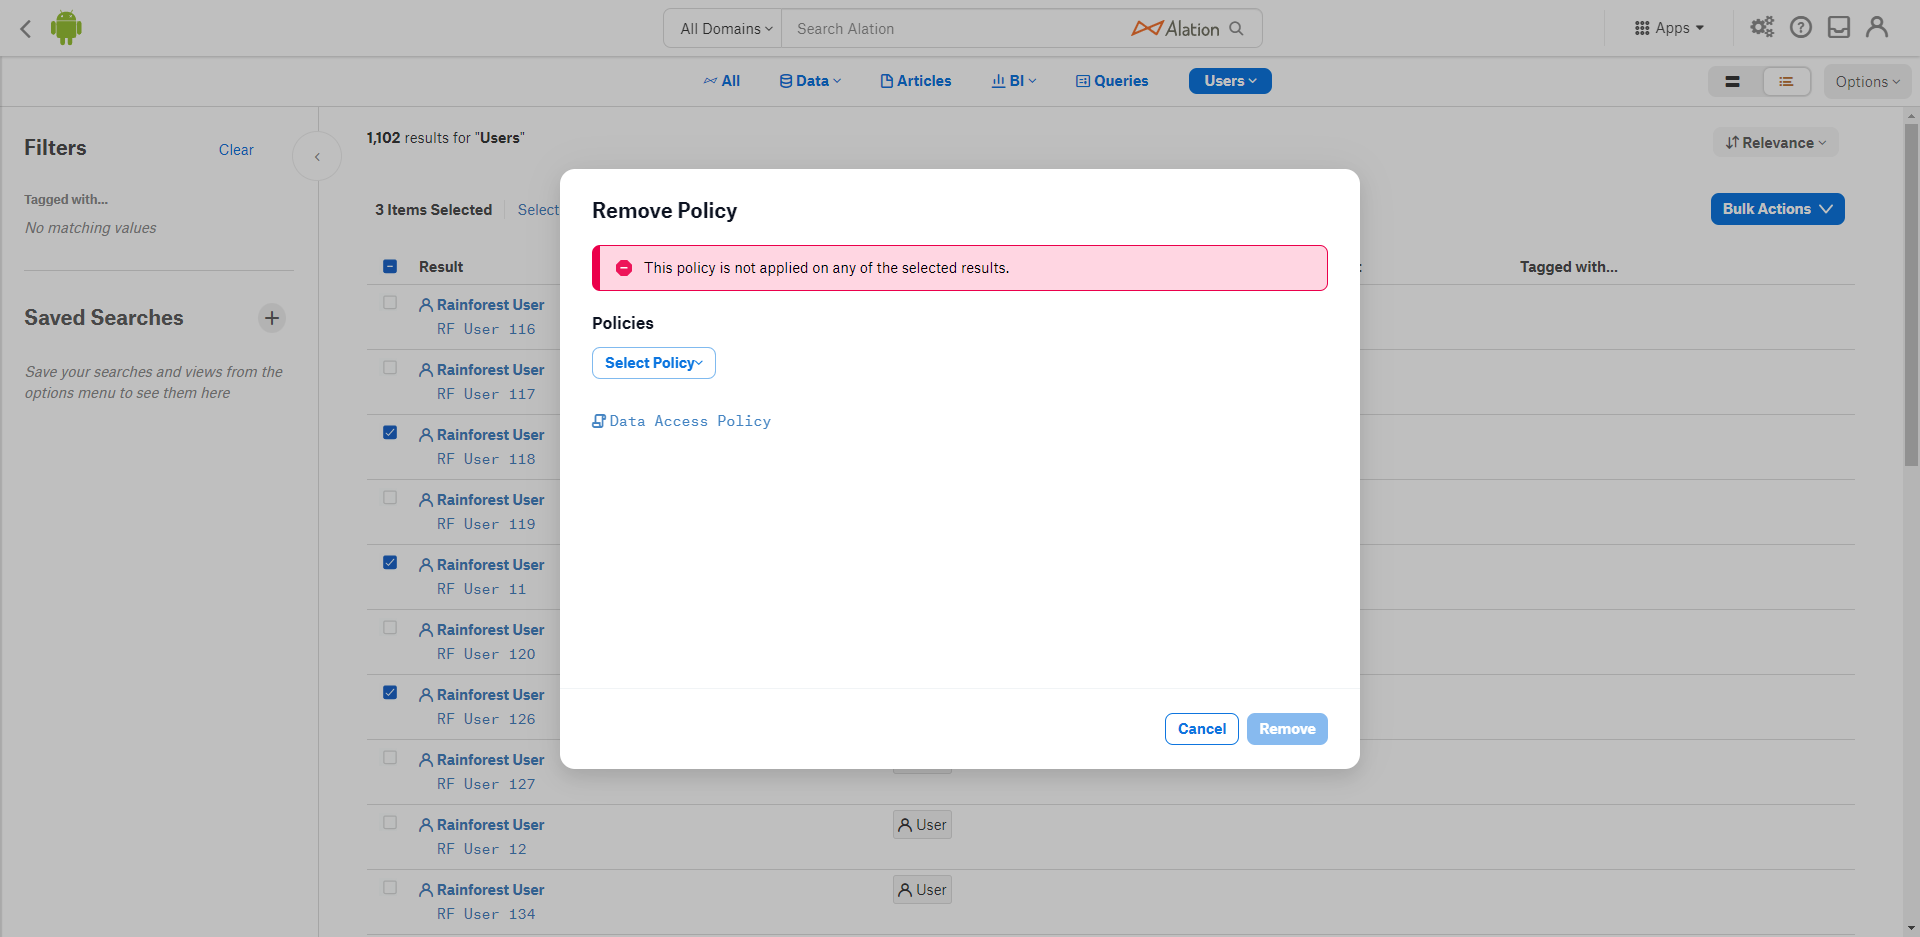
Click the Bulk Actions button and select Remove Policy from the list of options.
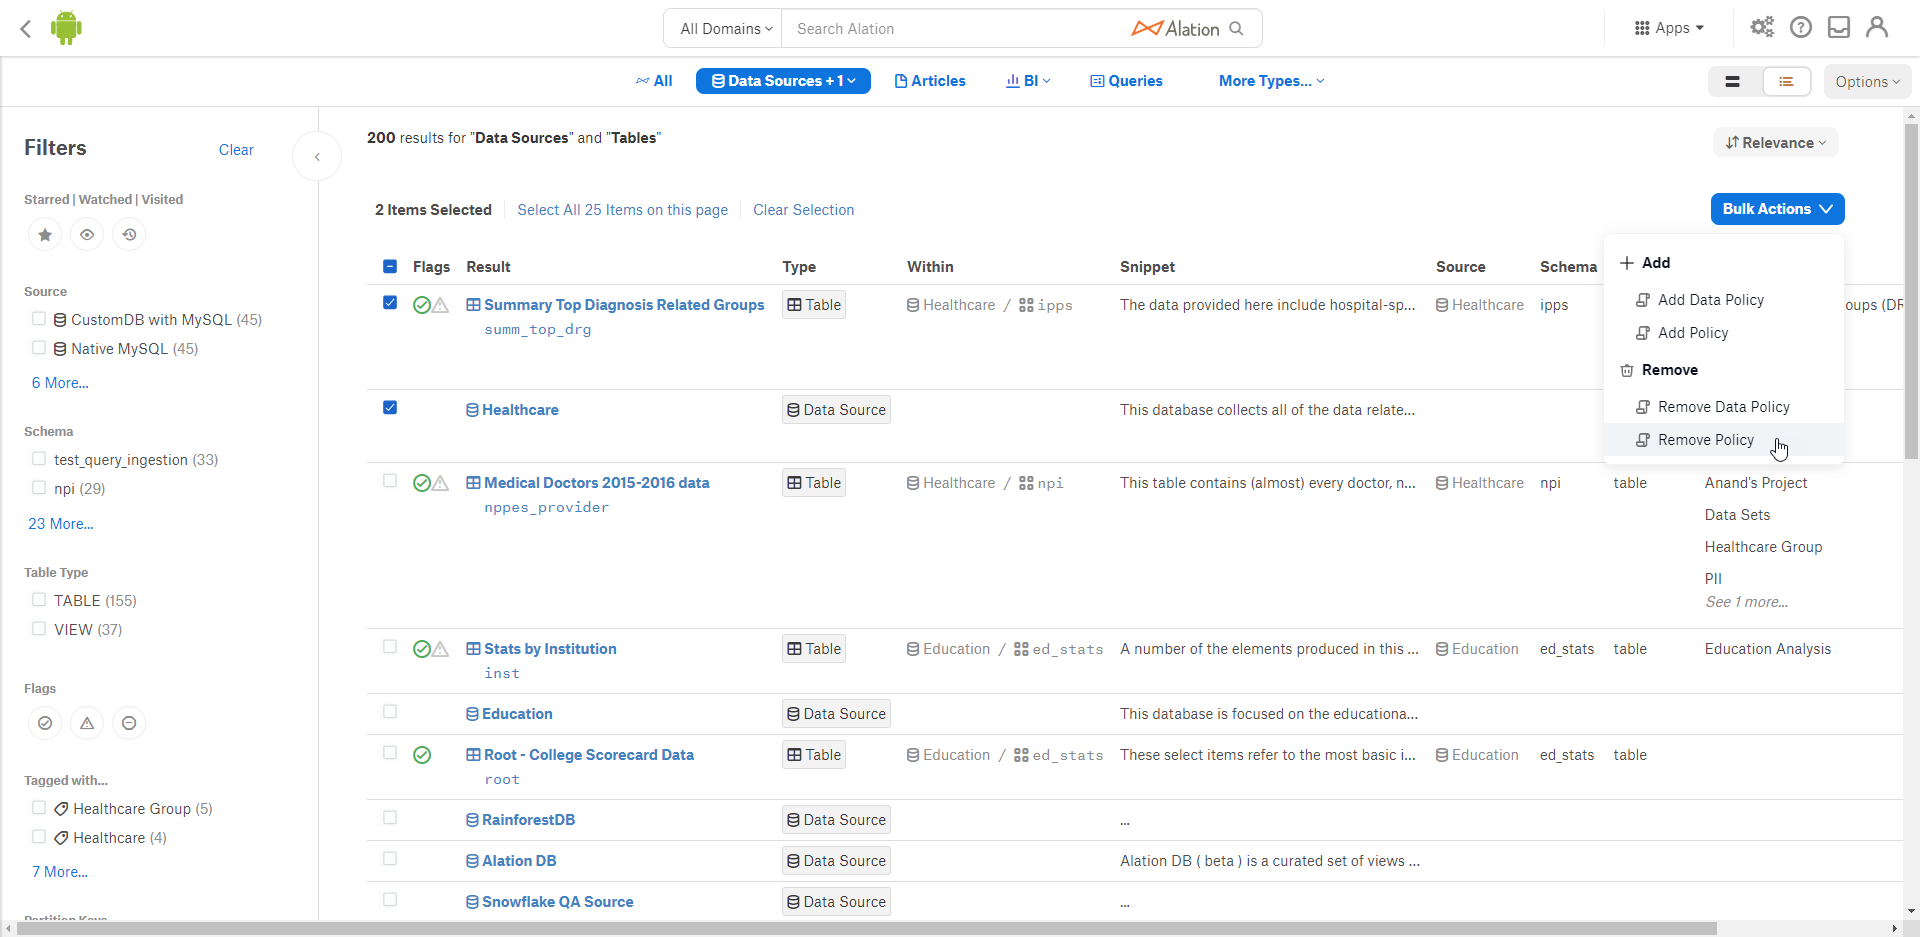
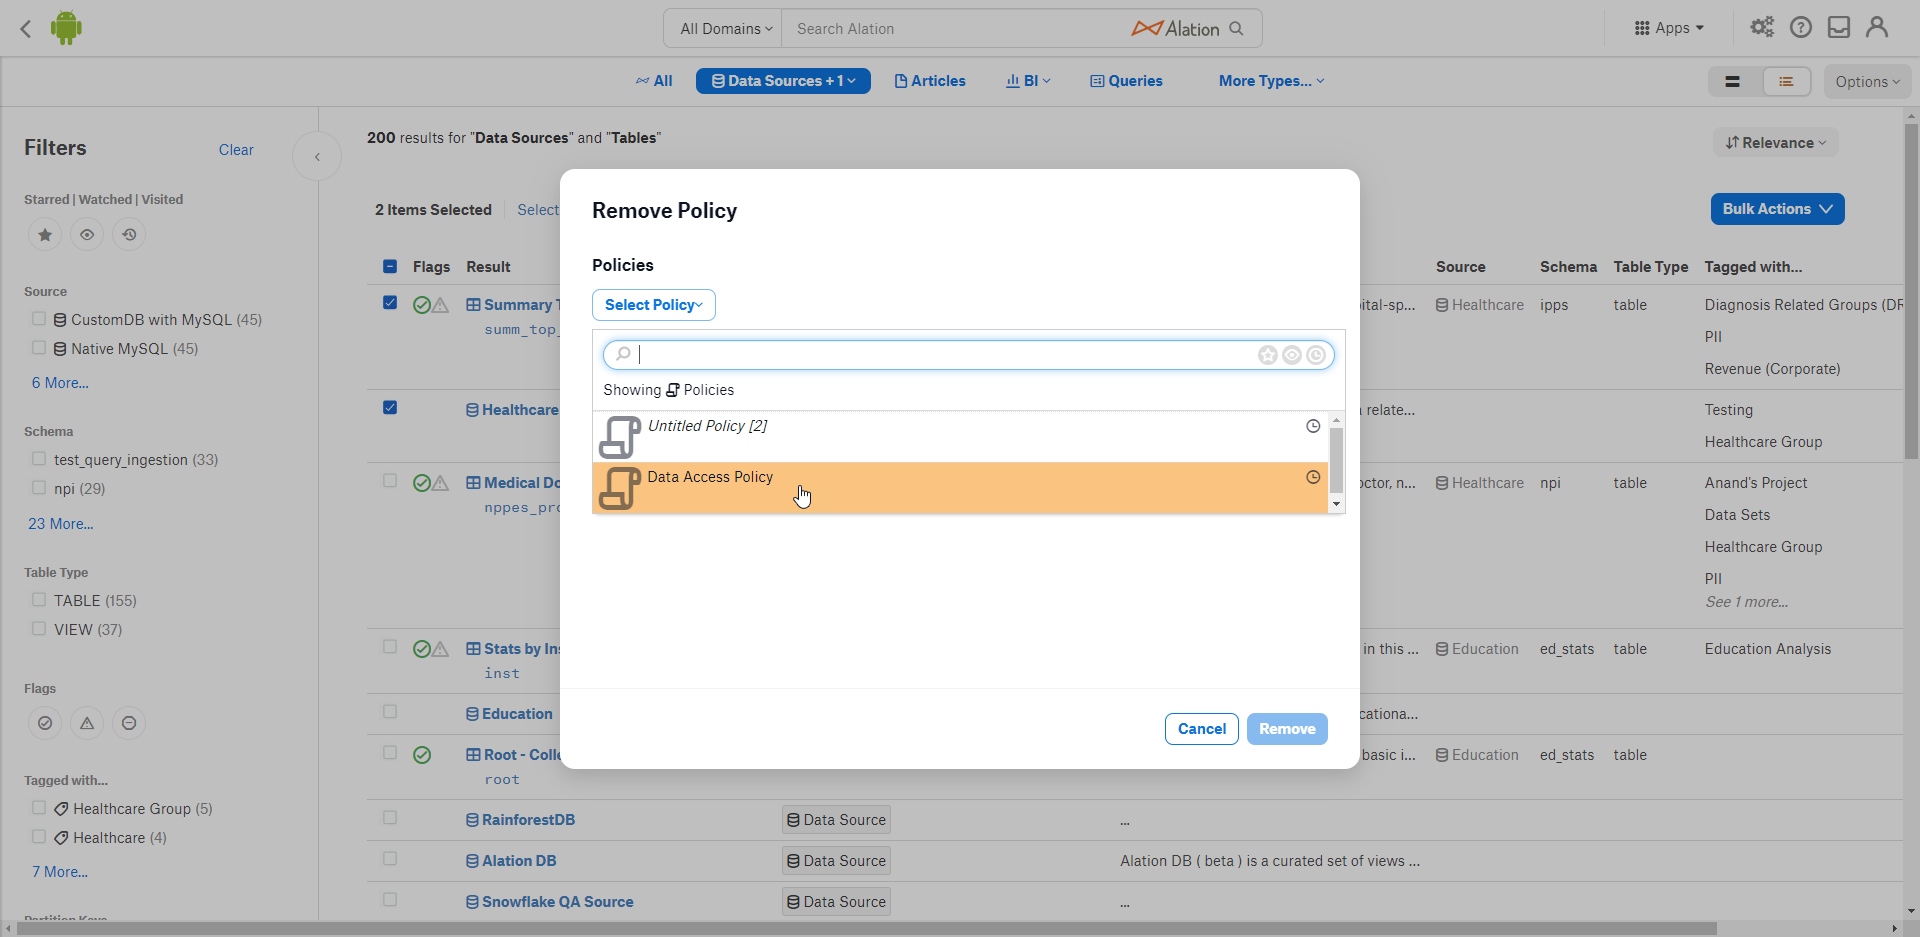
Click the Select Policy button.
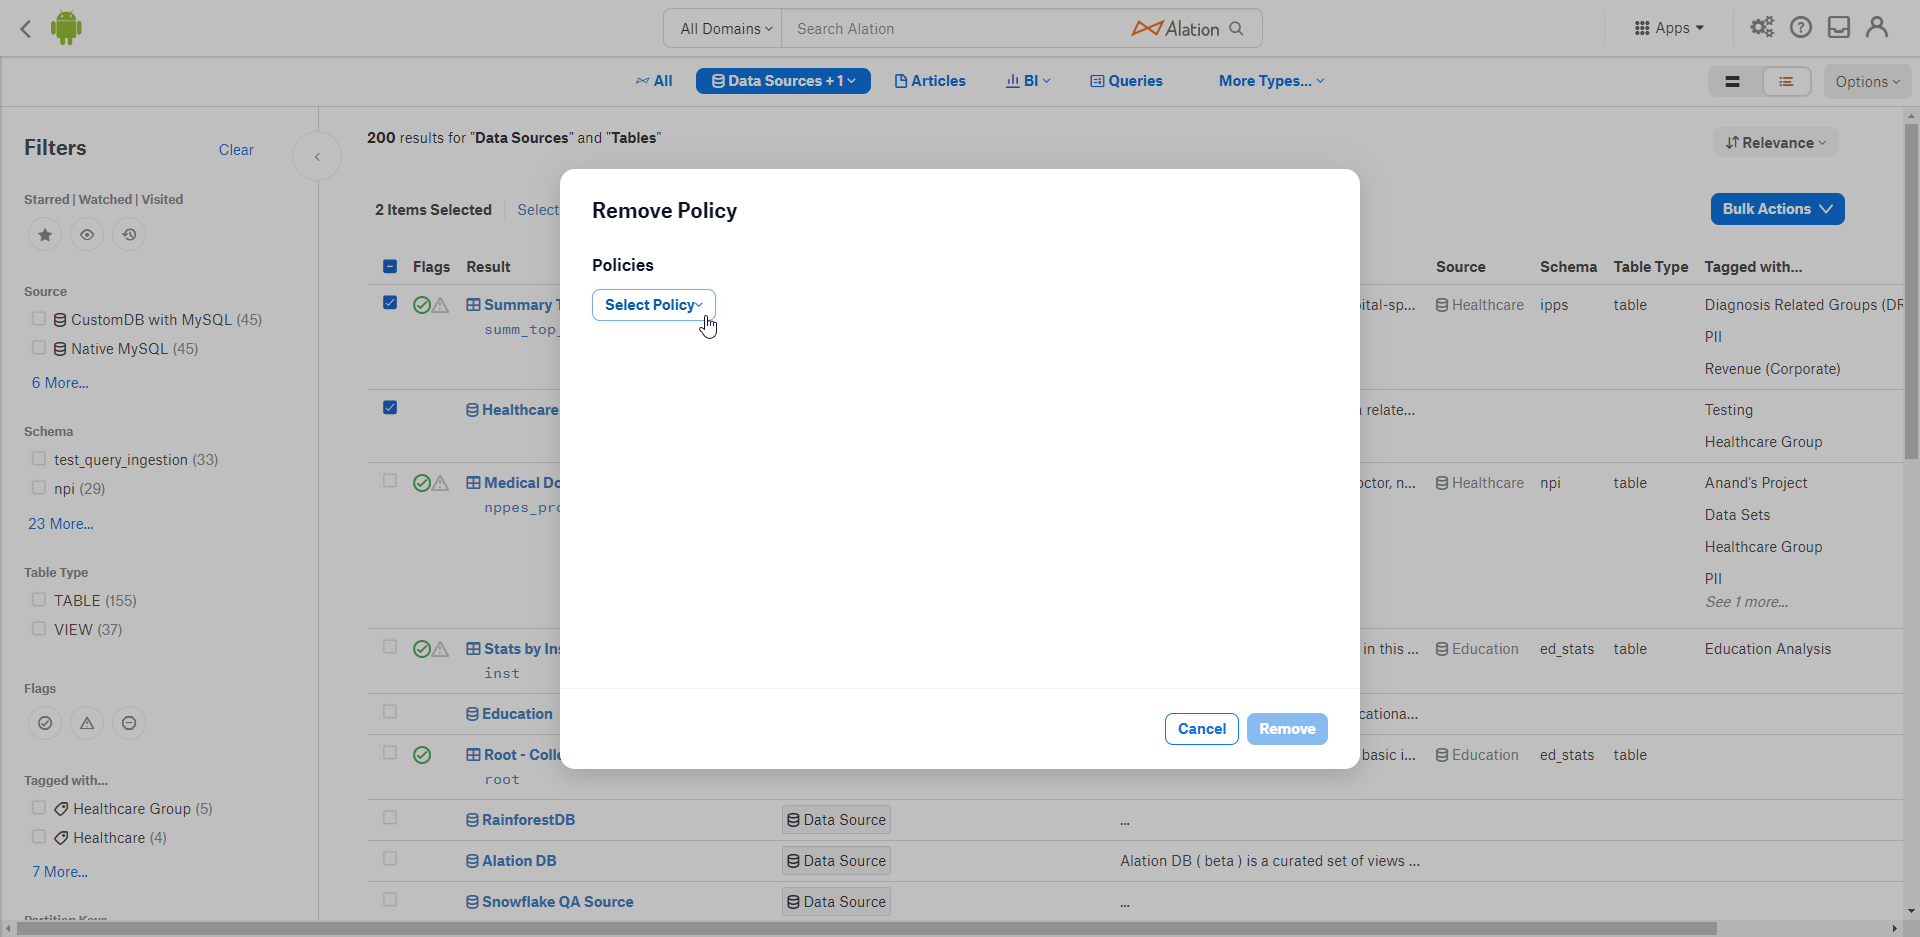
From the list, select the policy you want to remove.
Click the Remove button.
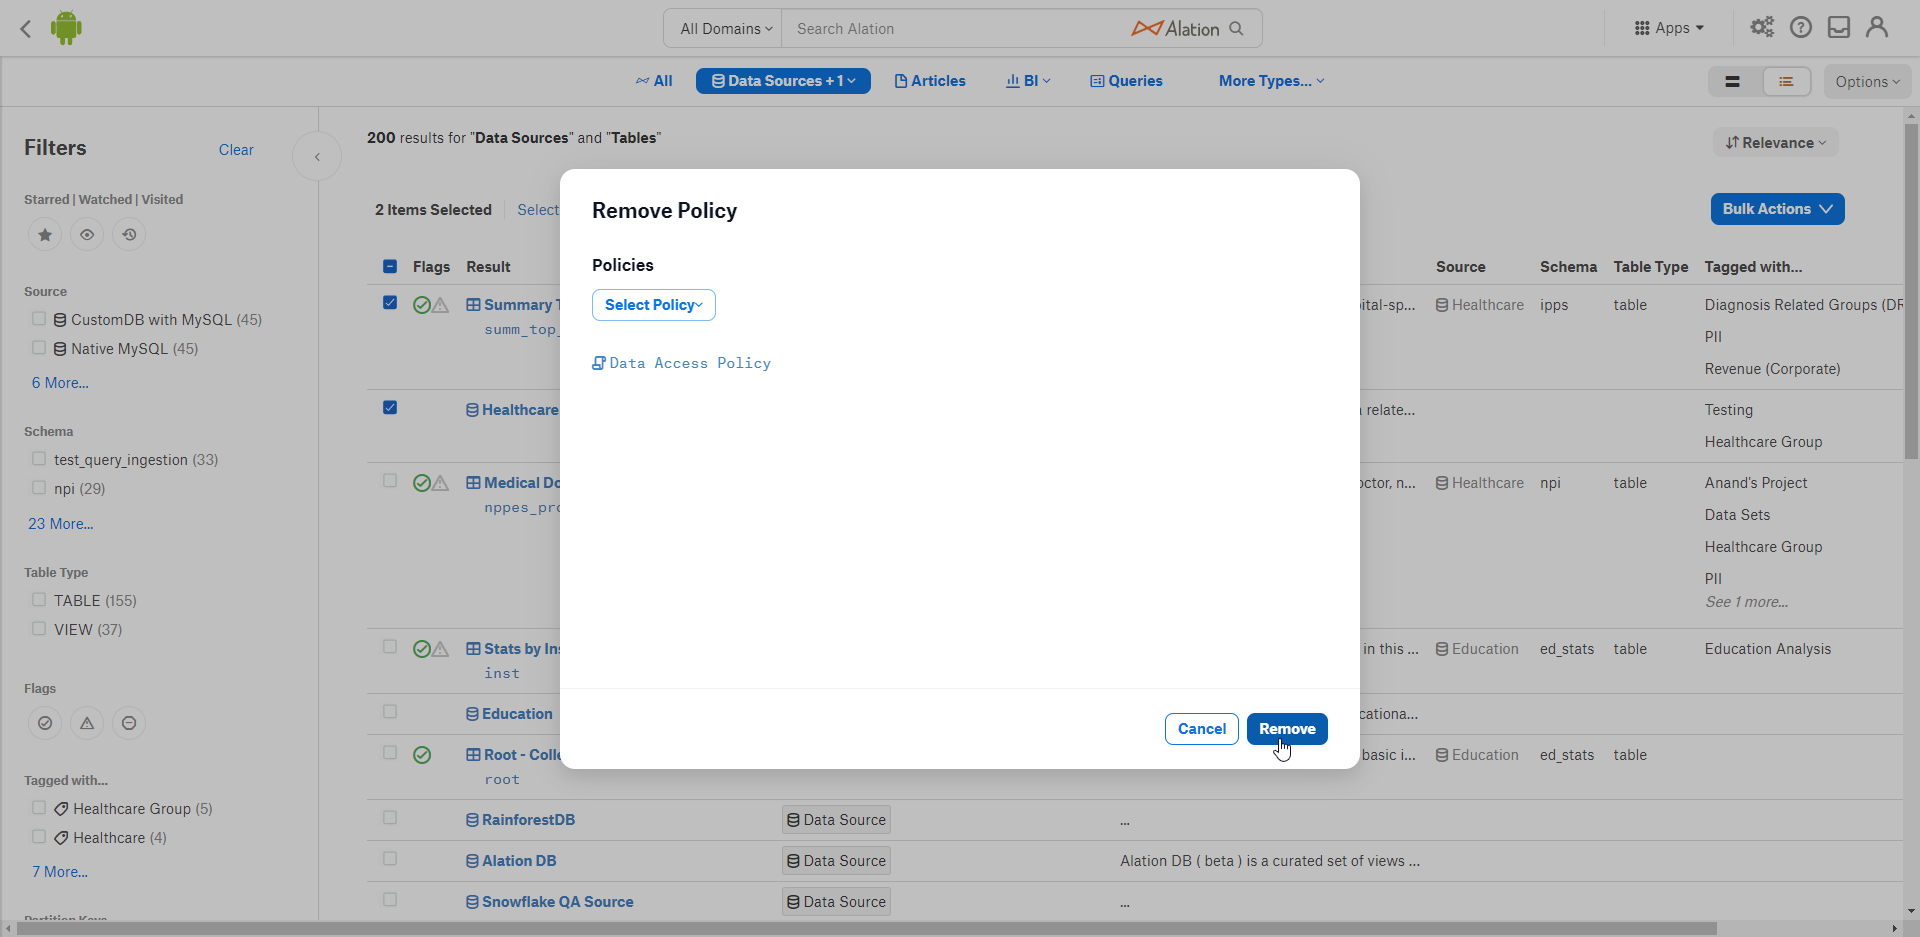
You will see a notification that the request to remove the policy has been sent and that you will receive an email notification when it is complete.