Alation Support Portal
Alation Cloud Service Applies to Alation Cloud Service instances of Alation
Customer Managed Applies to customer-managed instances of Alation
What is the Alation Help Center?
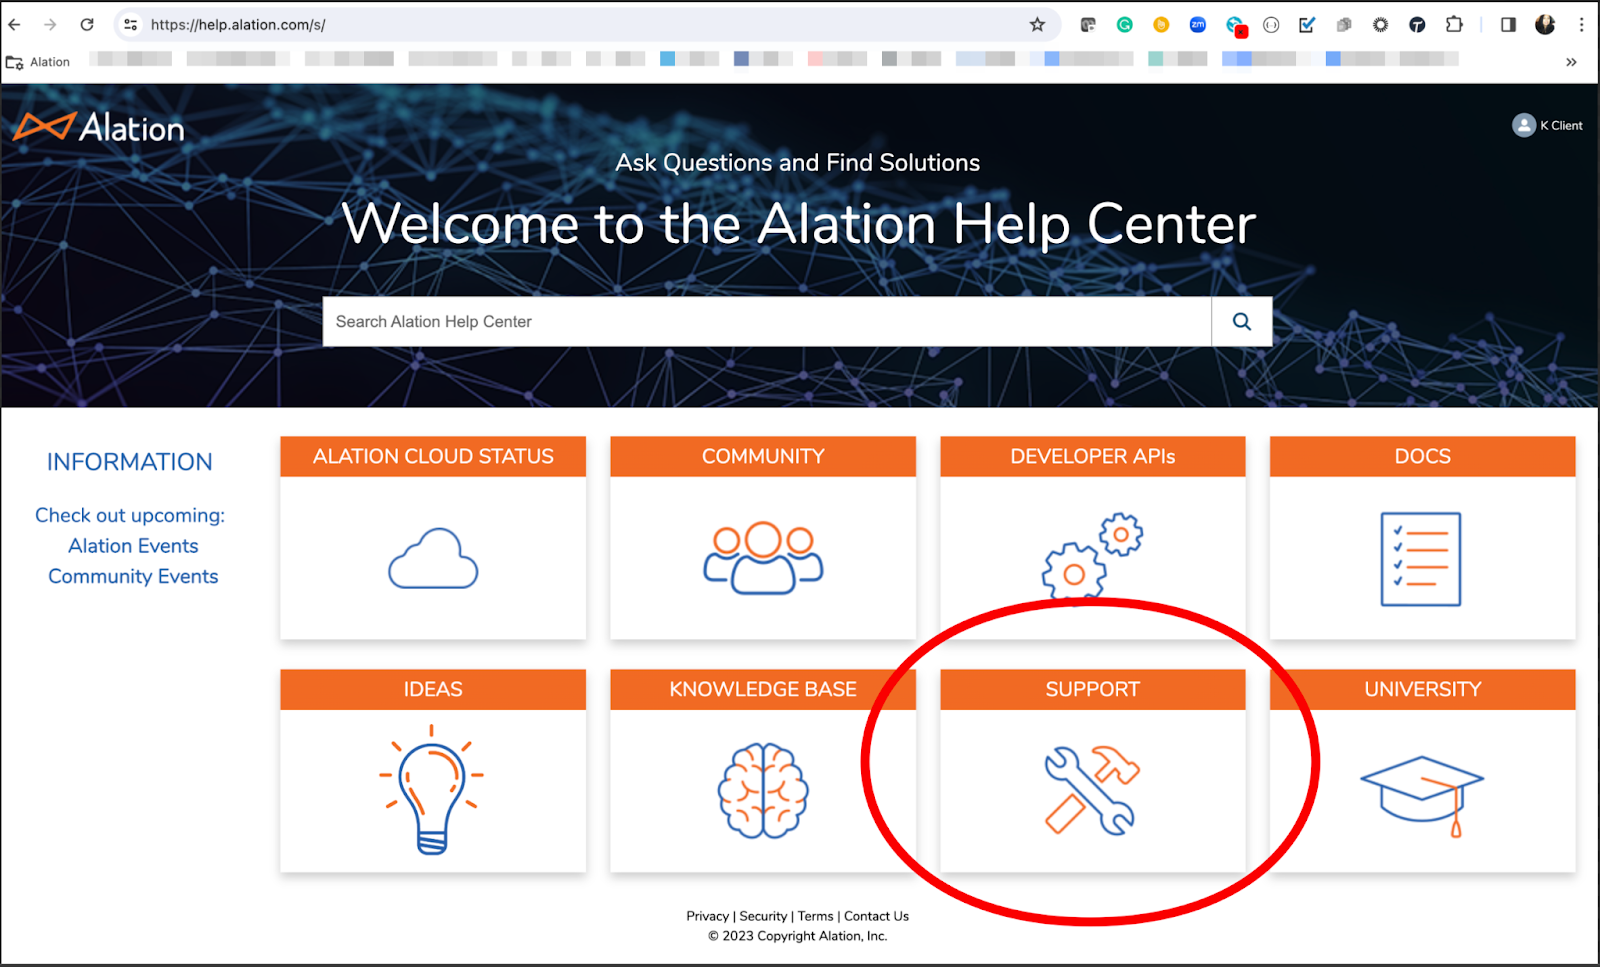
The Alation Help Center (AHC) is a single entry point to Alation resources for:
Community
Developer APIs
Documentation
Knowledge Base Articles
Alation University
Alation Ideation Portal
Alation Support Portal (for Customer Support Admins)
The AHC also connects content from many resources into a single search experience.
For more information, visit these blogs on Alation Community:
What is the Alation Support Portal?
The Alation Support Portal allows designated Alation Support Admin users to create new Support cases or review their organization’s Support cases.
Users and Permissions
Who Can Access the Alation Support Portal?
Not everyone registered to the Alation Help Center can access the Support Portal.
The Alation Support Portal access is provided to an Alation Support Administrator of a customer account.
A Support Administrator is identified as part of Alation onboarding and provisioned with an account on the Alation Help Center site.
By default, four admin users are suggested per account. A maximum of eight admin users are recommended.
Requirements
All new users must self-register in the Alation Help Center.
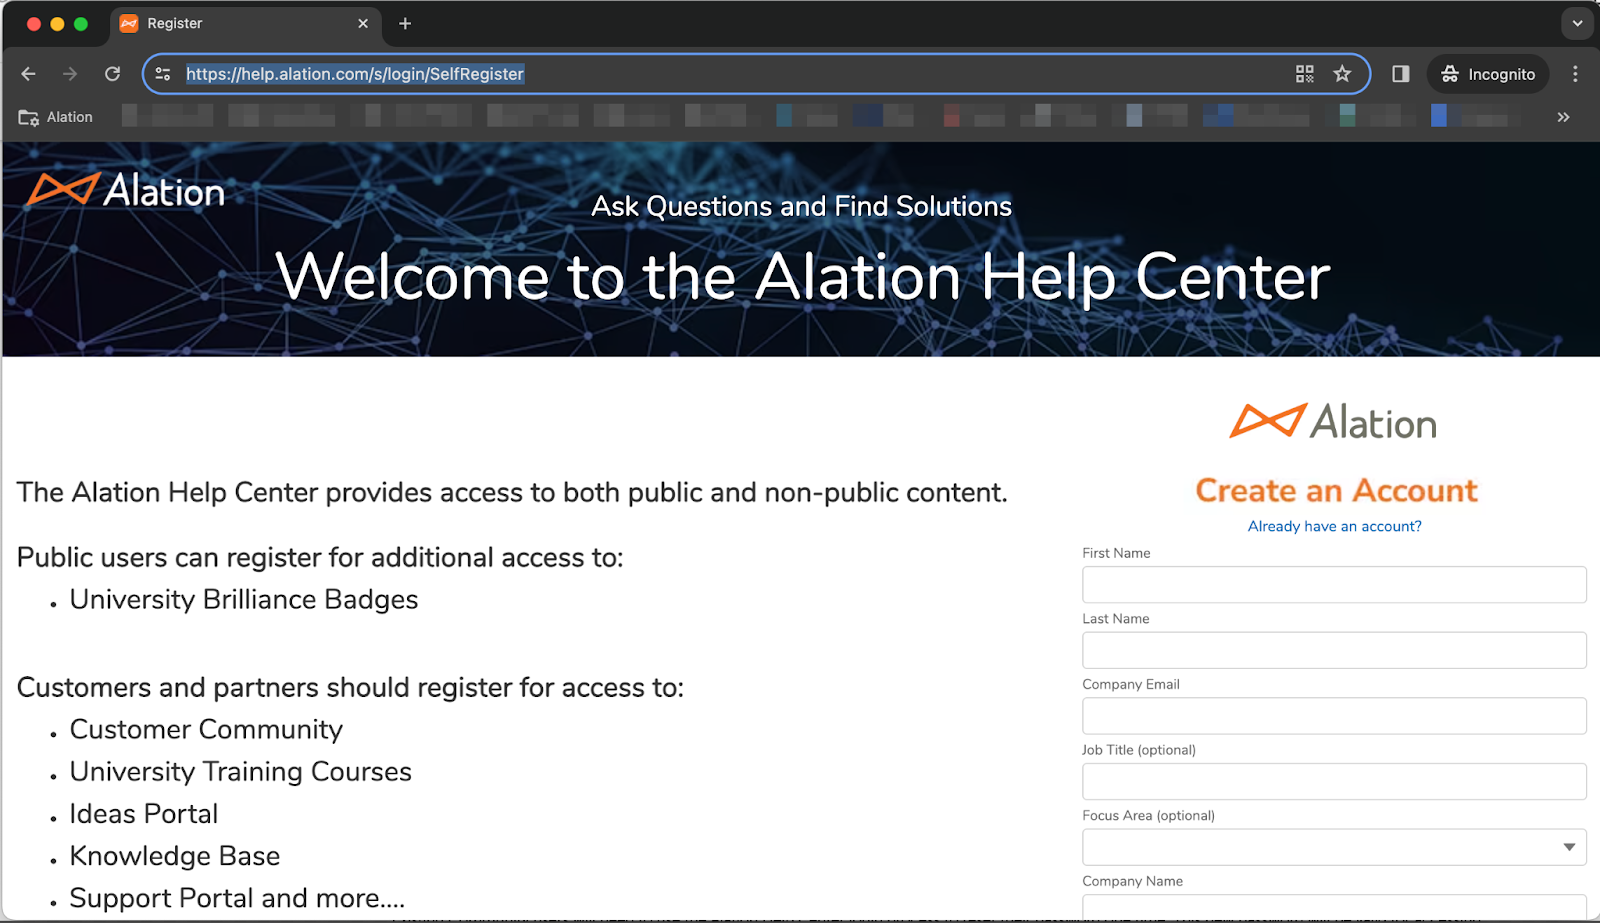
Alation Partners must self-register in AHC using a customer-provisioned email domain.
Alation Support Administrator
New Support Administrators must be vetted by an active Alation Support Administrator and processed after they self-registered in AHC.
The Alation Support Portal is accessible to authorized Support Admins from the Alation Help Center.
Managing your Alation Support Admin Users
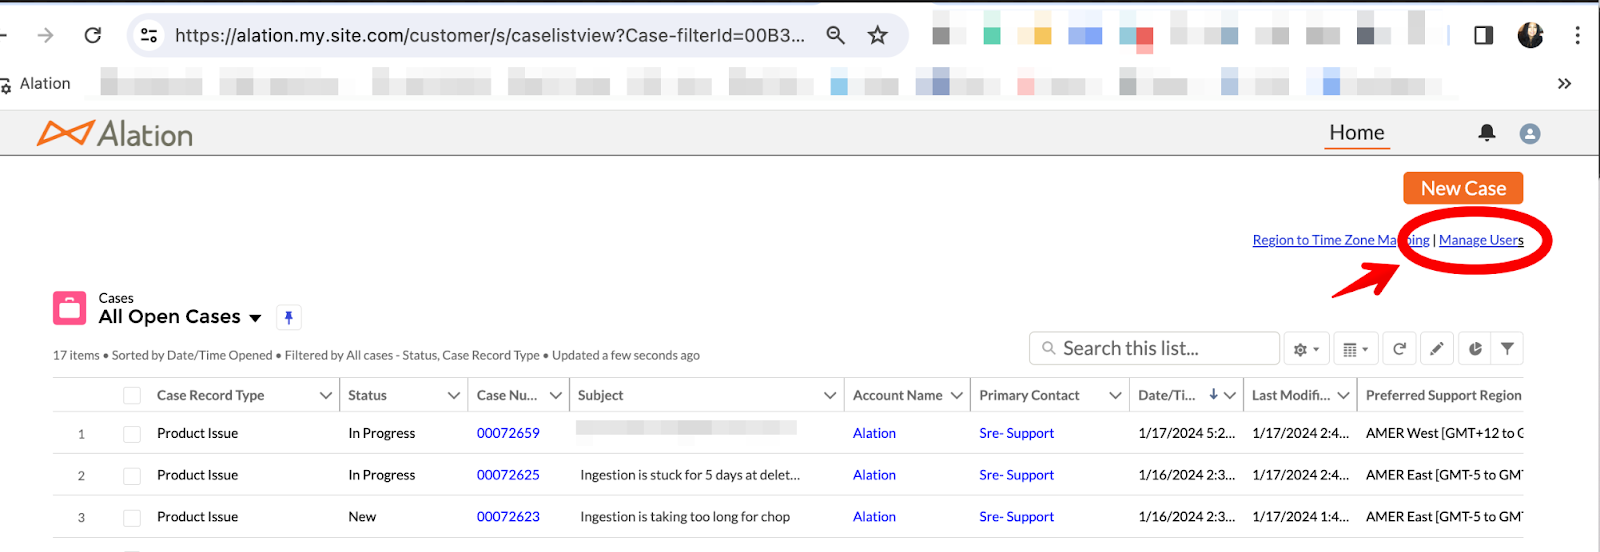
As a Support Admin, Log Into the Alation Help Center and Access the Alation Support Portal.
Go to Support Home Page >> Manage Users.
Manage Users Tab
Important
You must have the email address of the registered AHC user to proceed with these steps. Each option will require you to enter a valid user email address. If found, the following actions will be applied and confirmed as completed.
Activate as Admin - This promotes the user as a new Support Admin. The Support tile will be available to the new admin upon logging into the Alation Help Center.
Remove as Admin - This will remove the users’ Support Admin rights. The Support tile will no longer be available when logging into the Alation Help Center.
Deactivate User - This will deactivate the user’s access to AHC customer-specific portals and will be limited to general access only.

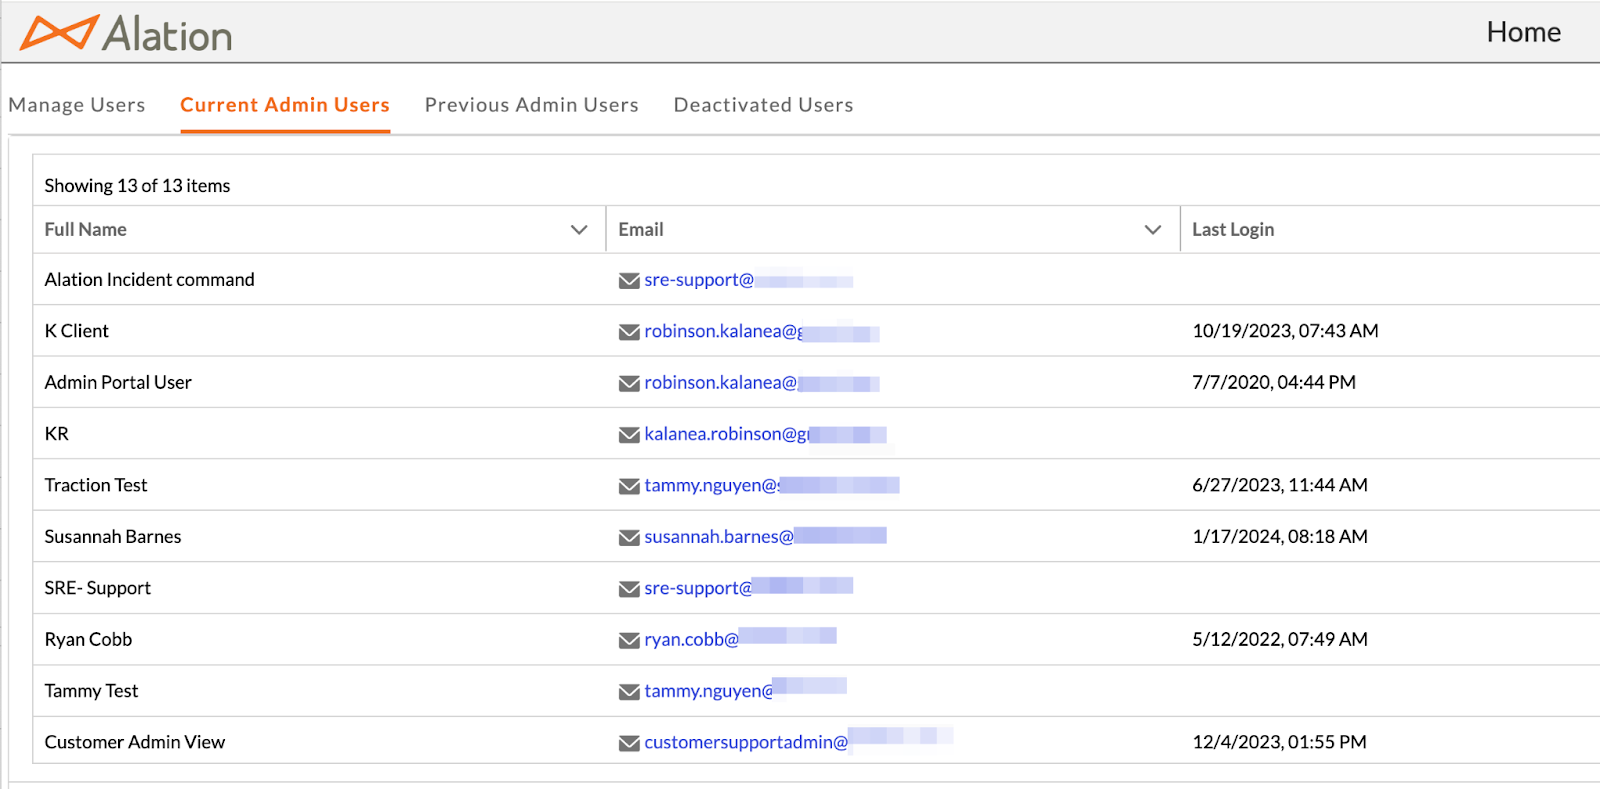
Current Admin Users Tab
All active Support Administrators for your organization will be listed. The last login date to the Alation Support Portal is also displayed.
Use the Email address listed to Remove as Admin or Deactivate User from the Manager Users tab.
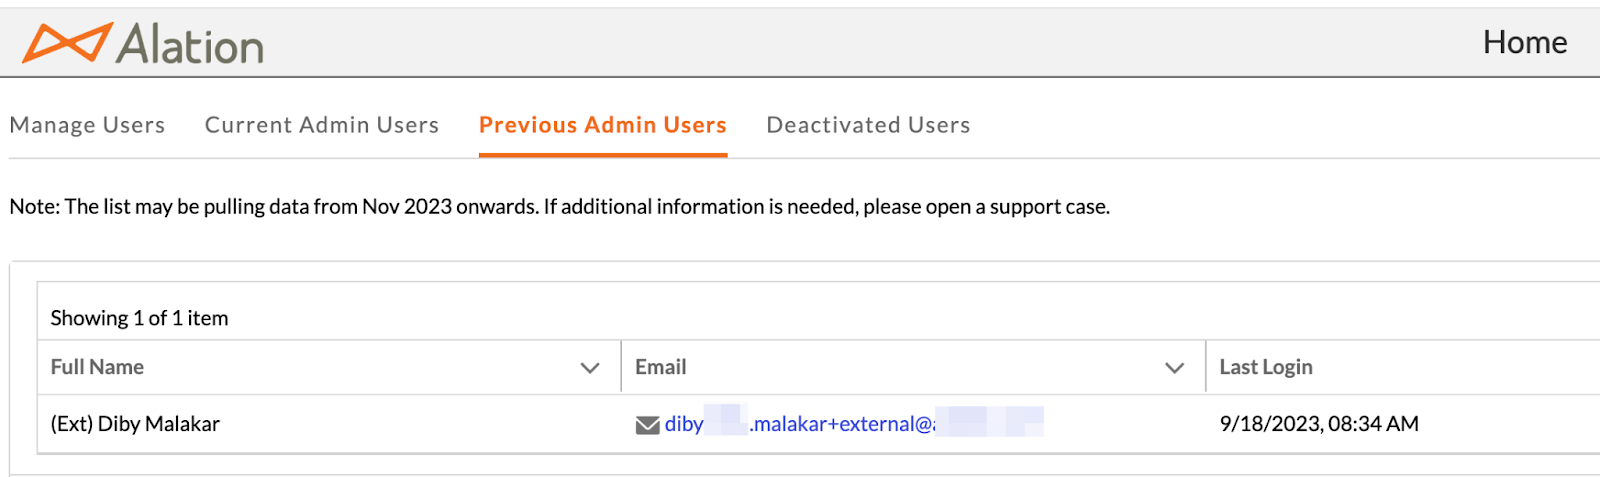
Previous Admin Users Tab
All Support Admins that were Removed and no longer active will show here.
Note
The list will only pull data from Nov 2023 onwards where this user management tool was used
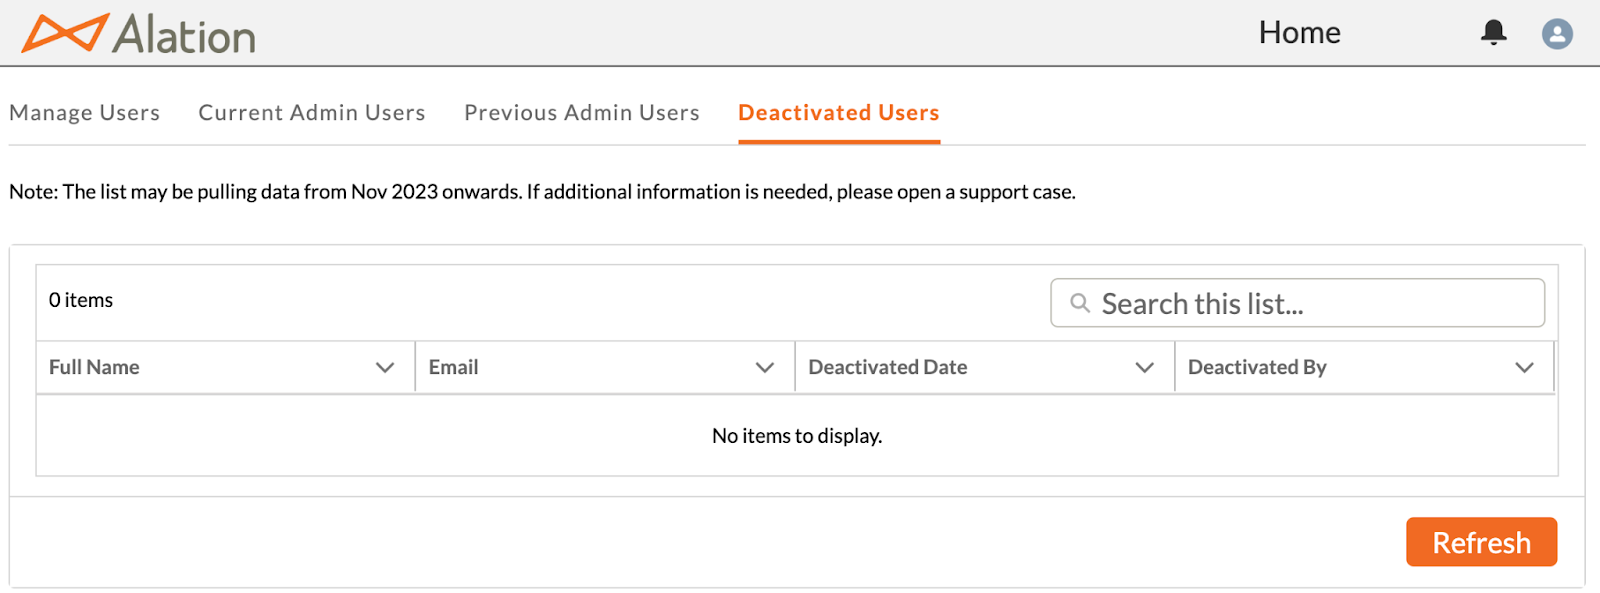
Deactivated Users Tab
All Deactivated Support Admins and no longer active in AHC will be displayed here.
Deactivation Date and Deactivated By will be displayed here.
Note
The list will only pull data from November 2023 onwards, where this user management tool was used.
Managing your Alation Support Case
The Alation Support Portal is accessible to authorized Support Admins from the Alation Help Center.
As a Support Admin, log into the Alation Help Center and click Support tile to access the Alation Support Portal.
As a Support Admin, log into the Alation Help Center and access the Alation Support Portal.
The Support Home Page defaults to Case List:
All open cases
Other shared case listing views are available from the dropdown
Shared Case Lists are locked and cannot be edited
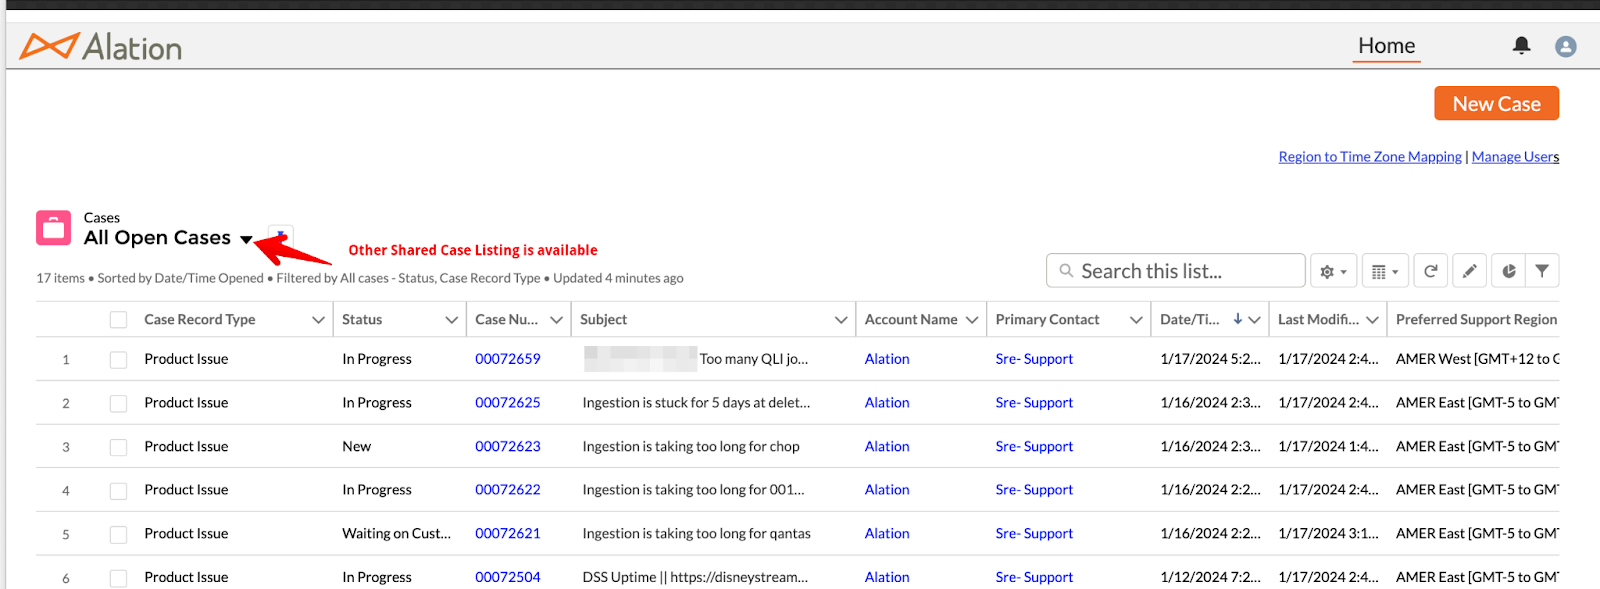
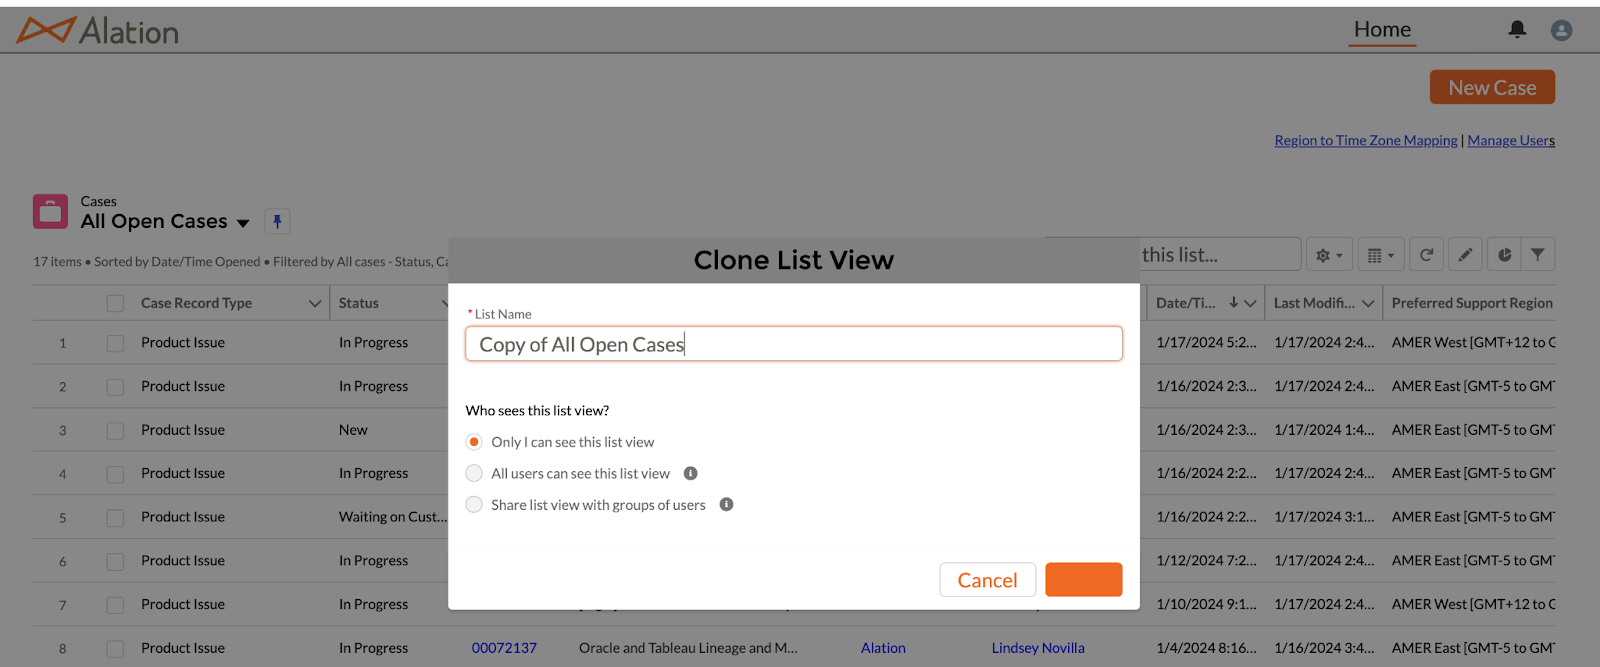
New Case Listings can be created using the CLONE feature on existing case listings for personal customization.
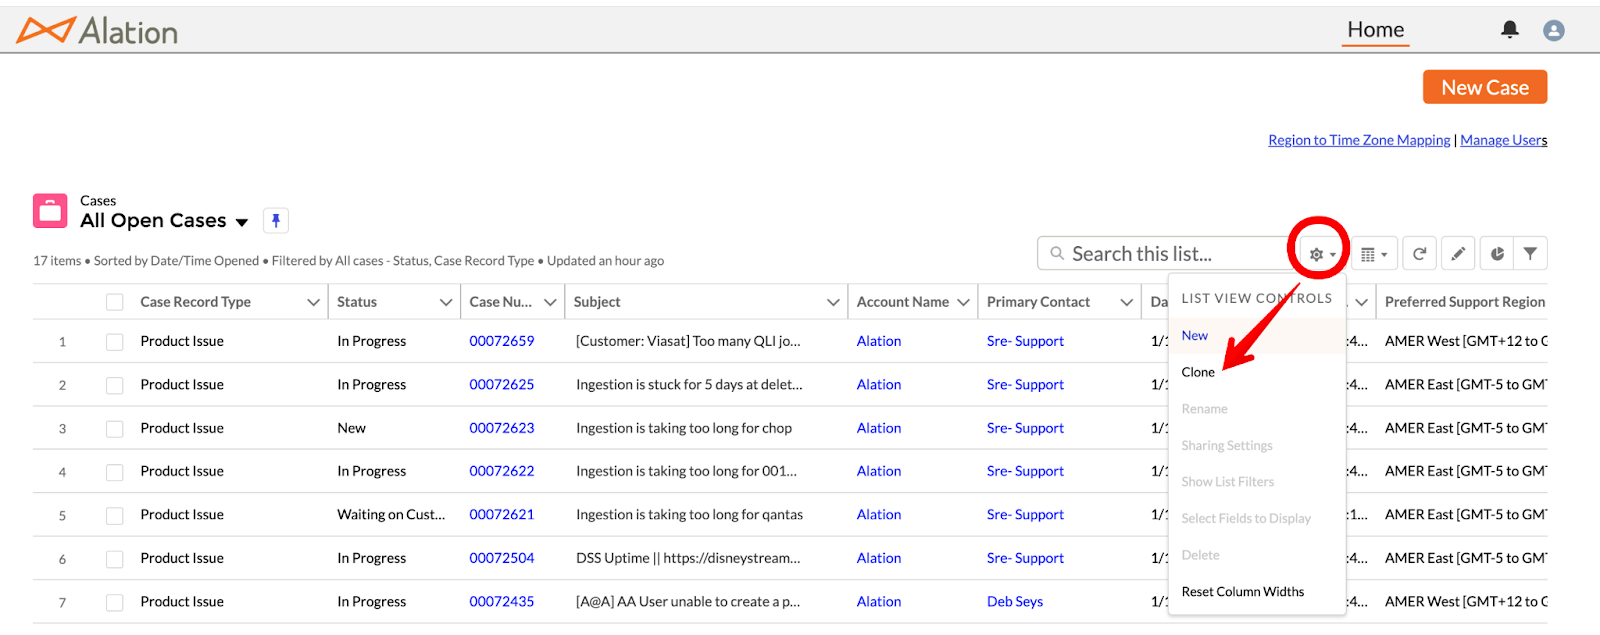
The Cloned List view can be shared with the entire organization or for personal use.
The Cloned List view can be edited on search filters and columns.
Viewing your cases: Case lists can be displayed using Kanban or Tabular views.
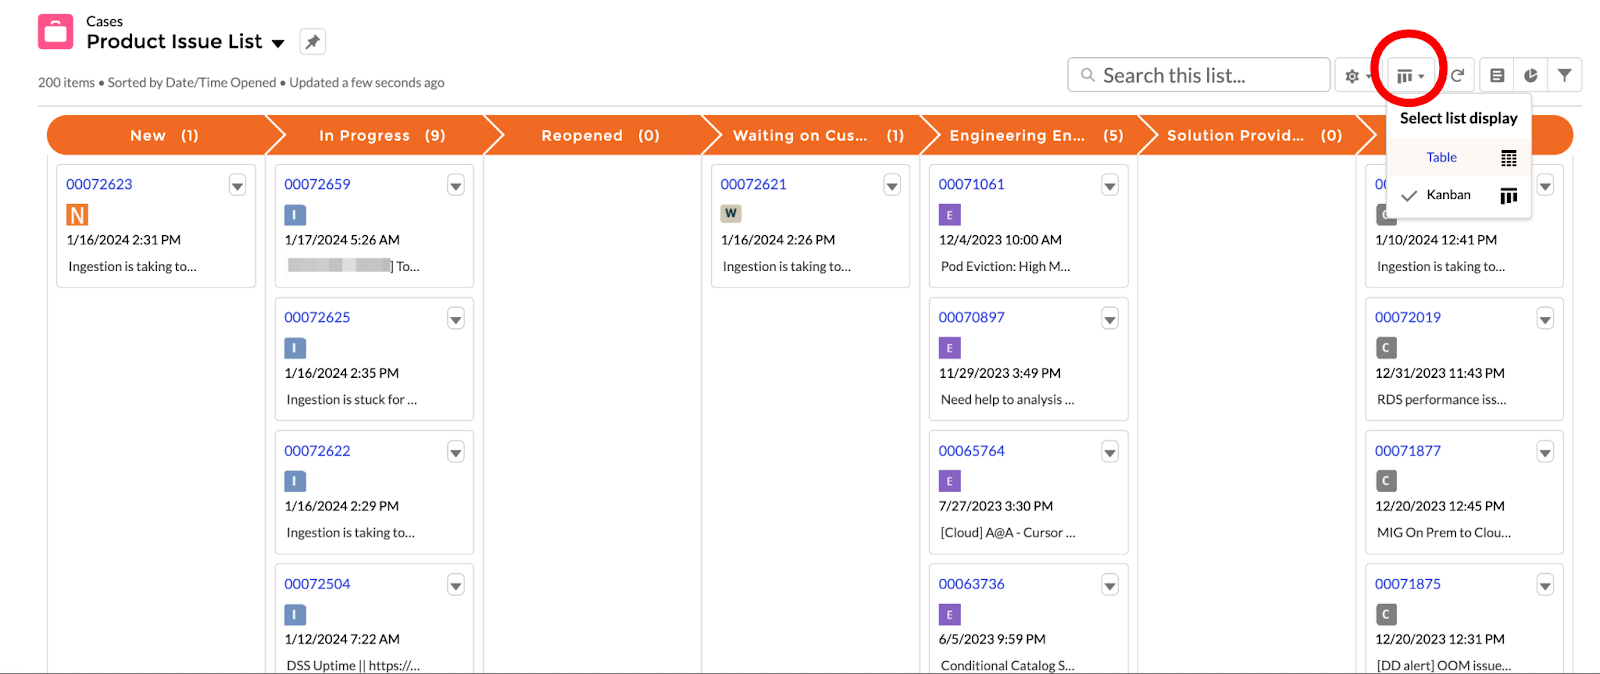
Sort your cases: Cases can be sorted by any fields displayed in your case list view. To sort, click on a column header.
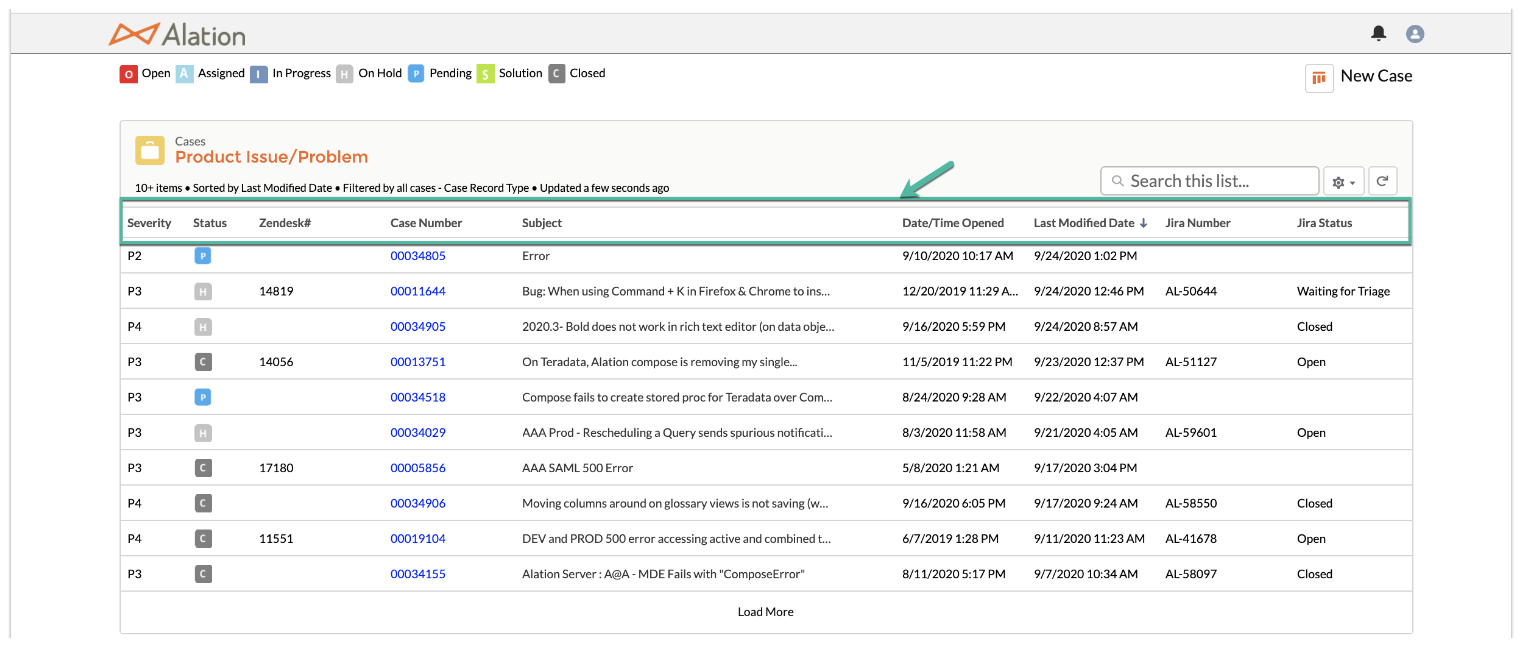
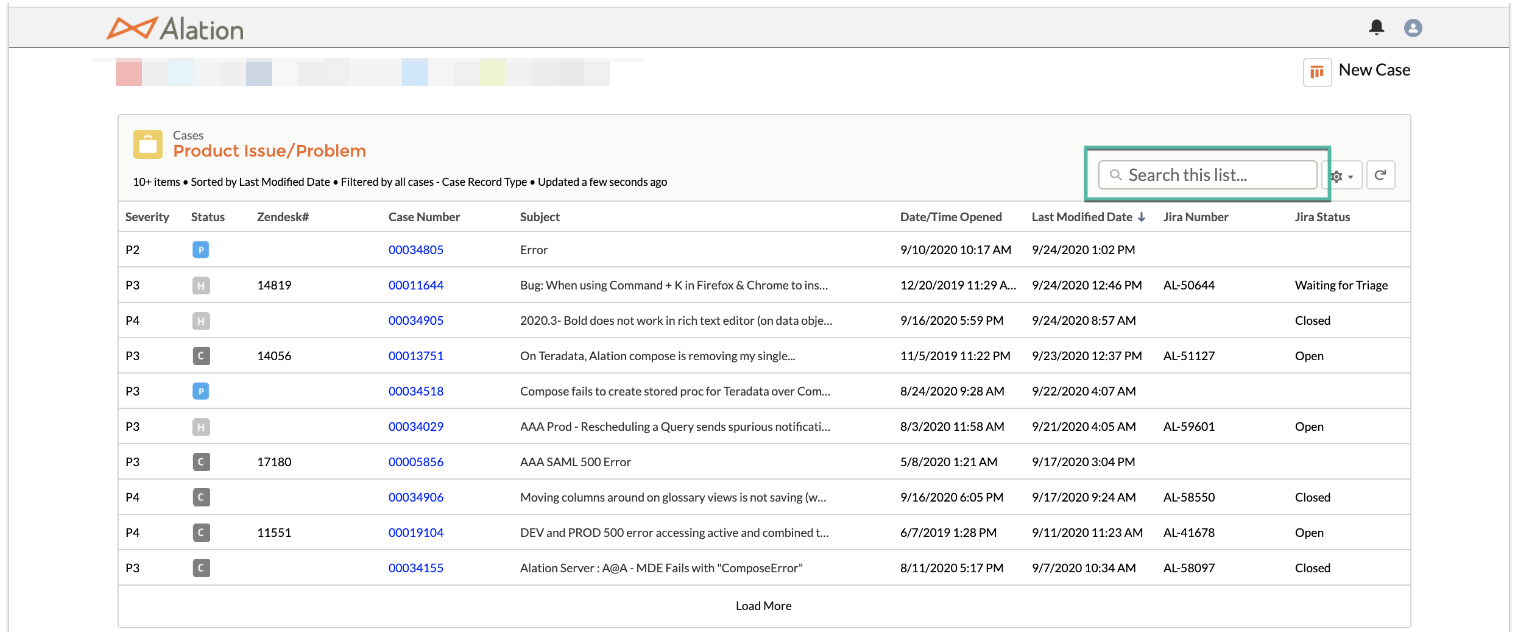
Searching: To find a case, use the search field on the case list home page using key terms or case numbers.
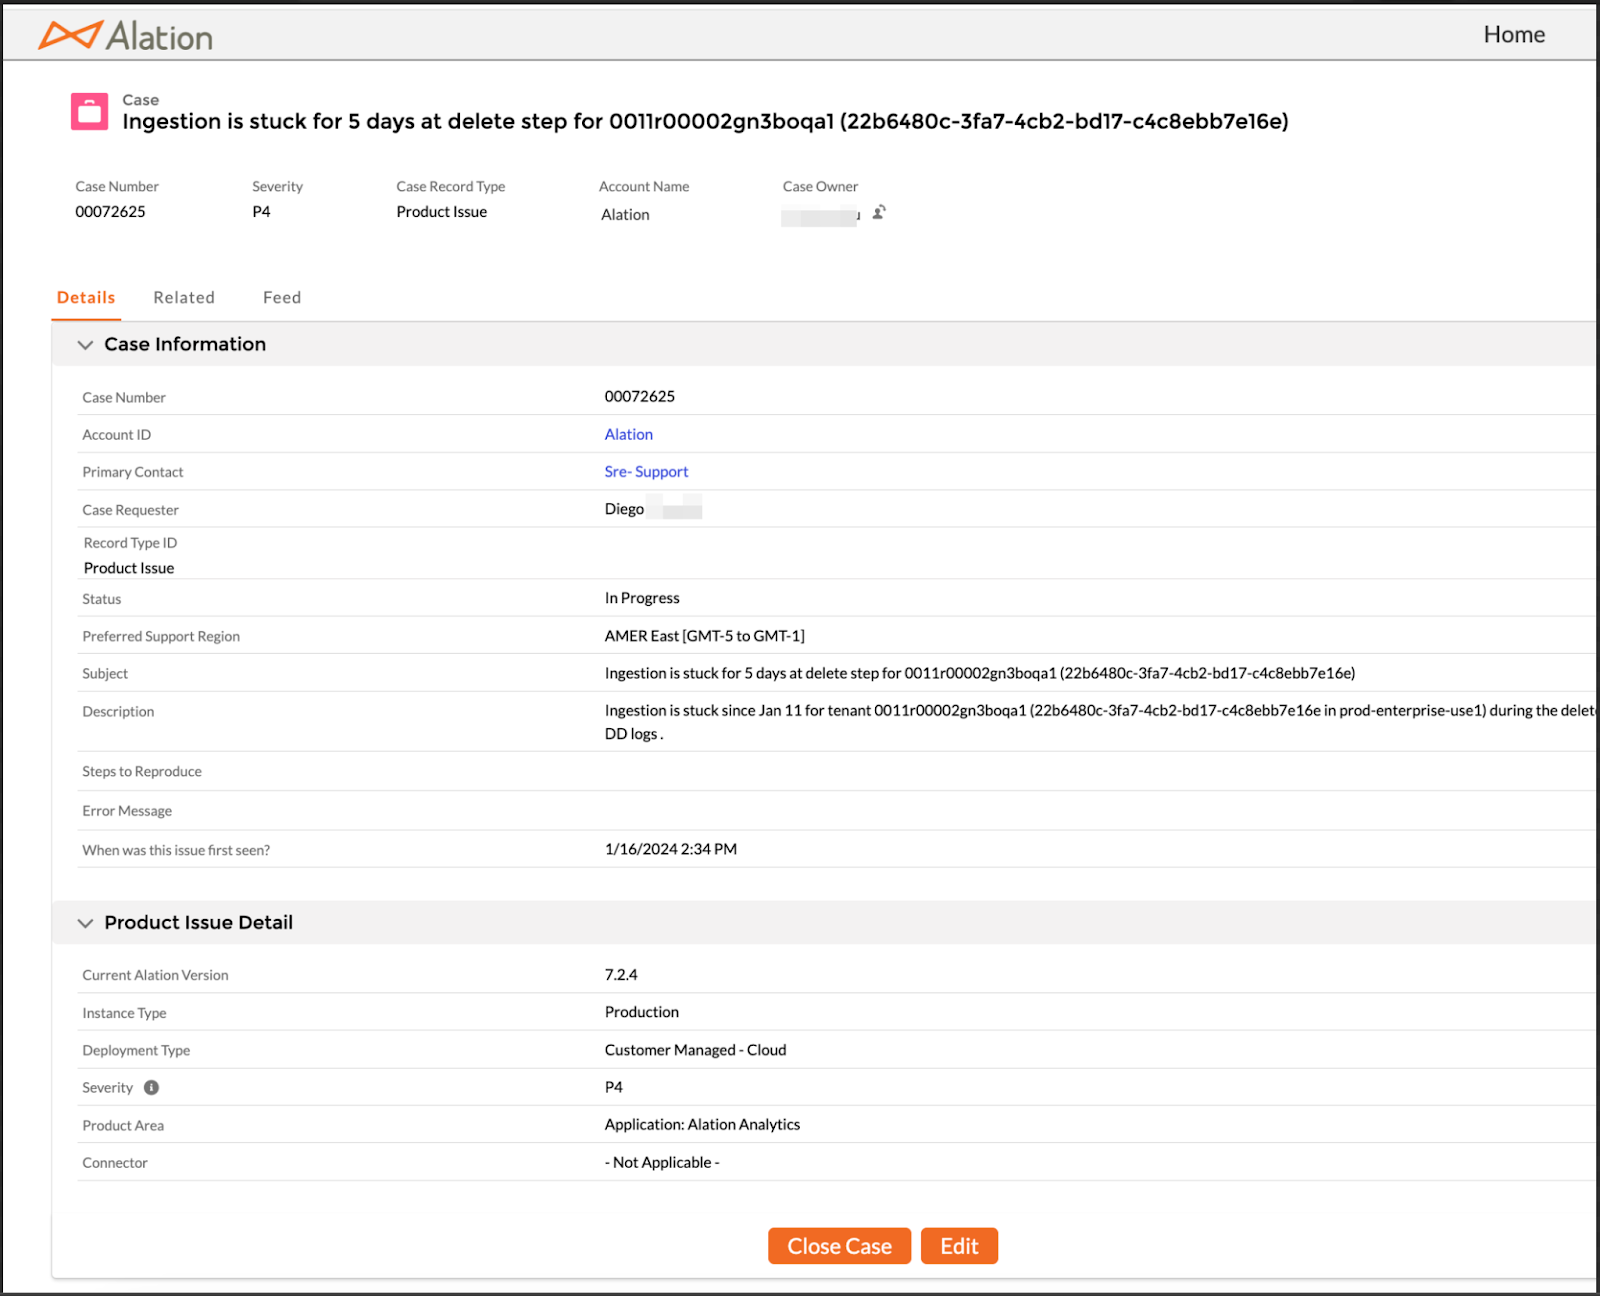
Reviewing Cases: Click Case Number link to view the case detail page.
The buttons to Close or Edit the Case are available in this view.
The Related tab displays basic information on the files attached and email threads.
The Feed tab will show communication threads between support admins of the case and support agent
Case communications are generally through emails and displayed in the Feed section.
Creating a new Alation Support Case
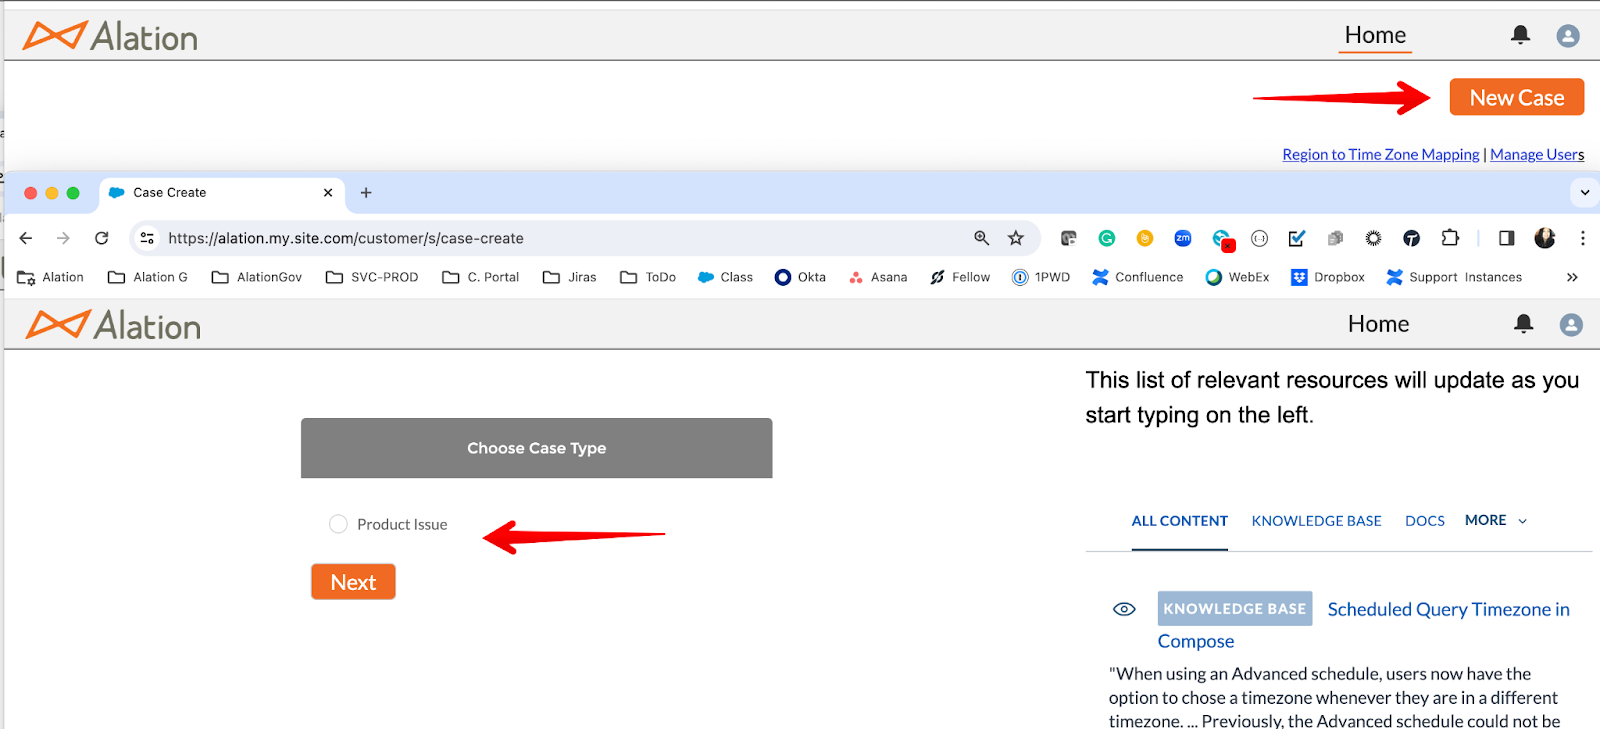
To Open a new support case, click New Case button on the top right corner of the home page.
Select Product Issue as Case Type.
Note
Other Case Record Type may be displayed depending on your organization’s subscription.
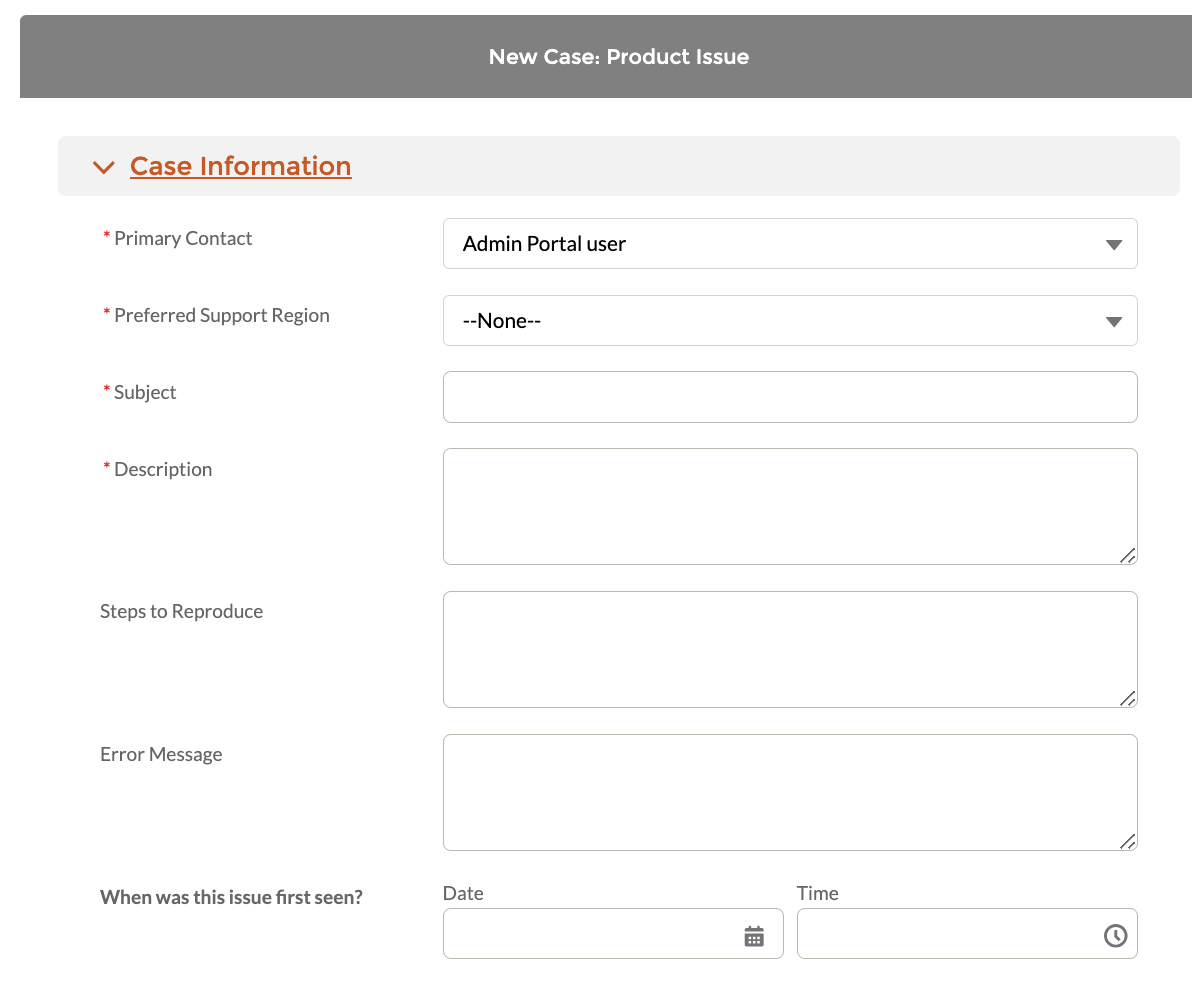
Provide the details in the New Case form. The information collected is grouped into four categories.
Case Information
Primary Contact - Defaults to the case creator, but you can select another support admin as the primary contact.
Preferred Support Region - Review the four regions and select the one that supports your needs. Support Regions.
Provide information on the Subject, Description, Steps to Reproduce, Error message, and when the issue was first seen.
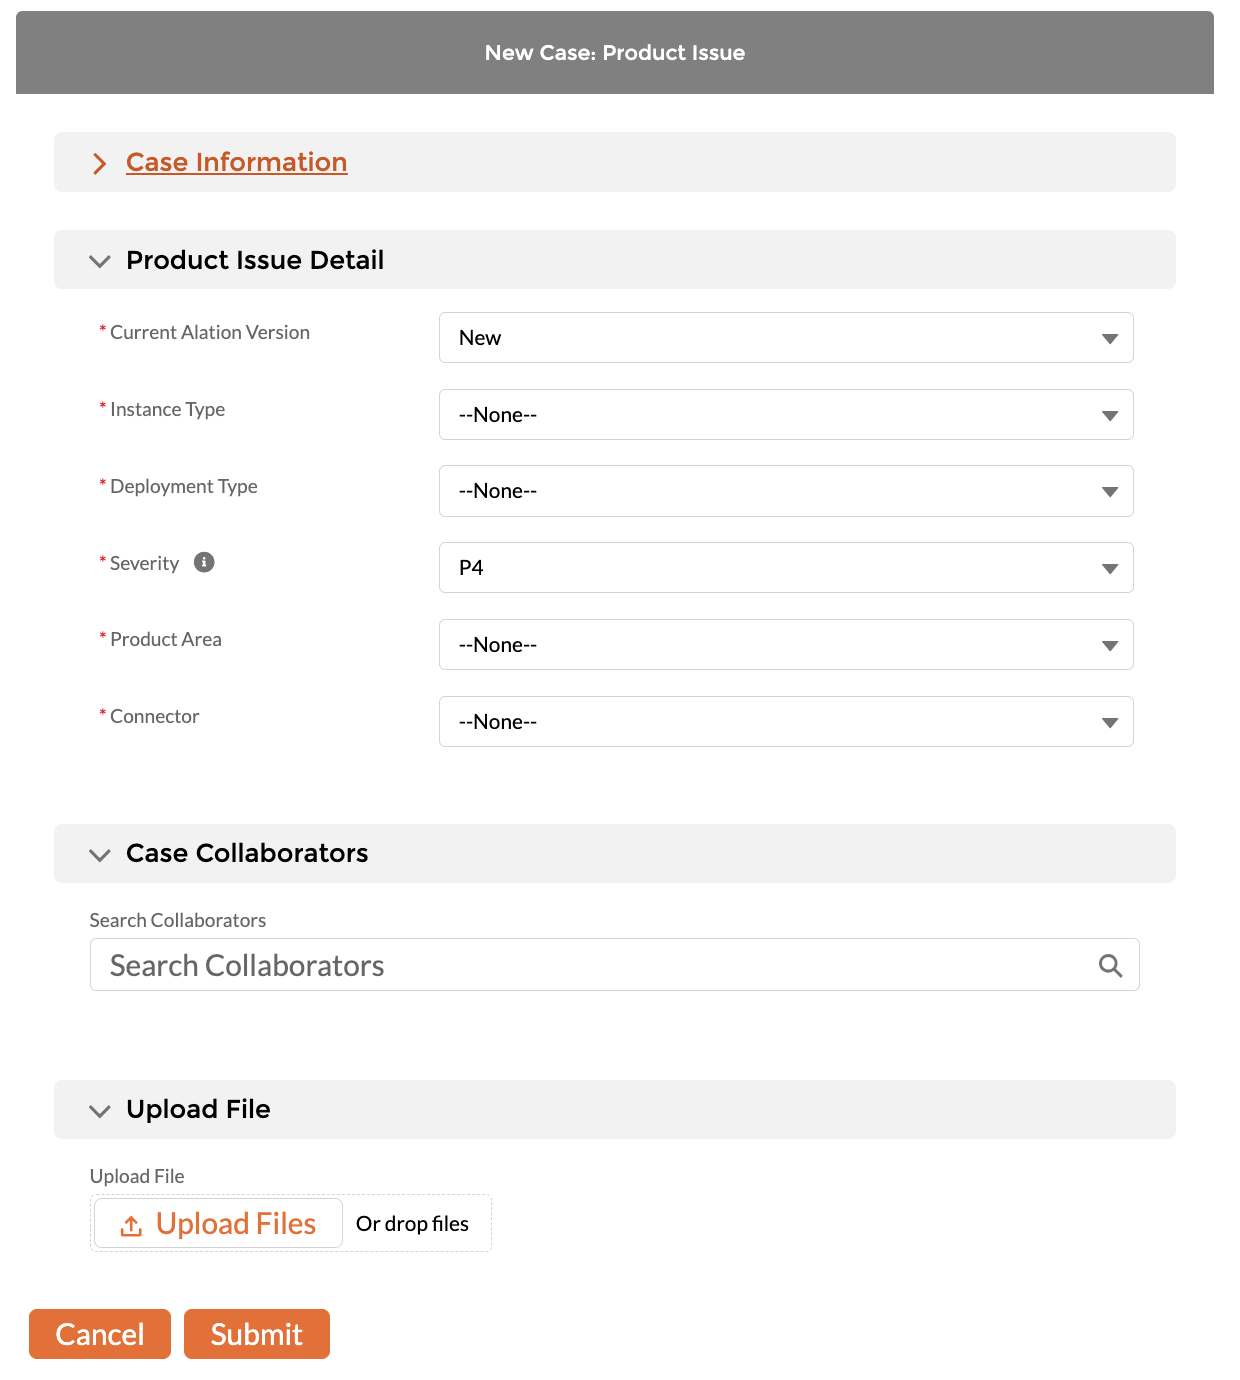
Product Issue Detail
These are mandatory fields here are all required.
Case Collaborators
Select other support admins whom you want to be copied on all email collaborations.
Upload Files
Upload relevant logs files or screenshots of error messages that can help the TSE agent to troubleshoot
Once submitted, you will be presented with the case detail page and will receive an email confirmation with the case number.
Alation Support Cases
One of our global Support Team member will respond to all cases as soon as possible following our Support Services Guidelines
Case Status:
New - Waiting for a Technical Support Engineer (TSE) assignment or case transfer reassignment stage
In Progress - TSE is actively troubleshooting
Waiting on Customer - TSE is waiting for a response or activity from Customer
Solution Provided - TSE has provided a solution and is waiting for confirmation for case closure. Unresponsive engagement from the client will prompt the case to case auto-closure, with at least three follow-up reminders before the case closes.
Closed - Case is Closed
Reopened - The case can be reopened for limited days since case closure. System Admin has to go to the case detail view of the closed case; a Reopen button is available.
Other - During the In Progress case status, if the case needs to be transferred to another TSE, an email notification will be sent to the case primary contact.
In Progress - Warm Case Transfer: Needs to be transferred ASAP to another available TSE.
In Progress - Cold Case Transfer: Needs to be re-zoned to another support region.