Manage Custom Fields
Alation Cloud Service Applies to Alation Cloud Service instances of Alation
Customer Managed Applies to customer-managed instances of Alation
Important
You are viewing documentation for Classic Alation.
Custom fields are user-defined fields that can be added to templates. This page describes how to manage custom field definitions.
You must have the Catalog Admin or Server Admin role to manage custom fields.
In this topic:
For information on the types of templates and custom fields, see About Templates and Fields. For information on how to add custom fields to templates, see Manage Templates.
Create or Edit a Custom Field
To create a custom field:
Click on the Settings icon in the top right corner.


The Admin Settings page appears. Under the Customization section, click Custom Fields.
Catalog Admins: A dropdown menu appears. Click Customize Catalog.
Server Admins: The Admin Settings page appears. Under the Catalog Admin section, click Customize Catalog.
The Custom Fields page appears.
The types of custom fields are listed on the left side of the page. Scroll to find the type of custom field you need.
To create a custom field, click the plus icon next to the type of custom field you want to create.
To edit a custom field, click the custom field name.
Enter or edit the custom field properties. The properties depend on the type of custom field you are creating. The following sections describe the properties for each type of custom field.
Important
If you are using Alation Analytics, the Name (singular) property for custom fields should be less than 64 characters. This is due to a limitation in Postgres that limits column names to 64 characters. If you exceed this limit, the custom field will not be available in Alation Analytics.
Object Set Properties
on the Target Page: These properties apply to the object page where the links are created.
Permitted Types: Click on Select Object Types and select the types of objects that can be added to the object set.
Name (plural): The name of the field in plural form.
Name (singular): The name of the field in singular form.
Tooltip Text: Optional. The text that appears when you hover over the field.
on the Source Page: These properties apply to the object pages that are referred to.
Backref Name: The name of the field that refers back to the page where the link was created.
Tooltip Text: Optional. The text that appears when you hover over the field.
People Set Properties
on the Target Page: These properties apply to the catalog page where the users and groups are selected.
Name (plural): The name of the field in plural form.
Name (singular): The name of the field in singular form.
Tooltip Text: Optional. The text that appears when you hover over the field.
on the Source Page: These properties apply to the user or group profile page.
Backref Name: The name of the field that refers back to the page where the link was created.
Tooltip Text: Optional. The text that appears when you hover over the field.
Reference Properties
on the Target Page: These properties apply to the object page where the link is created.
Permitted Types: Click on Select Object Types and select the types of objects that can be referred to.
Name: The name of the field.
Tooltip Text: Optional. The text that appears when you hover over the field.
on the Source Page: These properties apply to the object page that is referred to.
Backref Name: The name of the field that refers back to the page where the link was created.
Tooltip Text: Optional. The text that appears when you hover over the field.
Picker Properties
Name: The name of the field.
Tooltip Text: Optional. The text that appears when you hover over the field.
Options: The options that can be selected on a catalog page that contains this field.
To add an option, click Add Option. Enter the option name and click away from the field to add the option to the list.
To delete an option, hover over the option and click the X icon. The option is removed immediately.
To reorder the options, hover over an option and click the up or down arrow.
Multi-Select Picker Properties
Name (plural): The name of the field in plural form.
Name (singular): The name of the field in singular form.
Tooltip Text: Optional. The text that appears when you hover over the field.
Options: The options that can be selected on a catalog page that contains this field.
To add an option, click Add Option. Enter the option name and click away from the field to add the option to the list.
To delete an option, hover over the option and click the X icon. The option is removed immediately.
To reorder the options, hover over an option and click the up or down arrow.
Rich Text Properties
Name: The name of the field.
Tooltip Text: Optional. The text that appears when you hover over the field.
Date Properties
Name: The name of the field.
Tooltip Text: Optional. The text that appears when you hover over the field.
When you’re done, click the green checkmark icon
 at the top right of the editor to save the custom field.
Add a Custom Field to a Template
You can add a custom field to a template by editing the template. The way you do this depends on the type of template. For more information, see Edit a Template.
Add Permissions to a Custom Field
To add permissions to a custom field:
Click on the Settings icon in the top right corner.
The Admin Settings page appears. Under the Customization section, click Custom Field Permissions.
Catalog Admins: A dropdown menu appears. Click Customize Catalog, then click the Custom Field Permissions tab.
Server Admins: The Admin Settings page appears. Under the Catalog Admin section, click Customize Catalog, then click the Custom Field Permissions tab.
The Custom Field Permissions tab has two tables: Custom Field on top and Builtin Field below. To change permissions for custom fields, you will be working with the Custom Field table. To change permissions for built-in fields, scroll down to the Builtin Field table.
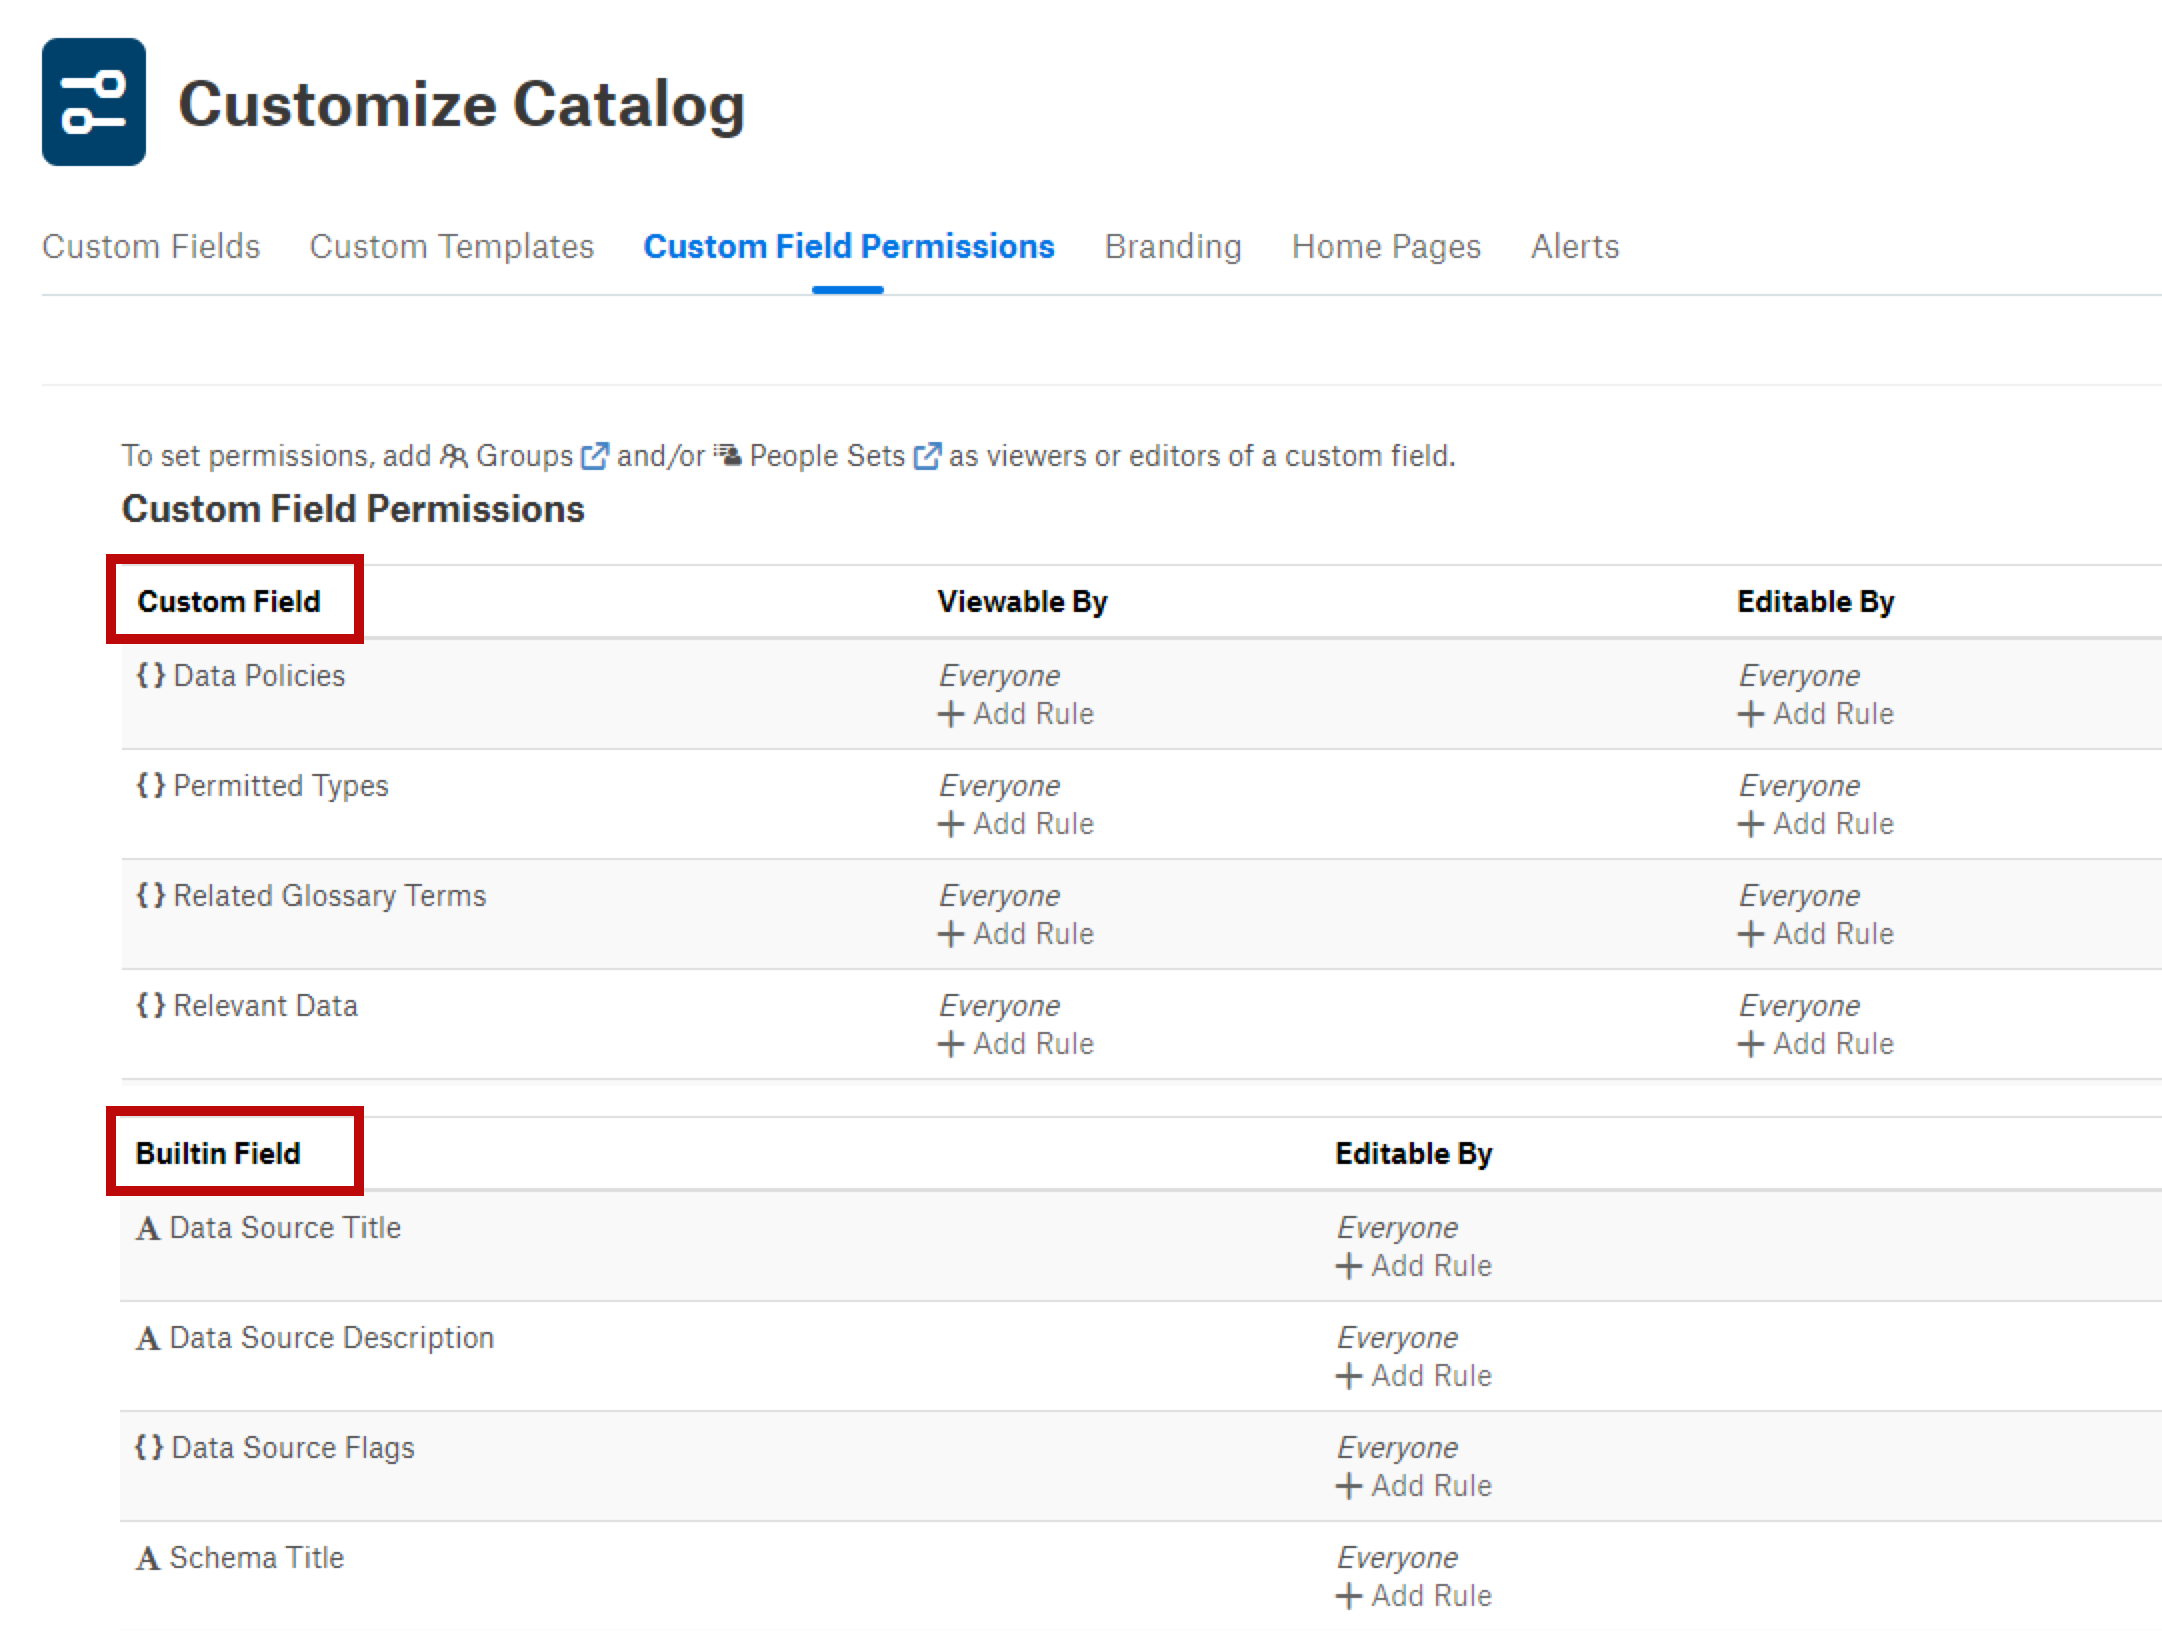
Find the field you want to add permissions to. Under the column for the type of permission you want to assign, click the Add Rule link. This will open a list of available groups and people sets.
Note
You can restrict editing of built-in fields, but not viewing. Built-in fields are always viewable by all users on all templates.
Select groups and people sets from the list.
Remove Permissions from a Custom Field
To remove permissions from a custom field:
Click on the Settings icon in the top right corner.
The Admin Settings page appears. Under the Customization section, click Custom Field Permissions.
Catalog Admins: A dropdown menu appears. Click Customize Catalog, then click the Custom Field Permissions tab.
Server Admins: The Admin Settings page appears. Under the Catalog Admin section, click Customize Catalog, then click the Custom Field Permissions tab.
The Custom Field Permissions tab has two tables: Custom Field on top and Builtin Field below. To change permissions for custom fields, you will be working with the Custom Field table. To change permissions for built-in fields, scroll down to the Builtin Field table.
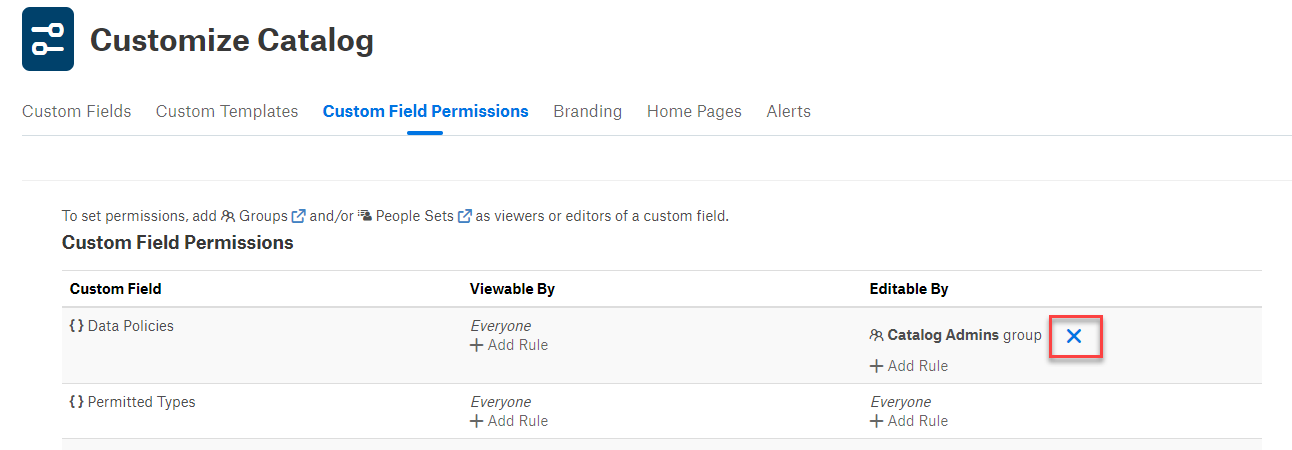
Find the field you want to remove permissions from. Click the X icon next to the group or people set you want to remove.
Delete a Custom Field
To delete a custom field:
Click on the Settings icon in the top right corner.
The Admin Settings page appears. Under the Customization section, click Custom Fields.
Catalog Admins: A dropdown menu appears. Click Customize Catalog.
Server Admins: The Admin Settings page appears. Under the Catalog Admin section, click Customize Catalog.
The Custom Fields page appears.
The custom fields are listed on the left side of the page. Scroll to find the custom field you want to delete.
Click the custom field’s name. The custom field editor will open on the right.
Click the trash can icon
 at the top right of the editor.
In the confirmation dialog that appears, confirm the deletion. The field is deleted.